
Christmas Tree Meringues are my go to fix for that familiar December problem: you want something festive and cute, but you do not want to babysit dough, chill anything, or wash ten bowls. I usually end up making these when the house is already busy, the playlist is on, and I still need a sweet treat for a party tray. They look fancy, but the truth is they are mostly air, sugar, and a little patience. If you have eggs in the fridge and a piping bag, you can totally pull this off. And if you do not have a piping bag, you can still make it work, I promise.
Christmas Tree Meringues vs Regular Meringue Cookies
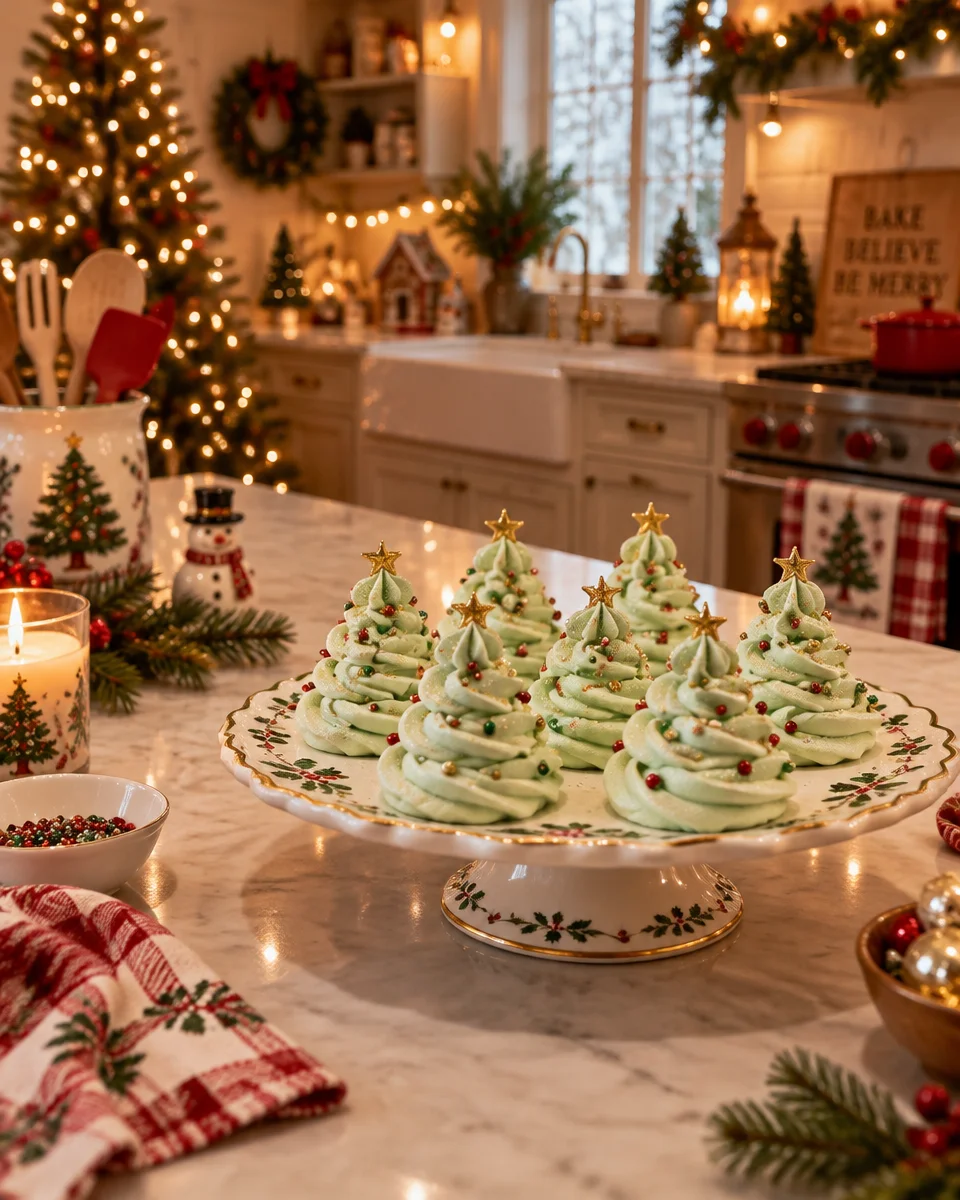
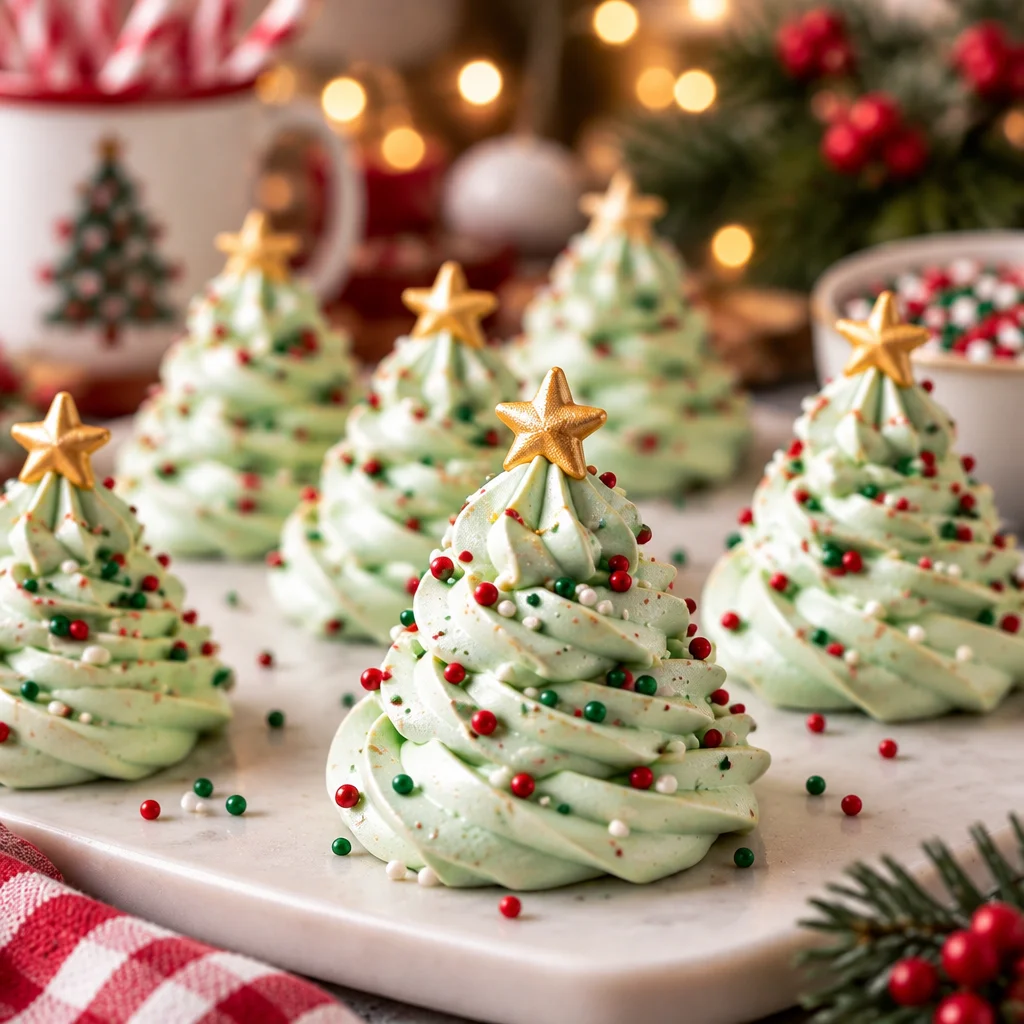
If you have made classic little meringue kisses before, this is the same idea, just shaped differently. christmas tree meringues are piped tall in layers so they look like mini evergreen trees, then decorated like tiny ornaments.
Regular meringue cookies are usually one swirl and done. With trees, you are basically stacking swirls: a wider base, then smaller circles on top, then a final point. The taste and texture stay the same when you bake them low and slow. You get that light crunch on the outside and the dry, melt in your mouth middle.
I like tree shapes because they automatically feel holiday themed even before you decorate. And if you are building a cookie tray, they add height and variety next to flatter cookies. If you are also baking buttery classics, this is a perfect pairing with Christmas butter cookies because you get a crisp snap in one bite and a rich buttery bite in the next.
How to Pipe Perfect Christmas Tree Shapes
This is the part people overthink. The trick is to keep it simple and repeat the same motion every time. I use a large star tip because it gives that “branchy” look without extra effort.
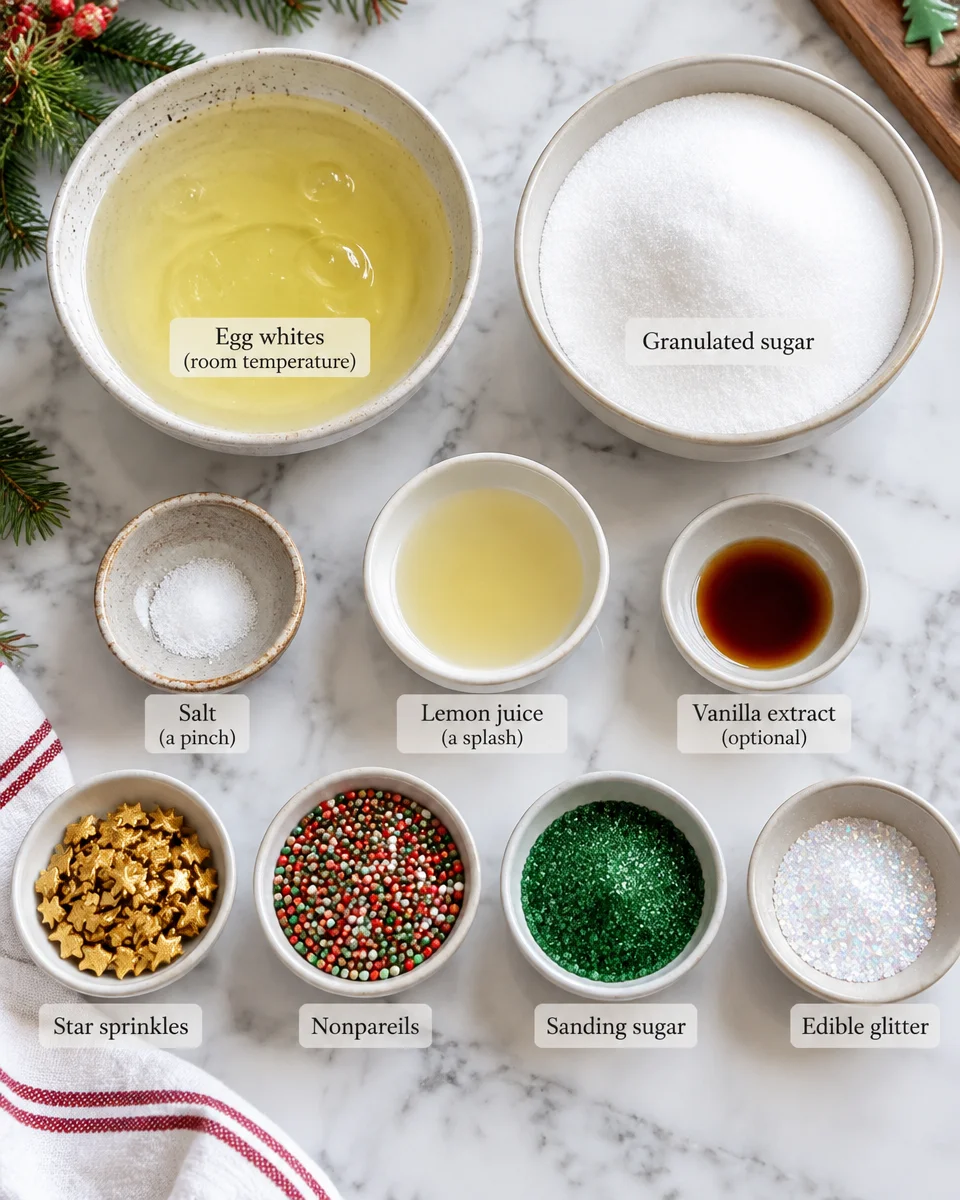
What you will need
- Egg whites (room temperature helps)
- Granulated sugar
- A pinch of salt and a tiny splash of lemon juice or vinegar
- Optional: vanilla or peppermint extract
- Piping bag with a large star tip (or a sturdy zip bag with the corner cut)
- Baking sheet with parchment paper
Now the piping method. Hold the bag straight up, about half an inch above the parchment. Squeeze to make a star burst, stop squeezing, and lift. That is your base. For the next layer, pipe a slightly smaller burst right on top. Repeat until you have 3 to 5 layers, depending on how tall you want them. Finish with a small point at the top.
My honest tip: do a couple practice trees on a plate first. Once your hands get the rhythm, it is almost relaxing. If one looks a little lopsided, just call it “rustic.” It will still taste perfect.
Tips for Getting Stiff, Glossy Meringue Peaks
Good meringue is all about structure. If it is too soft, your christmas tree meringues will slump and spread, and you will lose the tree look. Here is what actually helps, without getting too fussy.
My no drama method
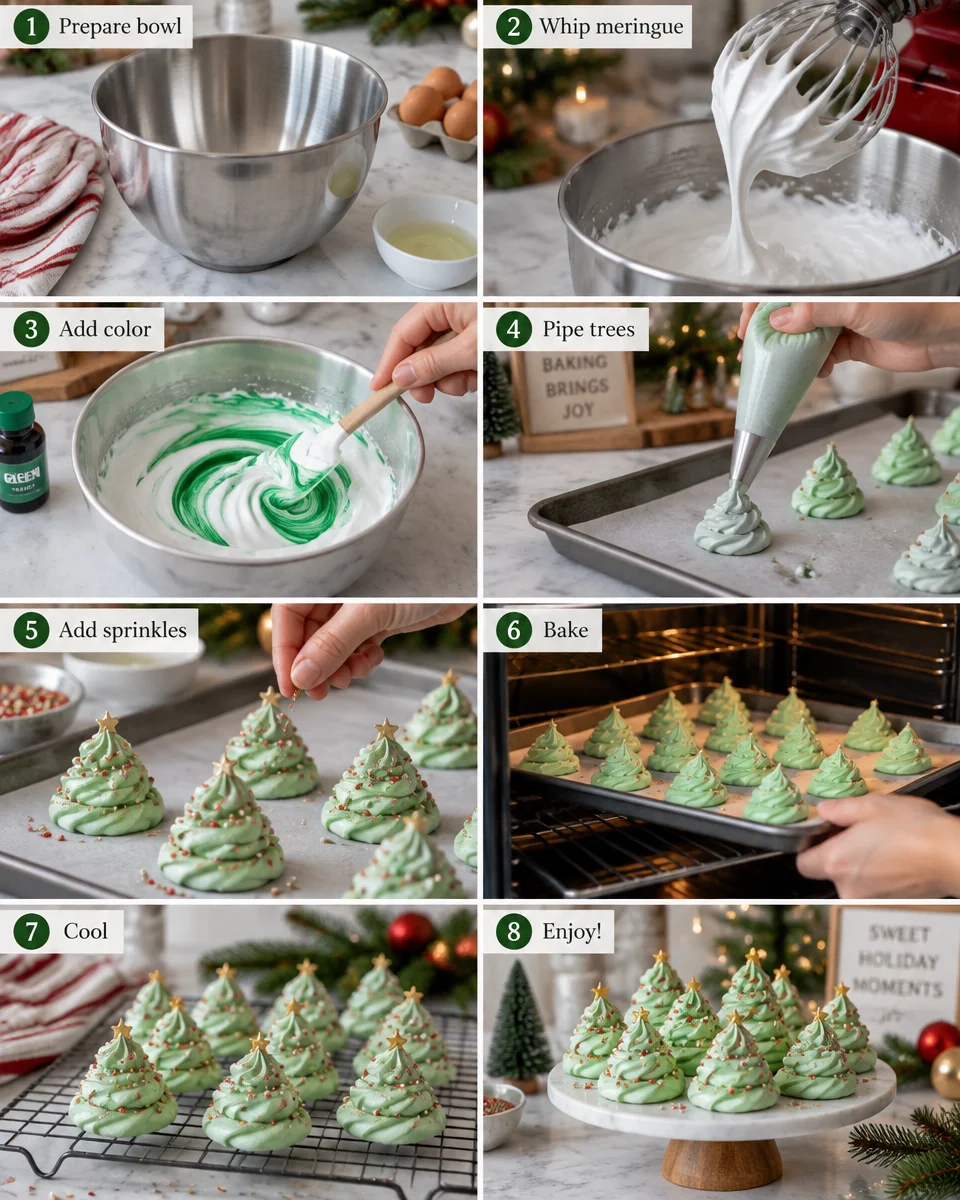
Start with a super clean bowl and whisk. Any grease can mess with the whip. I wipe my bowl with a little vinegar on a paper towel, then dry it. Add egg whites and a pinch of salt. Whip until foamy, then start adding sugar slowly, like a spoonful at a time.
Once all the sugar is in, keep whipping until the meringue is thick, glossy, and holds a point when you lift the whisk. If you rub a bit between your fingers and still feel sugar grains, keep mixing a bit more. Smooth meringue equals a smoother bake.
Also, do not rush the sugar. Dumping it in fast can make it gritty or unstable. Slow and steady is the vibe here.
I made these for my office cookie table and people kept asking where I bought them. They were crisp, not sticky, and the little trees stayed perfect even the next day.
How to Color Meringue Without Deflating It
Coloring is fun, but it is also where a lot of people accidentally flatten their work. My best advice: use gel food coloring, not the watery kind. Gel gives strong color with just a tiny amount, so you do not thin out the mixture.
If I want classic green trees, I add a toothpick dot of gel coloring right at the end, then mix on low just until it is evenly green. If you want a cute two tone look, you can “paint” a stripe of green gel inside the piping bag using a skewer, then add white meringue. When you pipe, you get a natural striped tree effect without extra stirring.
One more small tip: if you want peppermint flavor, go easy. A little is great. Too much can taste like toothpaste. If you love peppermint desserts, you might also want to add a candy themed treat like Christmas bark peppermint white chocolate to your holiday spread so you get that minty hit in a different texture.
Best Decorations: Sprinkles, Stars, and Edible Glitter
This is the part that makes them look like a holiday miracle, even if your piping was not perfect. Decorate right after piping, before baking, so everything sticks.
Here are my favorites:
- Star sprinkles for the tree topper
- Nonpareils for tiny ornaments
- Sanding sugar for sparkle without fuss
- Edible glitter if you want that extra party look
If you are making a whole cookie platter, I love mixing in different shapes and flavors so it feels generous. These trees are light and crisp, so they balance well with richer cookies. For example, Christmas cookies peanut butter blossoms bring that chocolate and peanut butter comfort next to the airy crunch of meringue.
Storage note: meringues hate humidity. If you are decorating with anything that is “wet” like gel icing or a drizzle, keep it minimal or add it right before serving.
Why Do Meringues Crack and How to Prevent It?
Cracks happen, and honestly they are not the end of the world. Most of the time, cracks come from heat changes or baking too hot. Meringues like a gentle, steady bake.
To prevent cracks in christmas tree meringues, here is what I do:
1. Bake low and slow. I usually bake around 200 to 225 F, depending on my oven mood. You want them to dry out, not brown.
2. Do not open the oven a million times. I know it is tempting. Every peek changes the temperature.
3. Cool gradually. When they are done, I turn off the oven and let them cool inside with the door closed for a while. Sudden cool air can cause cracking.
4. Avoid humid days if you can. If it is raining, I still bake them, but I accept they might get a little tacky later. An airtight container with a silica packet helps a lot.

And if one cracks? Cover it with extra sprinkles and move on. Nobody complains while eating them.
Frequently Asked Questions About Christmas Tree Meringues
Can I make them ahead of time?
Yes. I actually prefer it. Bake them a day or two early and store in an airtight container at room temperature. Keep them away from steam, the fridge, and anything humid.
Why are my meringues sticky?
Usually humidity or underbaking. Next time, bake a little longer and let them cool in the oven. Also make sure your container seals well.
Can I use carton egg whites?
Sometimes they whip up fine, sometimes they do not. Fresh egg whites are the most reliable for stiff peaks, especially if you are going for tall trees.
What if I do not have a piping tip?
You can still make simple tree blobs with a zip bag and a snipped corner. They will not look as “pine tree” detailed, but once you add sprinkles, they are still adorable.
What else should I bring to a cookie exchange?
If you need ideas beyond meringues, this list is genuinely helpful: Christmas cookie exchange ideas. I like bringing one fancy looking item like trees, plus one classic crowd pleaser.
A Little Holiday Pep Talk Before You Bake
If you have been nervous to try christmas tree meringues, make this your sign. They are simple once you see how the meringue should look, and the decorating covers a lot of tiny mistakes. Bake them low, keep them dry, and do not stress about perfection. If you try them, I hope you have that fun moment where you pull the tray out and think, okay wow, I made those. Happy baking and save a couple for yourself because they disappear fast.
Christmas Tree Meringues
Ingredients
Method
- Preheat the oven to 200°F (93°C) and line a baking sheet with parchment paper.
- In a clean bowl, wipe it with vinegar to ensure there is no grease.
- Add egg whites and a pinch of salt and whip until foamy.
- Gradually add sugar, one spoonful at a time, while whipping until thick and glossy.
- Add lemon juice or vinegar and any optional extracts, and mix briefly.
- Using a piping bag with a large star tip, hold it straight above the parchment, about half an inch away.
- Pipe a star burst for the base layer, then lift the bag.
- Pipe smaller bursts on top of each base layer to form the tree shape, finishing with a small point at the top.
- Bake meringues for about 1.5 to 2 hours until they are dry and crisp.
- Turn off the oven and let the meringues cool inside for an hour with the door closed.
- Decorate the meringues with star sprinkles, nonpareils, sanding sugar, and edible glitter immediately after piping.
