
Korean BBQ Beef Bowls are my go to dinner on those nights when I want something big on flavor but I do not want a sink full of dishes. You know the feeling, you open the fridge, you see a pack of ground beef, and your brain just says, please be easy today. This is that kind of meal. It is sweet, savory, a little garlicky, and it hits the spot with rice and crunchy toppings. If you have picky eaters or hungry teenagers, this one usually gets real quiet at the table, in a good way. 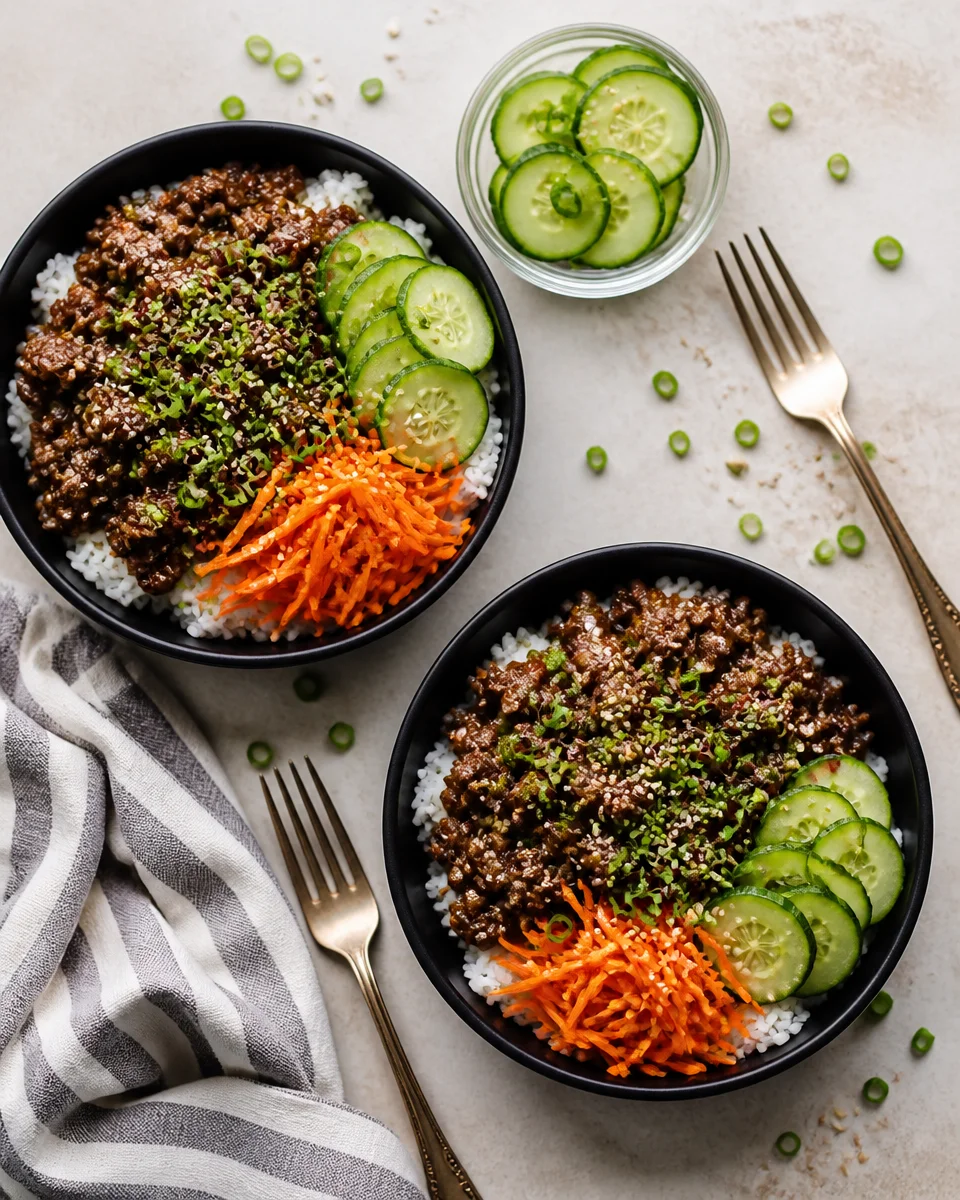
Why You’ll Love It
I keep coming back to this recipe because it checks all my boxes: fast, flexible, and it tastes like something you would happily pay for in a restaurant. The sauce is simple, but it has that sticky, glossy vibe that makes the beef feel special.
Here is why it works so well in real life:
- Weeknight friendly: you can get it on the table in about 25 minutes if your rice is already going.
- Budget friendly: ground beef makes it affordable without feeling boring.
- Easy to customize: spicy, mild, extra veg, low carb, whatever you need.
- Great for meal prep: it reheats like a champ.
Also, if you like this general flavor profile, you might enjoy this similar idea too: sticky Korean beef bowls with cucumber and rice. It is a nice little spin when you want extra crunch and freshness.
Key Ingredients in Korean Beef Bowls
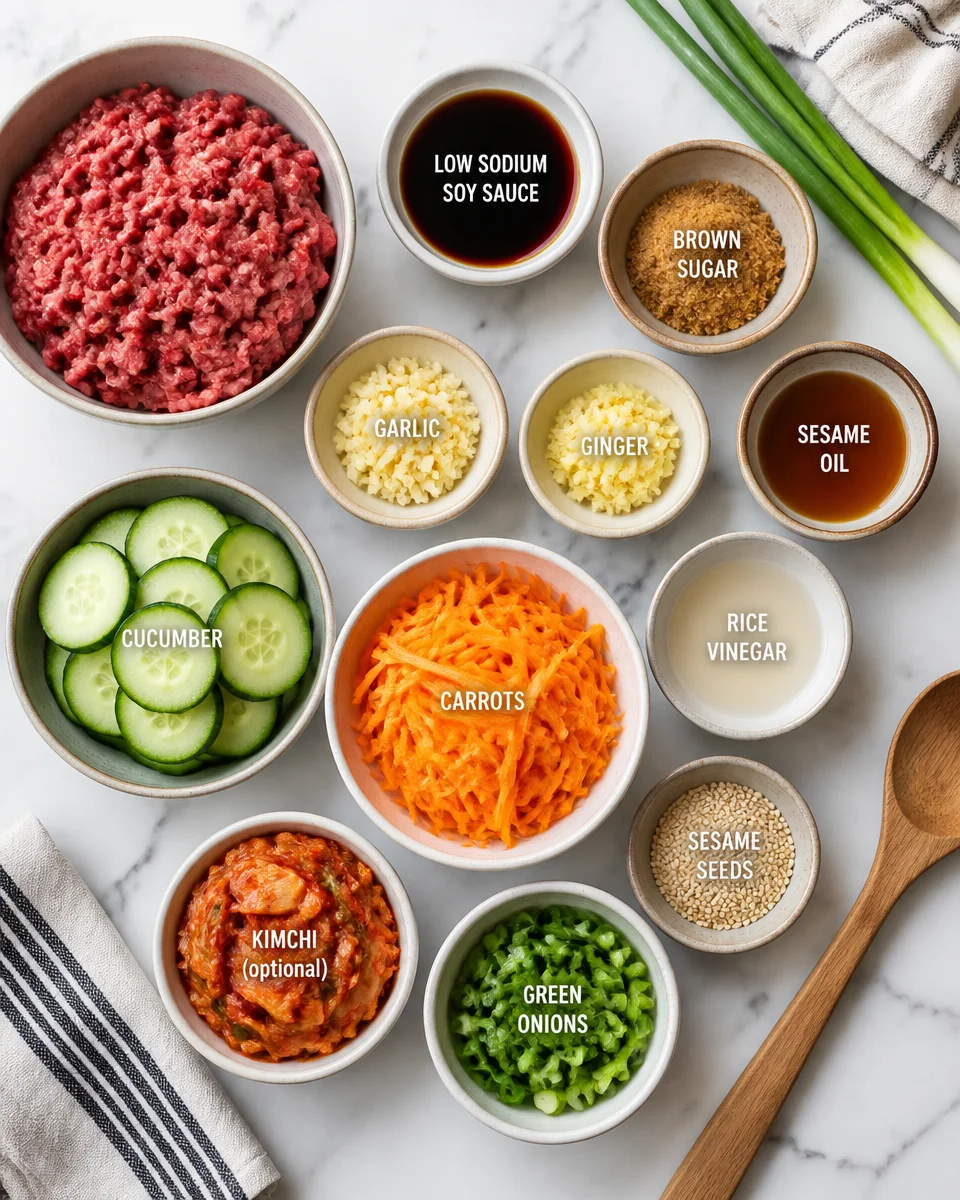
You do not need a long shopping list. Most of this is pantry stuff, plus beef and something fresh for topping. I am going to keep it straightforward and tell you what matters most, and what you can swap if needed.
The beef and the sauce basics
Ground beef is the easiest, but you can use ground turkey if you want it lighter. For the sauce, the main players are soy sauce, brown sugar, garlic, and sesame oil. That combo is the backbone of Korean BBQ Beef Bowls, and it is the reason the whole kitchen smells amazing.
What I use most often:
- Ground beef (80 20 is my sweet spot for flavor)
- Soy sauce (low sodium if you are sensitive to salt)
- Brown sugar (or honey if that is what you have)
- Garlic (fresh is best, but jarlic works in a pinch)
- Ginger (fresh or from a tube)
- Sesame oil (a little goes a long way)
- Rice vinegar or lime juice (for a small tangy pop)
- Chili flakes or gochujang (optional, for heat)
Toppings that make it feel like a bowl worth craving
Toppings are where you can really make the bowl yours. My regular combo is sliced cucumber, shredded carrots, green onions, and sesame seeds. If I have kimchi, I am definitely adding it.
If you are on a beef kick lately, you might also like this for snacking or meal prep protein: air fryer beef jerky. Totally different vibe, but it is handy to have around.
How to Make Korean Beef Bowls
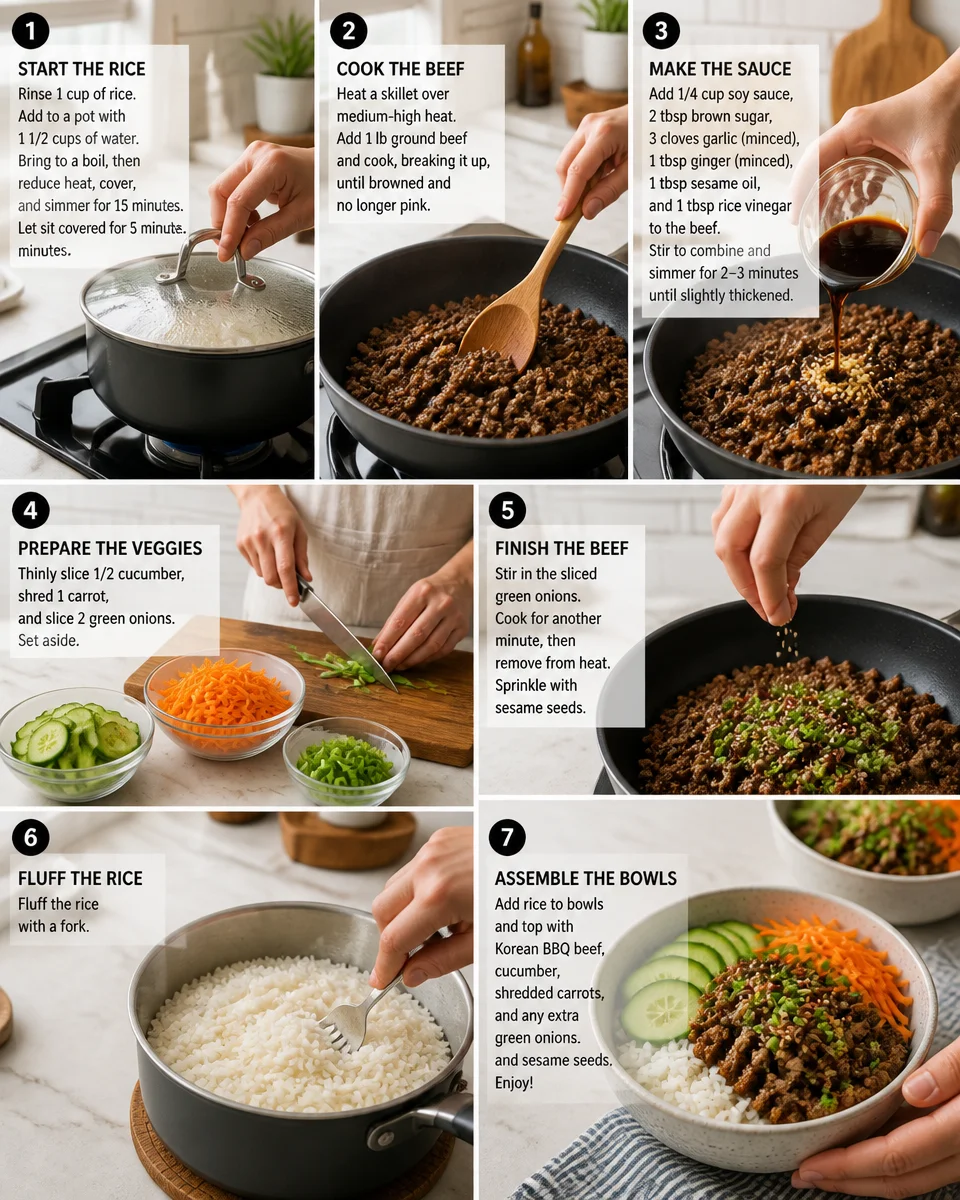
This is the part I love because it is basically: cook beef, stir sauce, build bowls, eat. I usually start rice first, then everything else happens while it cooks. If you are using microwave rice, you are going to feel like a genius because dinner becomes almost instant.
Step by step, the easy way
1) Start the rice. White rice, brown rice, jasmine, whatever you like. You can also do cauliflower rice if that is your thing.
2) Brown the beef in a skillet over medium heat. Break it up well so it gets little crispy bits. Those bits soak up sauce and taste incredible.
3) Drain excess fat if there is a lot. I usually leave a little for flavor, but not so much that it feels greasy.
4) Stir in garlic and ginger for about 30 seconds. You just want them fragrant, not burnt.
5) Add soy sauce, brown sugar, a splash of vinegar, and a tiny drizzle of sesame oil. Let it bubble for a couple minutes so it thickens slightly and clings to the beef.
6) Taste and adjust. If it tastes flat, add a little more vinegar or lime. If you want it sweeter, add a pinch more sugar. If you want heat, add chili flakes or a small spoon of gochujang.
7) Build your bowls. Rice first, then the sticky beef, then toppings. Finish with sesame seeds and green onion.
One quick tip: if you want the sauce thicker, mix 1 teaspoon cornstarch with 1 tablespoon water and stir it in while it simmers. It turns glossy fast.
“I made these bowls twice in one week because my family kept asking for them. Even my kid who hates ‘new food’ asked for seconds.”
If you want another beef and rice situation for busy nights, this one is also super practical: baked onion beef fried rice. It is cozy and filling in a different way.
Storage and Reheating Tips
This recipe is a meal prep hero, but there are a couple tricks that keep it tasting fresh instead of sad.
How I store it:

Store beef and rice separately if you can. The beef stays saucy and the rice does not get mushy. Toppings should be in their own little container, especially cucumber.
Fridge: 3 to 4 days in airtight containers.
Freezer: the beef freezes well for up to 2 months. Rice can be frozen too, but I usually just make fresh rice when I thaw the beef.
Reheating: microwave the beef with a tiny splash of water, 30 seconds at a time, stirring in between. For rice, I also add a teaspoon of water and cover it so it steams back to life.
If you are someone who likes having another hearty option ready to go, you can also check out baked beans with ground beef for a totally different comfort food moment.
What to Serve with Korean Beef Bowls
Korean BBQ Beef Bowls are pretty complete on their own, but adding one or two simple sides makes dinner feel extra fun. I keep it easy and focus on crunch, freshness, and something a little tangy to balance the sweet savory beef.
Here are my favorite add ons:
- Quick cucumber salad with rice vinegar and a pinch of sugar
- Kimchi straight from the jar
- Steamed edamame with salt
- Roasted broccoli or sautéed green beans
- Fried egg on top of the bowl for extra richness
If you are thinking ahead to breakfast meal prep too, this is a sweet option that has that same bowl convenience: baked blueberry cottage cheese breakfast bowls. Different flavors, same easy routine.
Common Questions
Can I make Korean BBQ Beef Bowls with sliced beef instead of ground beef?
Yes. Thin sliced steak works great. Just cook it quickly on higher heat so it stays tender, then toss with the sauce.
Is this recipe very spicy?
Not unless you make it spicy. The base is more sweet savory. Add chili flakes or gochujang if you want heat.
What is the best rice for bowls?
Jasmine rice is my favorite for smell and texture, but short grain rice feels more classic. Brown rice works too, it is just a bit chewier.
How do I keep the cucumbers crunchy?
Store them separately and add right before eating. If you are salting them, do it lightly and drain after 10 minutes.
Can I make this lower sugar?
Yep. Cut the brown sugar in half and add more vinegar or lime for balance. It will still taste great, just less sticky sweet.
A cozy bowl dinner you will actually make again
If you need a reliable dinner that tastes exciting without being complicated, Korean BBQ Beef Bowls are it. The ingredients are simple, the steps are forgiving, and the leftovers make lunch feel like a treat. I like that you can keep it basic or go all out with toppings depending on your energy level. If you want to compare versions and see another home cook’s take, this Korean BBQ Beef Bowls – Simply Scratch recipe is also a good read for extra inspiration. Now go grab that skillet and make it happen tonight, you are going to love how easy it feels.
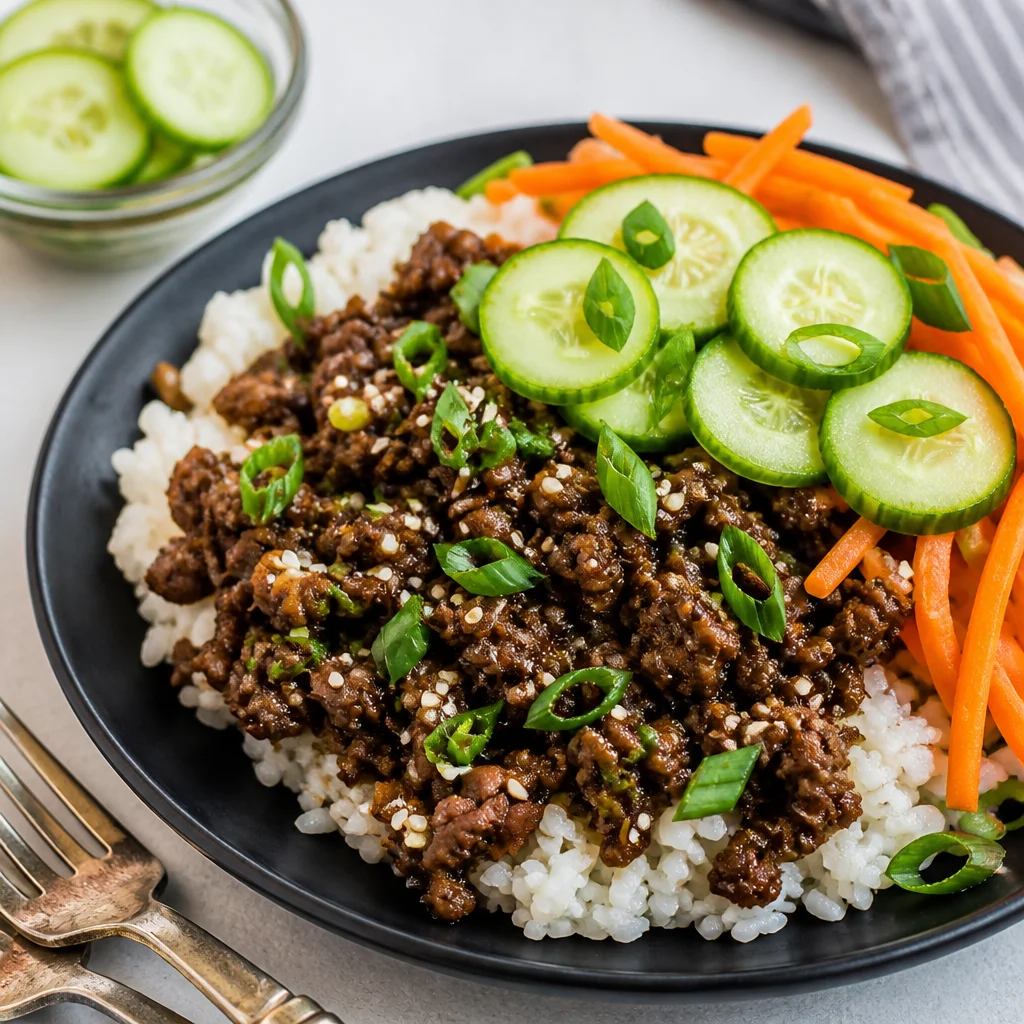
Korean BBQ Beef Bowls
Ingredients
Method
- Start the rice (white, brown, jasmine, or cauliflower rice).
- Brown the beef in a skillet over medium heat, breaking it up to get crispy bits.
- Drain excess fat but leave a little for flavor.
- Stir in garlic and ginger for about 30 seconds until fragrant.
- Add soy sauce, brown sugar, vinegar, and sesame oil. Let it bubble for a few minutes to thicken.
- Taste and adjust seasoning: add more vinegar for tang, sugar for sweetness, or chili for heat.
- Build your bowls starting with rice, then sticky beef, and finally toppings.
- Finish with sesame seeds and green onion on top.
