

Chocolate Peanut Butter Peanut Clusters are my secret weapon when I want something sweet, fast, and utterly craveable. Tell me if this sounds familiar: you want a homemade treat, but you also want to keep it simple and skip the oven. These clusters are your answer. They come together in minutes, they set quickly, and they always disappear at parties. I make them when I need a reliable, candy-like dessert that tastes like it came from a shop. Stick with me and I’ll show you exactly how to make these little bites glossy, crunchy, and peanutty without any fuss.
The Story Behind This Recipe
Here’s why I love this Chocolate Peanut Butter Peanut Clusters: it uses pantry staples and it tastes like a weekend dinner. Chocolate Peanut Butter Peanut Clusters are my secret weapon when I want something sweet, fast, and utterly craveable. Tell me if this sounds familiar: you want…
How to Make Chocolate Peanut Butter Clusters
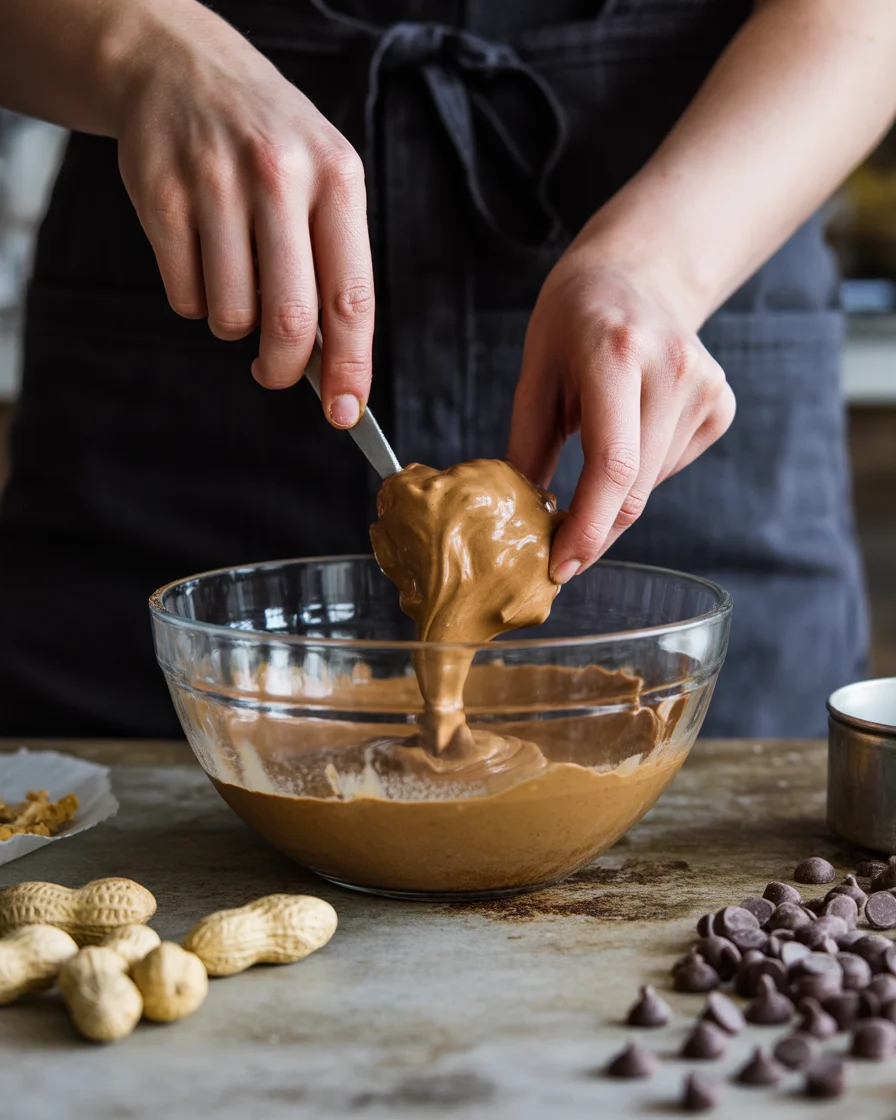
Here’s the joy of this recipe. You melt, you stir, you scoop, you chill. That’s it. You do not need special equipment. A bowl, a spoon, and a baking sheet lined with parchment are enough. If you can press a microwave button or heat a small pot on low, you can make these.
Quick game plan
Set up your station first. Line a baking sheet with parchment so the clusters don’t stick. Measure your peanuts and keep your peanut butter ready to go. Have a dry spatula around because water and melted chocolate are not friends.
I melt the chocolate gently and then stir in creamy peanut butter until it’s silky and shiny. Next, fold in a heap of peanuts until every nut is wearing a thick coat. Spoon mounds onto the parchment. Chill until firm. You’re done. The best part is how forgiving this method is. If your chocolate looks too thick, a tiny extra spoonful of peanut butter smooths it out. If it seems too thin, just add a few more peanuts.
If melting chocolate has ever stressed you out, keep it low and slow. Short microwave bursts with stirring in between work perfectly. Or use a double boiler setup with a heat-safe bowl over simmering water. For a little backup on melting technique, I’ve also leaned on the simple approach in this easy chocolate fudge guide when teaching friends how to get a glossy chocolate finish.
“I made a batch before school pickup and my kids thought I bought them. Ten minutes of melting and stirring, and they were hooked. I keep a stash in the freezer now.”
Ingredient Notes
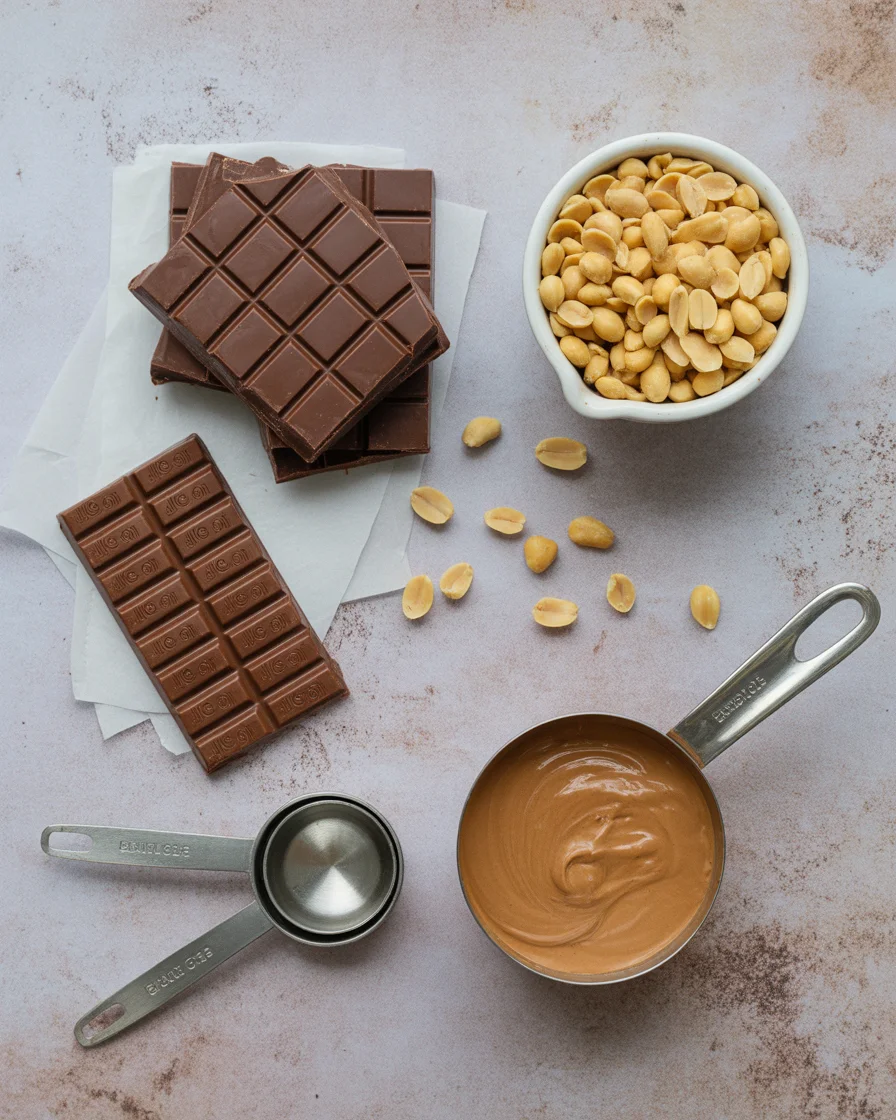
You only need a few things, but quality matters. Here’s what I use and why it works.
- Chocolate: Use good chocolate chips or chopped bars. Semi-sweet is my go-to. Milk chocolate makes them sweeter, while dark chocolate gives a deeper flavor. Avoid chocolate candy coating if you can, unless you want a very firm snap.
- Peanut butter: Creamy peanut butter blends into chocolate like a dream. Natural peanut butter can work too, but stir it very well to minimize oil separation. If the mix gets too loose, add more peanuts to thicken it.
- Peanuts: Roasted and salted peanuts are the heart and crunch. Salt balances the sweetness, so don’t skip it. Lightly crush a few if you like more texture in every bite.
- Vanilla and a pinch of salt: Optional, but I like the warmth from vanilla and the lift from a pinch of salt in the chocolate mix.
- Topping ideas: Flaky salt on top looks fancy and adds a pop. Sprinkles are cute for parties. A drizzle of contrasting chocolate gives bakery vibes.
If you’re also a peanut butter fan like me, you’ll love browsing treats like these Reese’s peanut butter brownies or this dreamy creamy peanut butter pie for more dessert inspiration.
Troubleshooting Common Issues
Most hiccups come down to heat and moisture. Keep things gentle and dry, and you’re golden. Here are the problems I see most and what fixes them fast.
If the chocolate seizes
Chocolate can seize if it gets a splash of water or gets too hot. If it turns grainy or stiff, try this: whisk in 1 to 2 teaspoons of neutral oil or a little more peanut butter. The fat helps smooth the mixture. You can also switch to stirring over a warm water bath to soften it back up.
If the clusters won’t set
Pop the tray in the fridge or freezer for a faster set. If they still stay soft, your mixture may be a bit heavy on peanut butter. Next time, reduce the peanut butter slightly or add more peanuts to give structure. If you prefer a crisp snap, tempering chocolate is an option, or use a firmer chocolate style like a higher cacao bar. For a satisfying snappy texture in another treat, see these crunchy chocolate quinoa crunch bars.
Greasy tops or streaks can happen if natural peanut butter is very oily. Stir the jar thoroughly before measuring. If you see oil pooling in the bowl, blot gently with a clean paper towel, then fold in a handful more peanuts to balance it out.
Too sweet or not sweet enough? Switch chocolate types. Dark chocolate cuts sweetness. Milk chocolate adds it. A pinch of sea salt flakes on top also helps balance sweet flavors.
Tips for Storing Chocolate Peanut Butter Clusters
These keep beautifully, which is why I make them ahead for holidays and game nights. The texture does shift a bit depending on storage, so here’s how I handle it.
- Room temp: Store in an airtight container for 3 to 4 days if your kitchen is cool. They’ll be softer but still hold shape.
- Fridge: My favorite. They stay firm and snappy for up to 2 weeks. Layer parchment between stacks to prevent sticking.
- Freezer: Freeze up to 2 months. Thaw a few minutes on the counter before serving. They taste like a chilled candy bar when eaten straight from the freezer.
- Packing for gifts: Use small candy cups or mini muffin liners to keep clusters separate and tidy in tins.
- Humidity watch: If your area is humid, keep them chilled to avoid condensation on the chocolate.
If you’re making them for a dessert board, pair with something fruity and glossy like these chocolate covered cherries for a lovely contrast.
Variations on Chocolate Peanut Butter Clusters
Once you master the base, you can riff forever. Here are my favorite ways to shake things up while keeping the classic crunch.
Fun add-ins and twists
Salty crunch: Swap some peanuts for crushed pretzels or cornflakes for a lighter, crispier bite.
Nutty switch: Try half peanuts and half almonds, cashews, or pecans. Toast the nuts first for deeper flavor.
Coconut joy: Fold in a small handful of shredded coconut for a chewy layer that plays so well with chocolate.
Peanut buttery boost: Stir in a spoon of powdered peanut butter for a bold nutty kick without thinning the chocolate too much.
Spice and heat: A tiny pinch of cinnamon or cayenne makes these surprisingly addictive. Start small and taste as you go.
Kid-friendly color: Mix in mini marshmallows or sprinkles for parties. If you want more no-bake ideas, these no-bake peanut butter cheesecake balls are always a hit on the same tray.
Dessert bar combo: Serve alongside gooey squares like these s’mores chocolate bars for a fun mix of textures.
Common Questions
Can I use white chocolate? Yes, but white chocolate can be sweeter and trickier to melt. Keep the heat extra low and consider adding a pinch of salt to balance the sweetness.
Do I need to temper the chocolate? Not required. The peanut butter keeps the texture soft and candy-like. For a harder snap and no fridge needed, you can temper, but I rarely do for weeknight batches.
Can I make these nut-free? You can swap peanuts for crunchy puffed rice and use sunflower seed butter in place of peanut butter. The flavor changes, but the candy vibe stays.
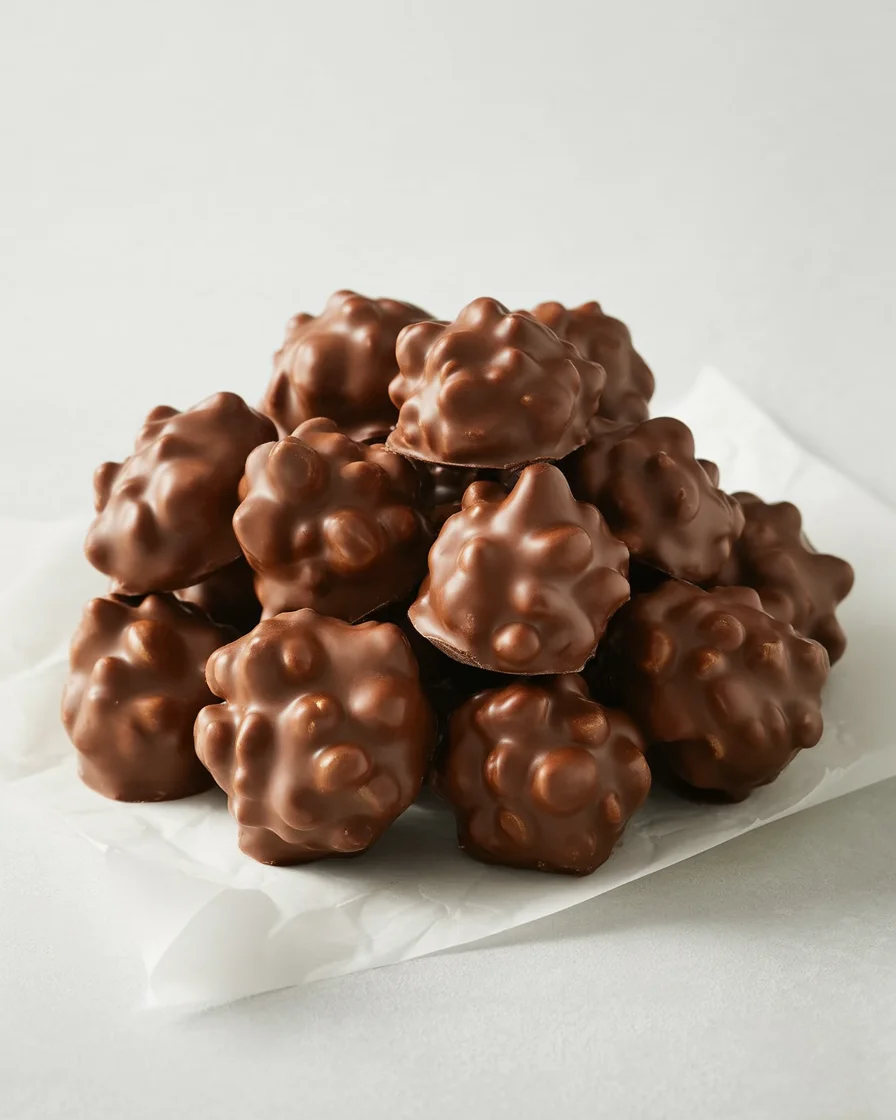
What size should the clusters be? I aim for heaping tablespoon mounds. That size sets evenly and makes perfect bite-size snacks. Use a small cookie scoop if you want uniform pieces.
How do I make them shiny? Don’t overheat the chocolate, and stir until smooth. A tiny bit of neutral oil can add sheen, but go easy so the clusters still set properly.
Sweet Little Bites You’ll Keep Making
I’ve made Chocolate Peanut Butter Peanut Clusters for lazy Sundays, teacher gifts, and big family parties. They always win because they’re simple, crunchy, and full of that classic peanut butter and chocolate magic. If you want to set yourself up for success, melt low and slow, stir until glossy, and scoop quickly. You’ll have a tray of candy that looks impressive and tastes even better.
As you play with your favorite chocolate and peanut butter combos, you might also enjoy comparing techniques from resources like Chocolate Peanut Butter Clusters Recipe – Add a Pinch or keeping it casual with Chocolate Peanut Butter Clusters {Easy Recipe} – Miss in the Kitchen. Meanwhile, keep this page bookmarked for when those late-night cravings hit. The next time someone asks for your recipe, you can smile and say it’s as easy as melt, mix, and chill.
Now go make a quick batch of Chocolate Peanut Butter Peanut Clusters, tuck a few in the fridge for later, and leave a plate out to share. If your house is anything like mine, you’ll be asked for more by tomorrow. And when you want a fun baking day, pair these with a tray of decadent chocolate peanut butter cake roll for an extra wow. Here’s to sweet little wins that taste like joy.
Chocolate Peanut Butter Peanut Clusters
Ingredients
Method
- Line a baking sheet with parchment paper.
- Melt the chocolate in a microwave or a double boiler until smooth.
- Stir in the peanut butter until the mixture is silky.
- Fold in the roasted peanuts until evenly coated.
- Using a spoon or cookie scoop, drop mounds of the mixture onto the lined baking sheet.
- Chill in the refrigerator until firm.