
Christmas Tree Brownies always show up right when I need something cute for a holiday party but I do not have the energy for complicated baking. You know the feeling, you want a festive dessert that looks like you tried, but you also want to actually enjoy the day. These are basically brownies with a little makeover, and it is honestly more relaxing than decorating cookies. I make them when the kids are bouncing off the walls, or when friends are coming over and I need a guaranteed crowd pleaser. If you can bake a pan of brownies and hold a knife, you can do this.
Brownie Christmas Trees vs Regular Christmas Brownies
So here is the big difference. Regular Christmas brownies are usually just baked in a pan, frosted, and topped with candy. Nothing wrong with that. But Brownie Christmas Trees are all about the shape, and that shape instantly makes them feel special, like you planned ahead even if you absolutely did not.
The other thing is portion control, kind of. Tree shapes naturally turn into smaller servings, which is great when there are lots of desserts on the table. I also like that they are easy for people to grab without needing a fork.
If you are short on time, you can absolutely lean on a box mix. I have done that more times than I can count. If you want a few extra tricks to make boxed brownies taste more homemade, this is super helpful: better boxed brownies.
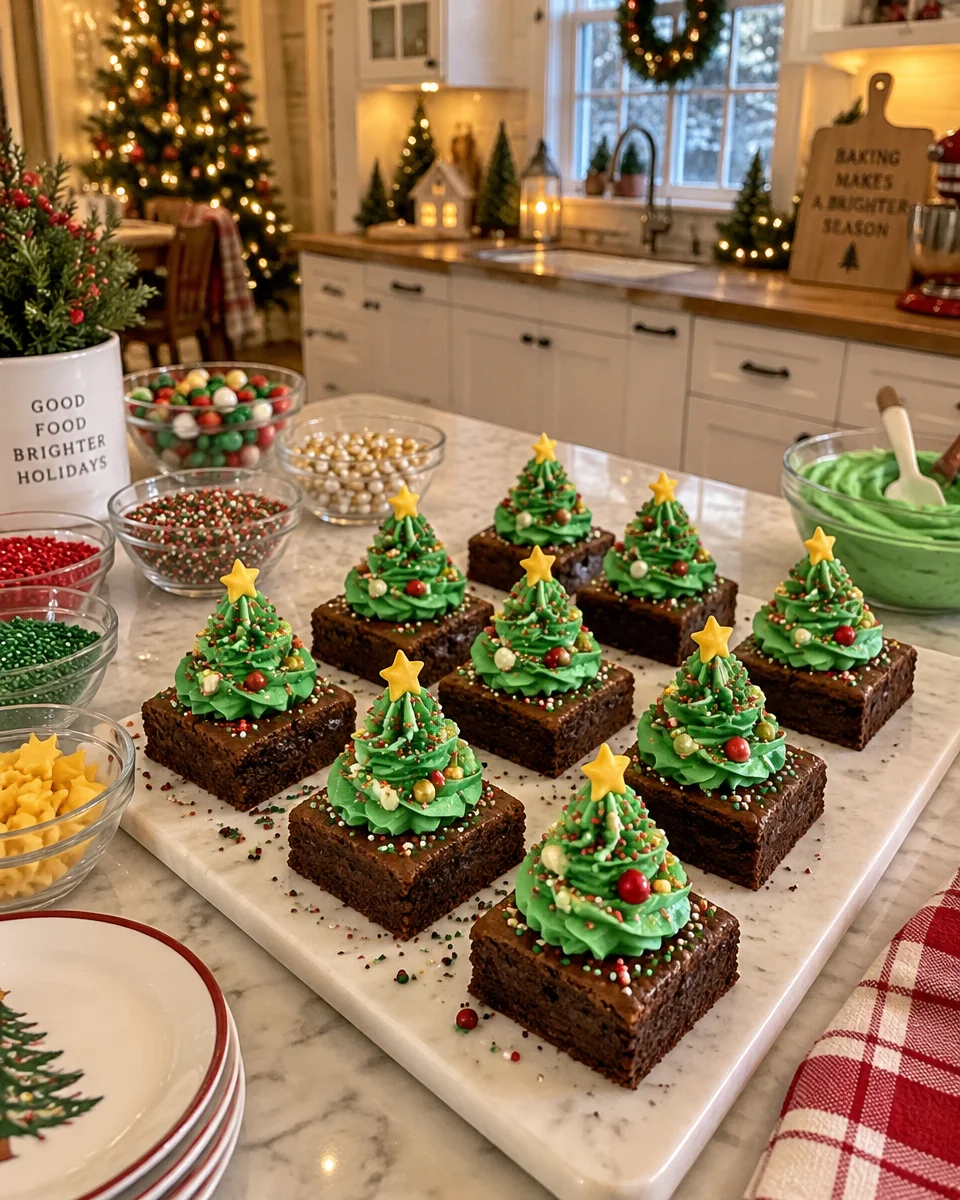
For me, the biggest win is the holiday vibe with minimal effort. Green frosting, a candy star, and suddenly people are taking pictures of your dessert. That is the magic of Brownie Christmas Trees.
Fudgy vs Cakey Brownies: Which Works Best for Shaping?
I have tried this with both fudgy and cakey brownies, and I have opinions. Fudgy brownies taste amazing, but they can be a little soft when you are cutting triangles. Cakey brownies are sturdier, but sometimes they feel a bit dry, especially the next day.
My sweet spot is a brownie that is fudgy but not gooey. Think set edges, soft middle, and it holds together when you lift a piece. If you are using a mix, bake it until a toothpick comes out with a few moist crumbs, not raw batter. Then let it cool all the way. I know that is annoying, but cutting warm brownies is a crumb disaster.
Also, if you are the kind of person who loves switching up brownie flavors, you might like these fun variations for other days: blondie brownies. Not for tree shaping exactly, but so good when you want something different.
Quick tip: line your pan with parchment paper so you can lift the whole slab out. It makes shaping your Brownie Christmas Trees way easier and way cleaner.
How to Cut and Shape Perfect Christmas Tree Brownies
This is the part that looks fancy but is actually simple. You are basically cutting big triangles, then adding a little trunk. I like using a ruler vibe, not an actual ruler, just eyeballing even slices.
What you will need
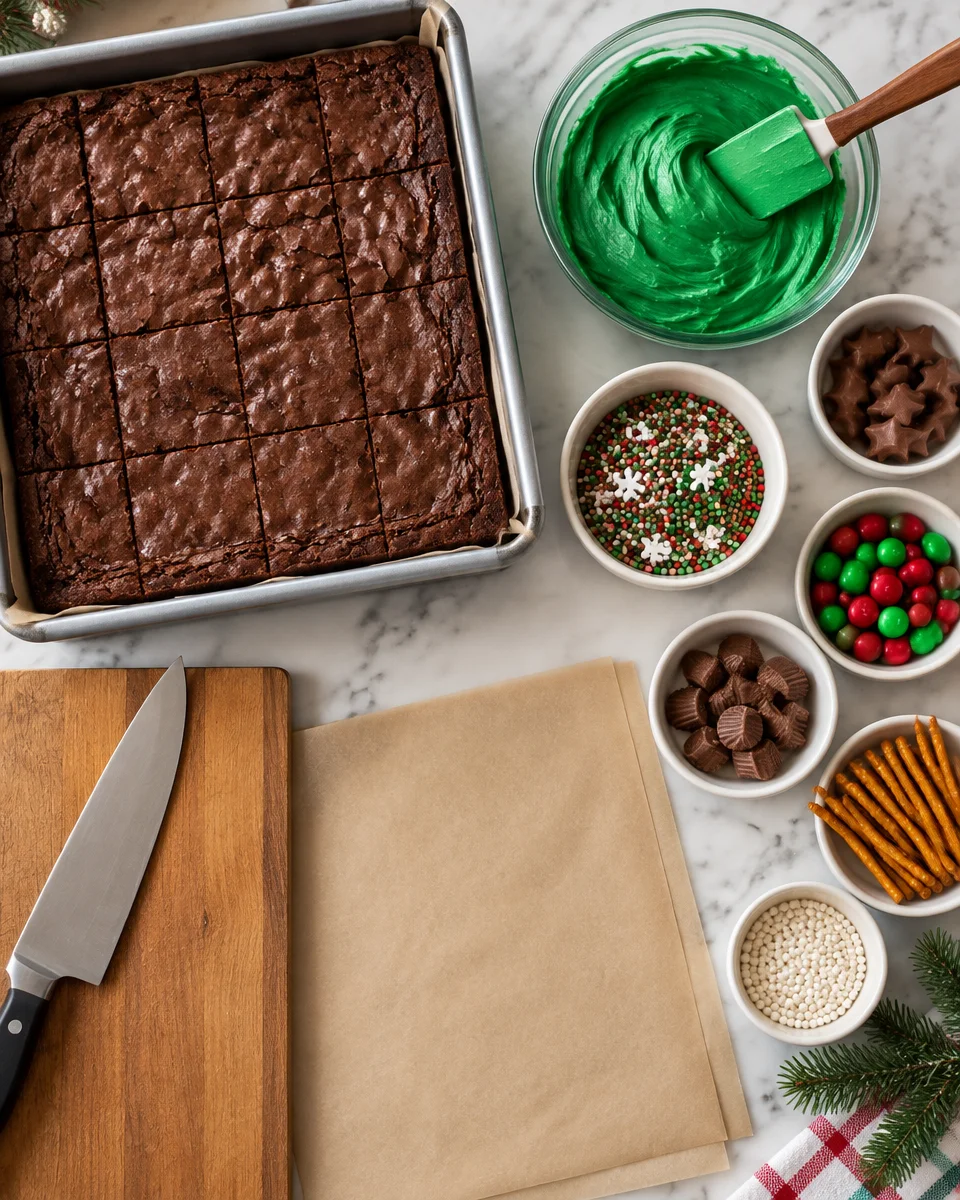
- One pan of brownies, fully cooled
- A sharp knife, wiped clean between cuts
- Parchment paper if you have it
- Optional: a small cookie cutter for stars or decorations
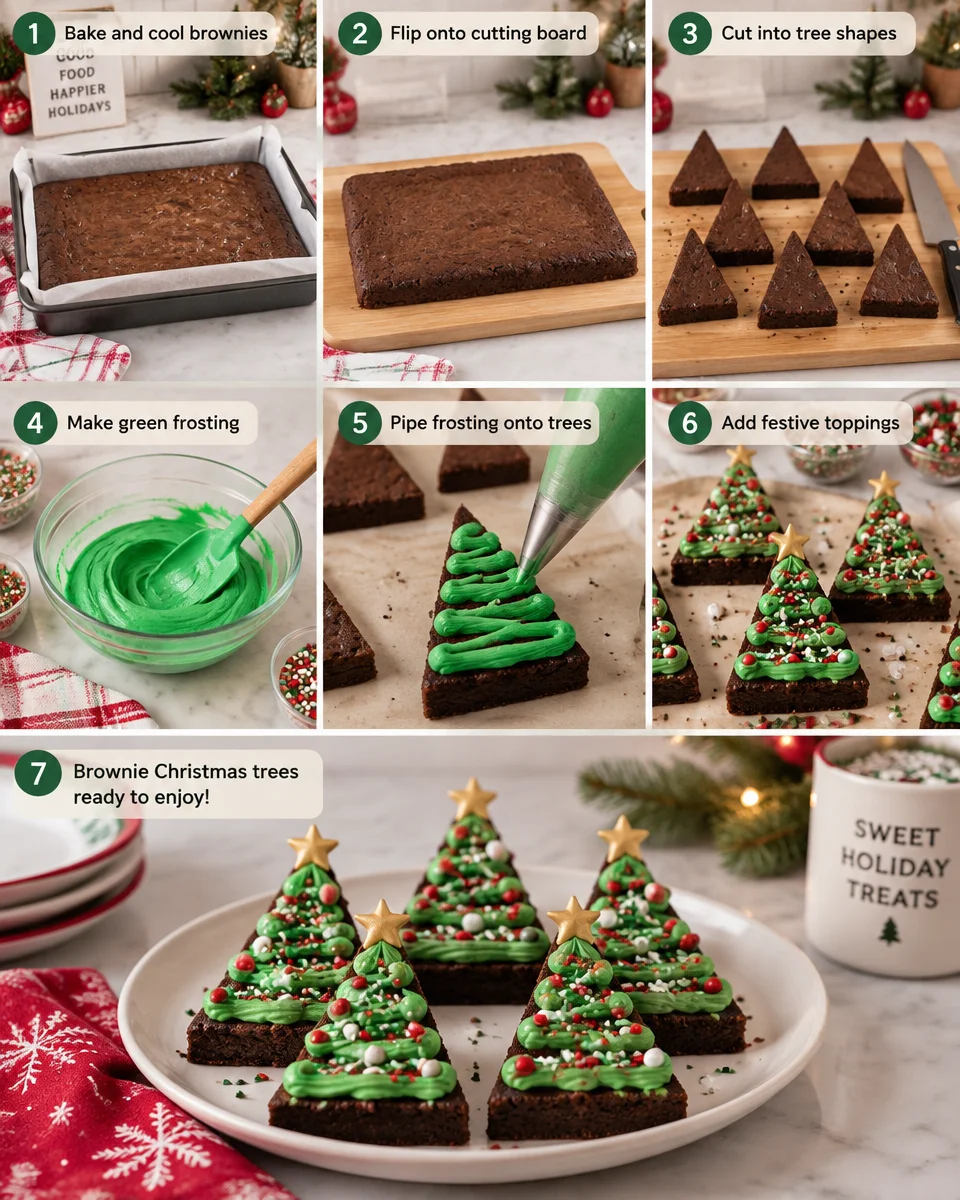
Here is how I do it. First, flip the brownie slab out onto a cutting board. Trim the edges if they are super crunchy or uneven. Then cut the slab into long strips, and cut each strip into triangles. For the trunks, you can cut tiny rectangles from the trimmed edges and press them into the bottom with a dab of frosting later.
If you want them all to look more uniform, make fewer, bigger trees instead of lots of tiny ones. Tiny ones are adorable, but they break more easily. And remember, once the frosting goes on, nobody is measuring angles. They just see Christmas.
I also like to chill the cut pieces for 15 minutes before decorating. It firms them up and makes the whole Brownie Christmas Trees situation feel less fragile.
Frosting and Decoration Ideas to Make Them Festive
Green frosting is the obvious choice, and yes, it looks like a Christmas tree instantly. You can use buttercream, store bought frosting, or even tinted cream cheese frosting. If you are going for the easiest route, microwave store bought frosting for about 5 seconds and stir. It spreads smoother without tearing the brownie.
Sometimes I skip frosting entirely and do a drizzle of melted white chocolate, then add sprinkles. But if you want the full tree look, frosting helps the decorations stick and gives that classic vibe.
Here is a little table I keep in my head when deciding what vibe I want.
If you like a fruity twist in brownies, I have made these for parties and they disappear fast: cherry cheesecake brownies. Not tree shaped, but they are a fun December dessert when you want something rich and different.
One more thing, do not stress about perfect piping. I usually just use a spoon and make swooshes. The decorations cover a lot, and the homemade look is part of the charm.
I brought these to our office cookie swap and people kept asking where I bought them. Nobody believed they started as regular brownies, and they tasted even better than they looked.
Fun Toppings: Sprinkles, Candy Stars, and Edible Glitter
This is my favorite part because it is basically arts and crafts you can eat. Also, toppings can hide little frosting mistakes, which is very convenient. For Brownie Christmas Trees, I like mixing textures so every bite is not just sweet on sweet.
Here are topping ideas that work really well:
- Candy stars for the top, classic and cute
- Mini M and M style chocolates as ornaments
- Rainbow or green sprinkles for that tree texture
- Crushed peppermint for a minty crunch
- Edible glitter, a tiny pinch goes a long way
My personal rule is one star plus two or three other toppings, max. If you add everything, the tree looks messy and the brownie gets overloaded. Unless you are decorating with kids, then all rules are off and you just enjoy it.
And if you are into playful, ice cream inspired brownie flavors, this one is a whole mood: cherry garcia brownies. Again, not tree shaped, but absolutely worth trying during the holidays.
Can You Make Brownie Christmas Trees Ahead?
Yes, and thank goodness because December is busy. I do this in two steps. Bake and cut the brownies the day before, then decorate the next day. That way the brownies are firm and easy to handle, and your frosting looks fresher.

Here is what works best:
Make ahead timeline: Bake and cool, cut into trees, store in an airtight container at room temperature. If your kitchen is warm, you can refrigerate, but bring them back to room temp before serving so they taste soft again.
Decorating ahead: You can decorate a few hours ahead and keep them in a single layer if possible. If you must stack them, place parchment between layers so the frosting does not smear.
Freezing: Freeze undecorated tree shapes wrapped well. Thaw at room temp, then frost. Freezing decorated trees can work, but sprinkles sometimes bleed and the frosting can get a little weird.
The main thing is moisture. Brownies stay great for a couple of days, but once you add a lot of frosting, you want to keep them covered so they do not dry out.
Frequently Asked Questions About Brownie Christmas Trees
Do I have to use homemade brownies?
Nope. Use a box mix if that makes your life easier. Just let them cool completely before cutting so they do not crumble.
How do I keep the triangles from breaking?
Cool fully, chill for 10 to 15 minutes, and use a sharp knife. Wipe the knife between cuts. Also, cut bigger trees if you are worried about breakage.
What can I use for the tree trunk?
Cut small rectangles from the edge pieces, or use a pretzel stick, a small wafer cookie, or even a bit of chocolate bar. Frosting acts like glue.
Can I make them without green food coloring?
Yes. Do white frosting with snowy sprinkles, or use melted chocolate drizzle. They will still read as Christmas, especially with a star on top.
How many trees do I get from one pan?
From a 9 by 13 pan, I usually get 10 to 14 trees depending on how big I cut them and how much I trim off the edges.
A sweet little holiday send off
If you want a festive dessert that feels fun but not stressful, Brownie Christmas Trees are it. You get the cozy brownie flavor, plus the holiday look that makes people smile. Keep it simple with green frosting and a candy star, or go wild with sprinkles and glitter. Try a batch this week and tell me if you can actually stop at one, because I never can.
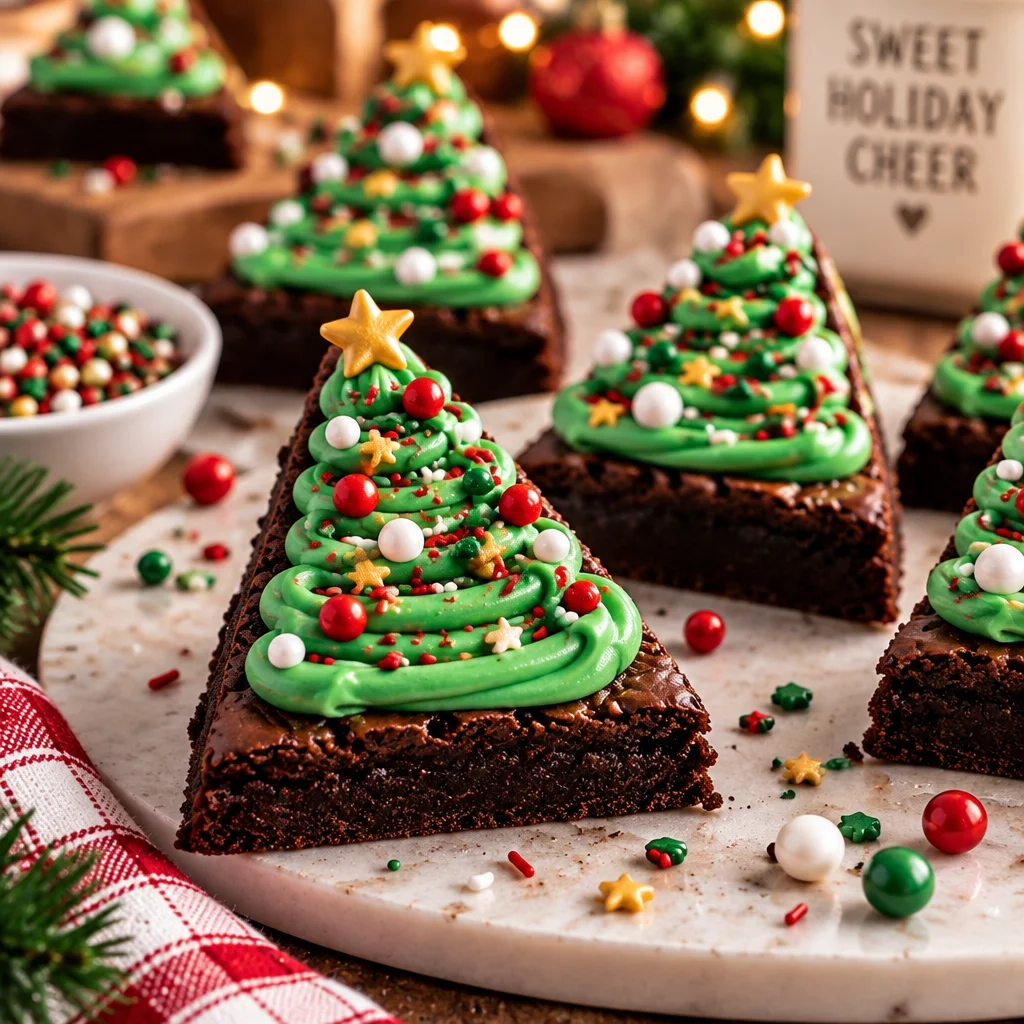
Brownie Christmas Trees
Ingredients
Method
- Bake the brownies according to package instructions or your homemade recipe until a toothpick comes out with a few moist crumbs. Let them cool completely.
- Once cooled, flip the brownie slab onto a cutting board lined with parchment paper for easy handling.
- Trim the edges of the brownies if they are crunchy or uneven.
- Cut the brownie slab into long strips, then cut each strip into triangles to form trees. Use trimmed edges for small tree trunks.
- Chill the cut brownie triangles for 15 minutes before decorating to firm them up.
- Spread green frosting over each brownie triangle to create a tree shape.
- Top each tree with a candy star and adorn with mini M&Ms, sprinkles, and additional toppings of choice.
- If desired, use melted white chocolate instead of frosting for a different look.
- Let the decorated trees sit for a few minutes to allow the frosting to set slightly.