
Chocolate Espresso Layer Cake is my go to move when I want a dessert that feels a little fancy but still totally doable on a normal day. You know that moment when you want something deeper than plain chocolate, but you also do not want to babysit a complicated recipe for hours? This cake hits that sweet spot. The espresso makes the chocolate taste richer, like it woke up and decided to show off. I started making it for birthdays, then it turned into my bring it to every gathering cake because people always ask for seconds. If you are craving bold chocolate flavor with a soft, fluffy crumb, you are in the right place. 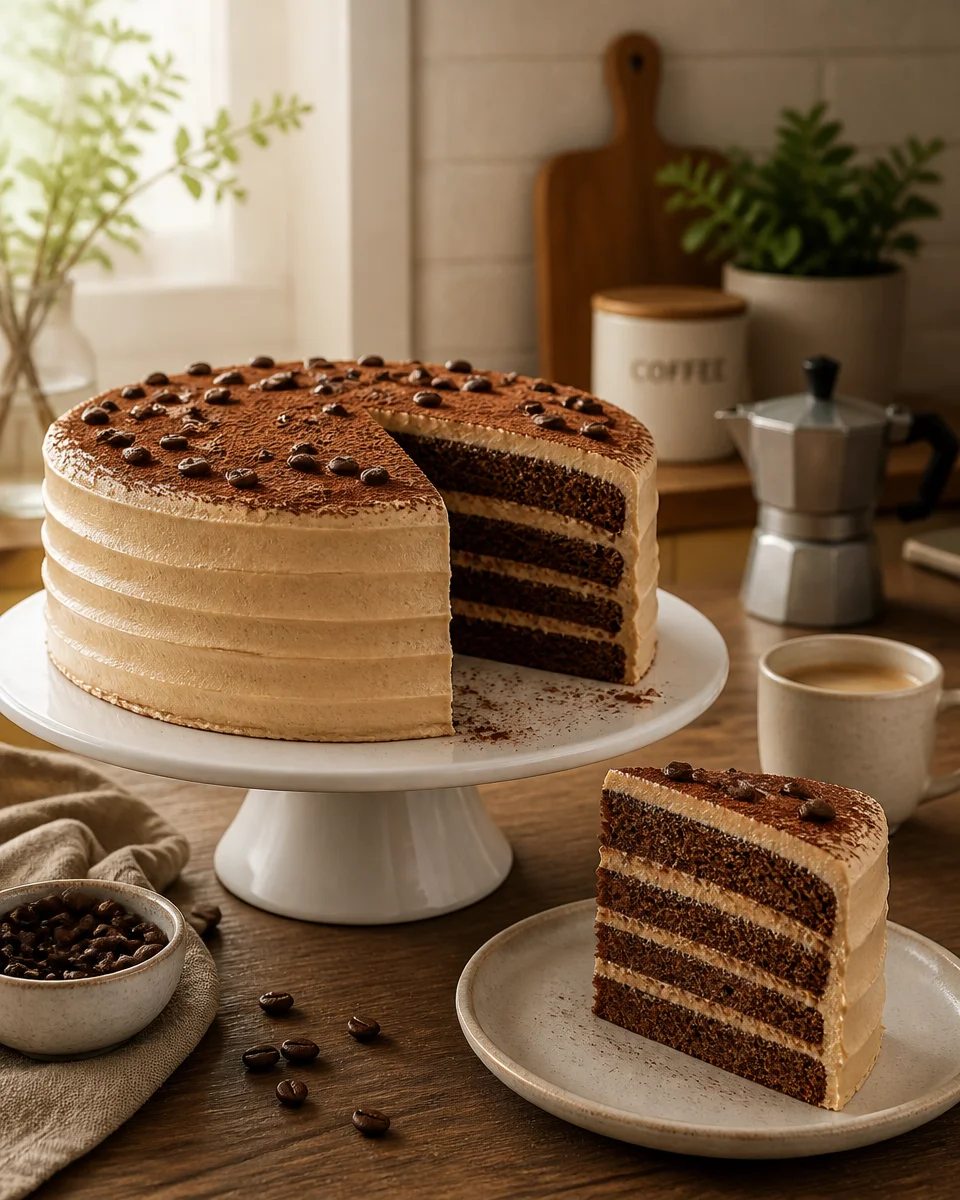
Natural Vs. Dutch-Process Cocoa Powder
Let us talk cocoa, because it actually matters here. I used to buy whatever was on sale and wonder why my cakes came out different every time. For a Chocolate Espresso Layer Cake, the cocoa choice affects both flavor and how the cake rises.
What is the difference and which one should you use?
Natural cocoa powder is more acidic and tastes a bit sharper and lighter in color. Dutch-process cocoa is treated to reduce acidity, so it tastes smoother, looks darker, and leans into that classic bakery style chocolate vibe.
Here is the practical part. If your recipe uses baking soda, it often expects the acidity of natural cocoa. If it uses baking powder, it can usually work fine with either. My version uses both baking powder and a small amount of baking soda, so it is flexible, but I still have preferences:
My pick: Dutch-process when I want the darkest, boldest chocolate layers. Natural when I want a slightly lighter chocolate flavor that still pops.
Also, espresso plays really nicely with Dutch-process because both taste deep and smooth together.
One more tip: sift your cocoa. It takes 10 seconds and saves you from bitter little cocoa lumps hiding in your frosting or batter.
If you are in a chocolate mood and want another dessert that screams crowd pleaser, I have to point you to this chocolate fudge truffle cheesecake because it is basically pure chocolate comfort.
How to Make a 3 Layer Cake
A three layer cake looks impressive, but it is mostly just a little planning. The first time I made a 3 layer cake, I was convinced it would slide into a disaster pile. It did not. The trick is keeping your layers even and letting them cool completely.
Here is what you will need in simple terms.
- Three 8 inch cake pans (or bake in batches if you only have two)
- Parchment circles or a quick parchment cutout for the bottoms
- Mixing bowls and a whisk or hand mixer
- A cooling rack (even a clean stove grate works in a pinch)
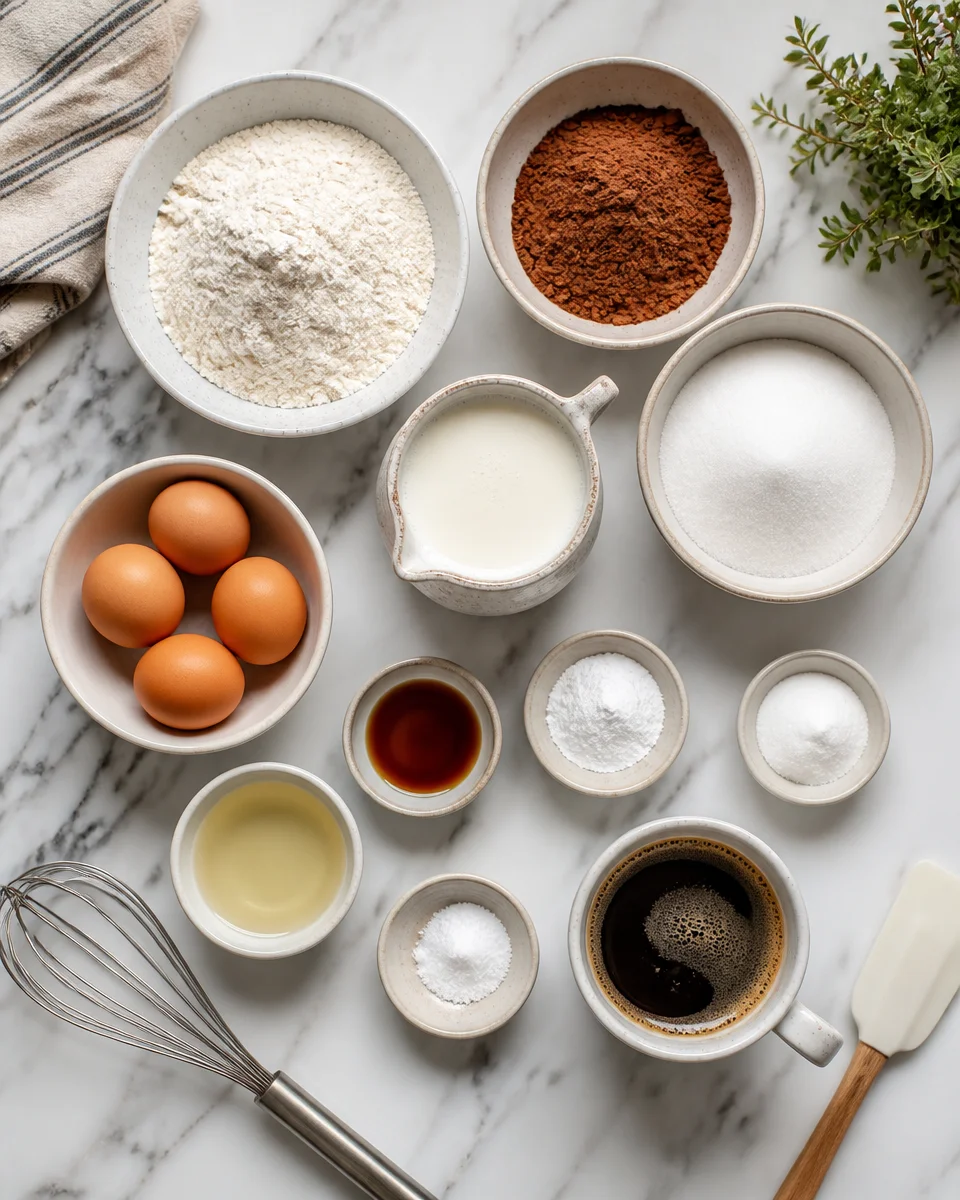
And here is my basic ingredient lineup for the Chocolate Espresso Layer Cake layers:
- All purpose flour
- Cocoa powder (natural or Dutch-process)
- Sugar
- Baking powder and baking soda
- Salt
- Eggs
- Buttermilk (or milk plus a little vinegar)
- Oil (keeps it moist)
- Vanilla
- Hot espresso or strong coffee
My simple method is this:
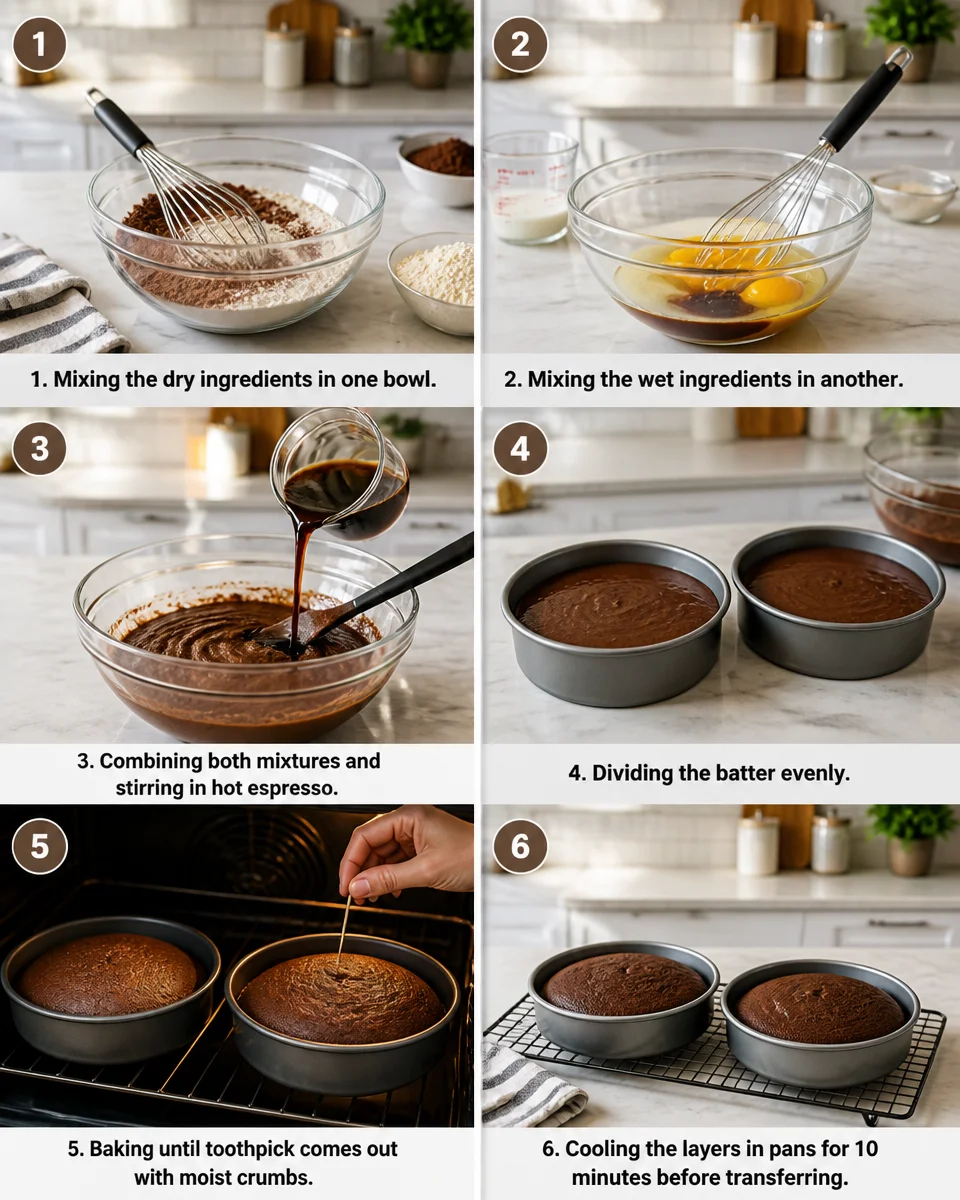
Mix the dry ingredients in one bowl. Mix the wet ingredients in another bowl. Combine them, then stir in the hot espresso last. The batter will look thin, and that is normal. Thin batter bakes up surprisingly tender.
Divide the batter evenly. If you have a kitchen scale, use it, but if not, just eyeball it and smooth the tops.
Bake until a toothpick comes out with a few moist crumbs, not wet batter. Let the layers cool in the pans for about 10 minutes, then turn them out to cool completely.
If you are the kind of person who loves layered desserts but wants something even easier, this chocolate cheesecake trifle is a great no stress option for parties.
How to Assemble Chocolate Espresso Cake
This is where the magic happens. A Chocolate Espresso Layer Cake is all about the stack, the frosting, and that little espresso kick in every bite.
My go to frosting and filling plan
I usually do a chocolate espresso buttercream or a chocolate cream cheese frosting, depending on who is coming over. Buttercream looks cleaner. Cream cheese frosting tastes a little tangy and rich. If you want something super reliable, do buttercream and add espresso powder to taste.
Here is my assembly routine, and it keeps things neat:
1) Level the layers (optional but helpful). If the cakes domed up, trim just a little off the top with a serrated knife. Snack on the scraps. That is baker tax.
2) Chill the layers for 20 to 30 minutes. Cold cake is easier to frost and does not crumble as much.
3) Start with a frosting dam. Pipe a ring of frosting around the edge of the first layer. This helps hold fillings in if you add any extras.
4) Add filling. You can keep it simple with frosting only, or spread a thin layer of chocolate ganache. Sometimes I add a tiny swipe of espresso syrup. Not too much or it gets soggy.

5) Stack and repeat. Press gently so it settles.
6) Crumb coat. This is a thin layer of frosting all over to trap crumbs. Chill again for 15 minutes.
7) Final coat. Smooth it, swirl it, or make it rustic. Rustic is forgiving and still gorgeous.
“I brought this to a family dinner and my uncle, who claims he does not like cake, ate a full slice and then asked if there was more. The espresso flavor was the thing he would not stop talking about.”
If you want another fun chocolate moment that feels a bit playful, check out these chocolate cheesecake stuffed strawberries. They are the easiest way to look like you tried really hard.
Tips for the Best Baked Goods
Let me drop my most practical baking tips that actually make a difference. I am not here to make baking feel fussy. These are the little habits that make your Chocolate Espresso Layer Cake come out right, even if your day is chaotic.
Measure flour gently. Spoon it into the measuring cup and level it off. Scooping straight from the bag packs it in and makes cake dense.
Use room temperature eggs and buttermilk if you can. It helps the batter mix smoothly. If you forget, set eggs in a bowl of warm water for 5 minutes. Works every time.
Do not overmix. Once the flour is in, mix just until you do not see dry streaks.
Espresso matters. Use strong coffee or espresso, not watery leftover coffee that has been sitting around. If you only have instant espresso powder, dissolve it in hot water and you are good.
Salt is not optional. It makes chocolate taste more like chocolate. A small amount is enough.
And yes, you can make this ahead. I often bake the layers the night before, wrap them well, and frost the next day. The flavor gets even better after it rests.
If you are thinking about switching up flavors next time, this chocolate mint cheesecake is a cool, refreshing change after a run of rich chocolate bakes.
Cake Decorating Tips
I am not a perfect cake decorator, and honestly, that is part of the charm. You do not need fancy tools to make a cake look like it belongs at a celebration. The goal is a cake that makes people say, wait, you made that?
Simple ways to make it look bakery cute
Go for swirls. If your frosting is not perfectly smooth, make it look intentional. Use the back of a spoon to create soft swoops.
Add a drip. A quick chocolate ganache drip covers a lot of sins. Let ganache cool a bit so it is thick but still pourable.
Top it like you mean it. A little pile of chocolate curls, cocoa dusting, or even espresso beans on top makes it look finished.
Clean slices trick. Warm your knife under hot water, wipe it dry, then slice. Repeat between slices if you want those neat layers.
Also, if your layers slide a little, just chill the whole cake for 20 minutes. Cold frosting firms up and behaves better.
By the way, if you like the whole layered cake vibe but want a different flavor profile for your next project, this caramel pecan layer cake is such a cozy option.
Common Questions
1) Can I make Chocolate Espresso Layer Cake without espresso?
Yes. Use strong coffee, or even hot water if you must. Espresso gives the best flavor, but the cake will still be chocolatey without it.
2) Can I bake this in two pans instead of three?
You can. Use two 9 inch pans or two 8 inch pans and bake a little longer. Just keep an eye on it near the end.
3) Why did my cake turn out dry?
Most of the time it is overbaking or too much flour. Pull it when the toothpick has a few moist crumbs, and measure flour lightly.
4) Can I freeze the layers?
Absolutely. Wrap each cooled layer tightly in plastic wrap, then foil. Freeze up to 2 months. Thaw overnight in the fridge.
5) What frosting pairs best with it?
Chocolate espresso buttercream is my favorite. Chocolate cream cheese frosting is great if you want a little tang to balance the sweetness.
A sweet note before you preheat that oven
This Chocolate Espresso Layer Cake is rich, cozy, and surprisingly simple once you break it into steps. Pick your cocoa, bake your three layers, chill them, then stack with confidence and plenty of frosting. If you want to compare approaches, I have browsed recipes like Chocolate Espresso Layer Cake Recipe – Savory Simple and Chocolate Espresso Cake – Eats Delightful, and it is always fun to see how different bakers play with coffee and chocolate. Now it is your turn to make it, slice it, and enjoy that first bite when the espresso flavor sneaks in. If you bake it, I hope you share it with someone who really needs a good piece of cake today. 
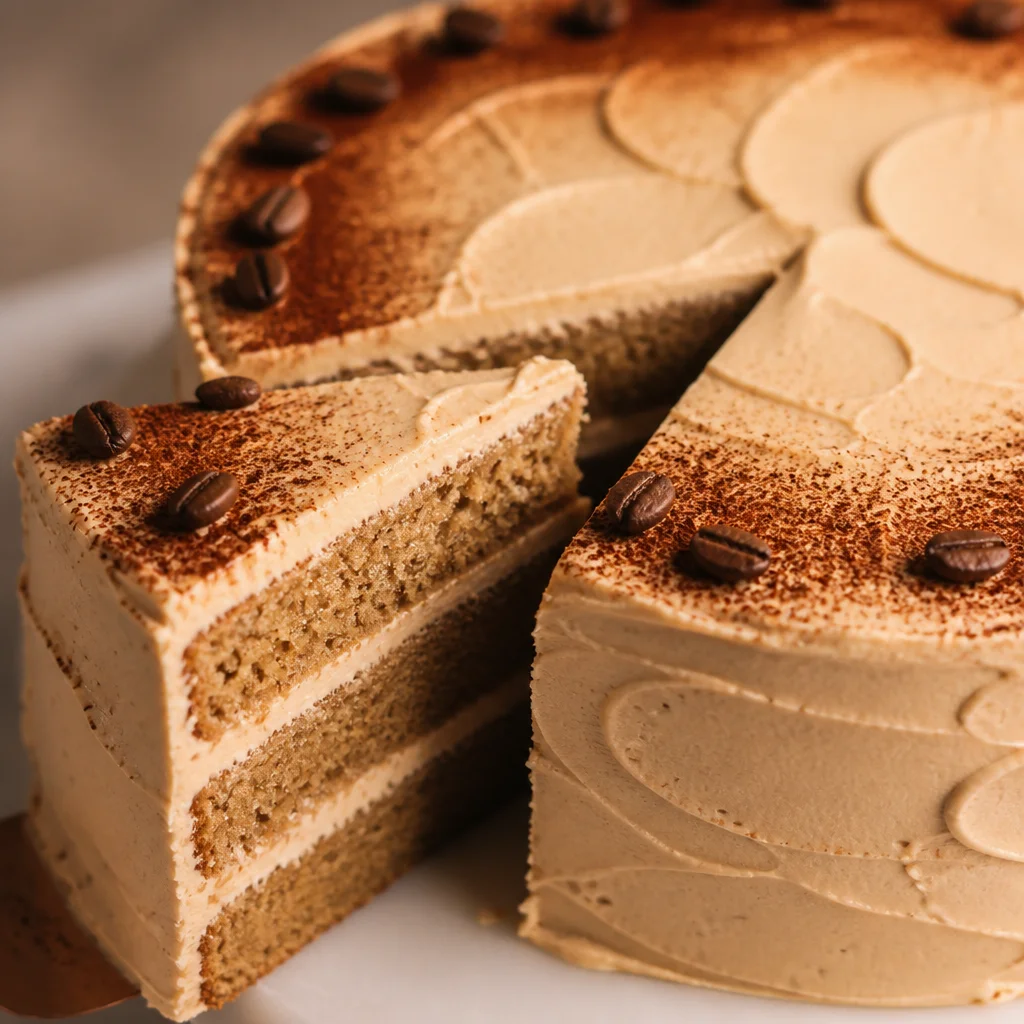
Chocolate Espresso Layer Cake
Ingredients
Method
- Preheat the oven and prepare three 8-inch cake pans with parchment paper.
- In one bowl, mix the dry ingredients: flour, cocoa powder, sugar, baking powder, baking soda, and salt.
- In another bowl, mix the wet ingredients: eggs, buttermilk, oil, and vanilla extract.
- Combine wet and dry ingredients, then slowly stir in hot espresso until well mixed.
- Divide the batter evenly among the prepared pans and bake.
- Check doneness by inserting a toothpick; it should come out with a few moist crumbs, not wet batter.
- Let cool in pans for 10 minutes before transferring to cooling racks to cool completely.
- Level the cake layers and chill in the fridge for 20-30 minutes.
- Using a piping bag, create a frosting dam on the first layer and add filling if desired.
- Stack the layers and repeat the process.
- Apply a crumb coat and chill for 15 minutes.
- Complete with a final coat of frosting, smooth or rustic.
