


King’s Hawaiian Cheesecake Danish is my go to move when I want something that feels bakery level, but I do not want to babysit dough for hours. You know those mornings when everyone is hungry, you want something sweet, and you also want to look like you totally have your life together? This is that recipe. It uses soft, buttery Hawaiian rolls, a quick cheesecake filling, and a simple glaze that makes the whole tray disappear fast. I have made these for lazy weekends, brunch with friends, and that one time I needed a last minute dessert for a neighbor. 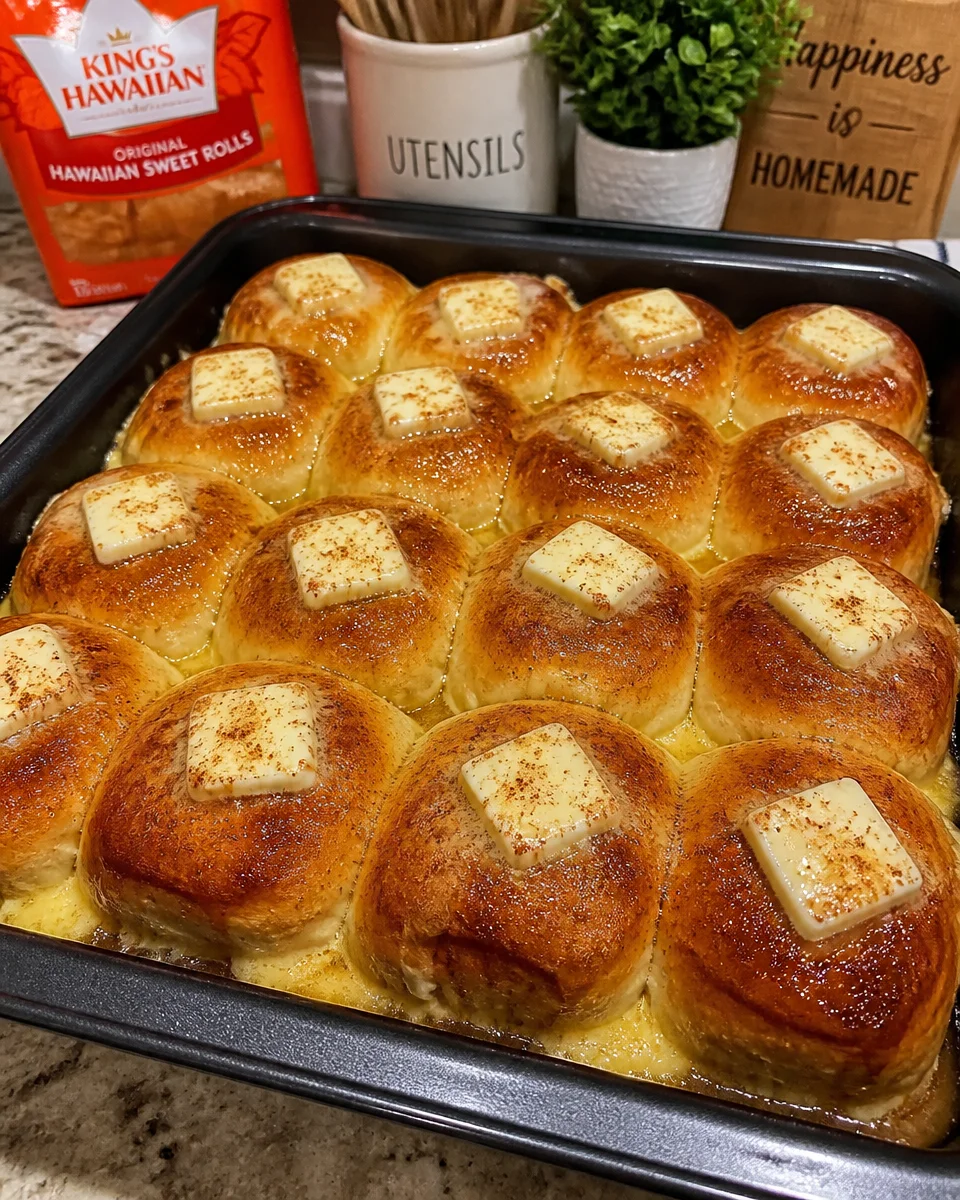
The Story Behind This Recipe
Hey, I’m Alexandraa! This King’s Hawaiian Cheesecake Danish was built for real kitchens: simple steps, reliable results, and flavor that makes people ask for seconds. King's Hawaiian Cheesecake Danish is my go to move when I want something that feels bakery level, but I do not want to babysit dough for…
Recipe Overview
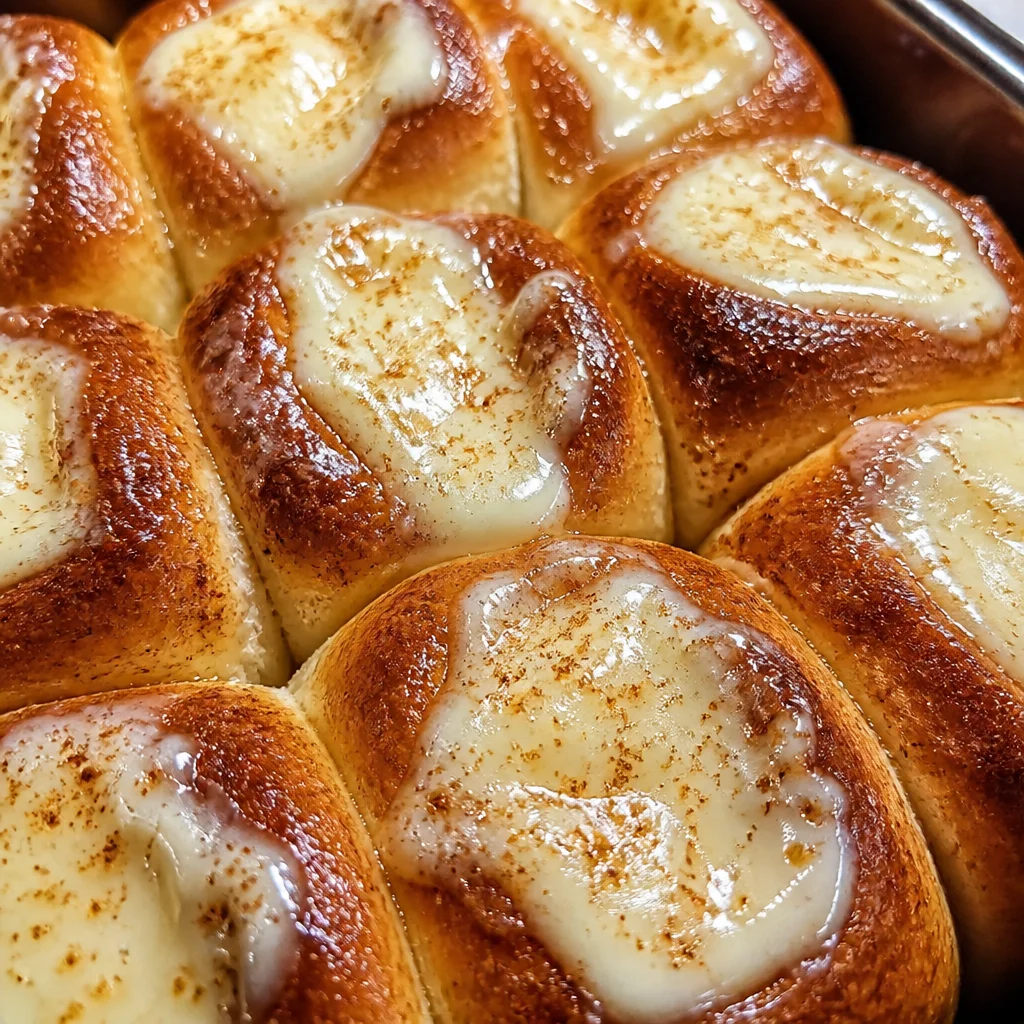
If you have ever stood in front of the fridge hoping a dessert will magically appear, this is the kind of recipe that saves you. The base is a pack of King’s Hawaiian rolls, and we basically turn them into little danishes by making a creamy center. The rolls bake up golden and sweet, and the cheesecake filling puffs slightly, then settles into this soft, tangy middle.
When I first tested this, I overfilled a few and they looked a little messy, but they still tasted amazing. That is honestly the vibe here. They are forgiving, and people are impressed even if yours are not perfectly neat.
If you want to see the exact version I usually follow, this is the page I keep bookmarked: King’s Hawaiian Cheesecake Danish recipe. I like comparing my notes to it every time I make a batch.
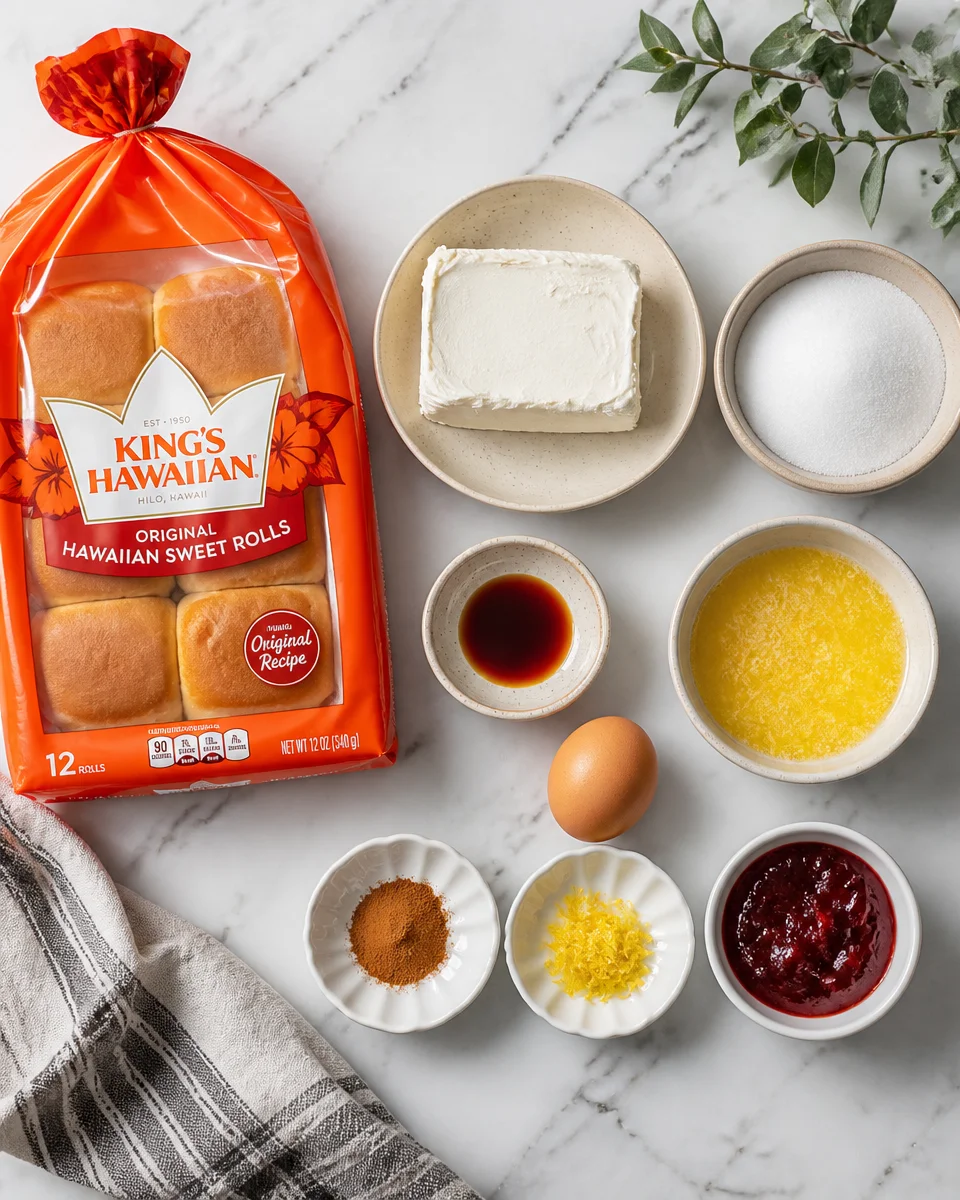
What you will need
- King’s Hawaiian rolls (1 package, usually 12 rolls)
- Cream cheese (softened)
- Sugar (granulated)
- Vanilla extract
- One egg (for richness and structure)
- Butter (melted, for brushing)
- Optional: cinnamon, lemon zest, or a spoon of jam
- For glaze: powdered sugar and a splash of milk
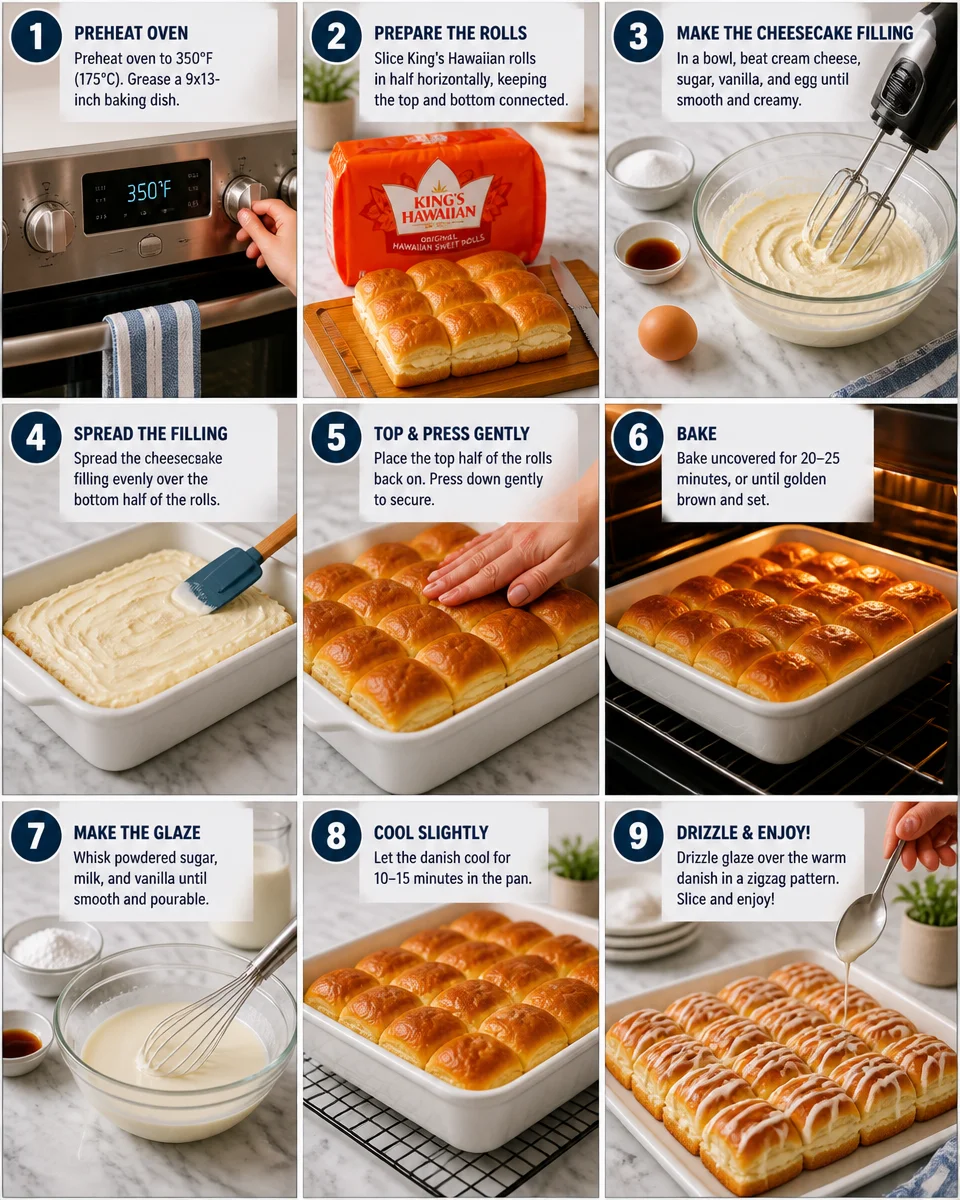
How I make them at home
I keep it simple, because that is the whole point.
First, I preheat the oven and line a baking dish. Then I place the rolls close together. I gently press an indent into each roll, kind of like making a little nest. In a bowl, I beat cream cheese, sugar, vanilla, and the egg until smooth. I spoon the filling into each indent, brush the tops with melted butter, and bake until the rolls are golden and the filling looks set.
While they cool, I mix powdered sugar with just enough milk to make a drizzle. Then I zigzag it over the top and pretend I am in a cafe.
One more thing I like about this recipe is how it fits into the same “easy pastry” family as other quick treats. If you are in a fruit mood, you might also like this one later: 3 ingredient apple danish. It is a lifesaver when you want something sweet with almost no effort.
Tips for Perfecting Your Danishes
After making these a bunch of times, I have a few little tricks that make a big difference.
First, soften your cream cheese properly. If it is still cold and stiff, you will end up with lumps. I leave it out for about 30 minutes, or I cut it into cubes to speed things up.
Second, do not press all the way through the rolls when you make the indent. You want a pocket, not a hole. If you accidentally tear one, just patch it with a bit of roll and keep going. No one will notice once it is baked and glazed.
Third, do not overfill. I know it is tempting. But too much filling can bubble over and burn on the edges, which tastes bitter. I aim for a nice rounded spoonful, not a mountain.
Fourth, bake until the tops are clearly golden. Underbaked rolls taste doughy, and the filling will be too soft. If your oven runs hot, check early.
Here is a little real life reassurance from someone who tried them at my place and basically made my day:
I thought these were from a bakery. The rolls are so soft and the cheesecake center is perfect. I ate two before I even poured my coffee.
If you are craving another fun, hand held cheesecake style snack, you should absolutely check out these air fryer cherry cheesecake egg rolls too. Different vibe, same “why is this so good” feeling.
Common Variations
Once you have the base down, you can play around without stress. I do this depending on the season or what I have in the pantry.
Fruit swirl is the easiest upgrade. Add a small spoon of jam on top of the cheesecake filling, then use a toothpick to swirl it a little. Strawberry, raspberry, blueberry, even apricot all work. Just keep it light so it does not flood the center.
If you want a brighter flavor, add a little lemon zest to the filling. It gives a fresh, slightly tangy taste that cuts the sweetness in a good way.
Chocolate lovers can add mini chocolate chips on top, or a tiny drizzle of chocolate after the glaze sets. It feels extra, but still easy.
You can also go “fall cozy” by mixing a pinch of cinnamon into the filling and topping with a few chopped pecans.
And if you are the kind of person who likes layered desserts, the flavor profile here reminds me of these apple pie cheesecake trifles. Different format, but same comforting cheesecake plus sweetness combo.
Serving Suggestions
These are best when they are slightly warm and the glaze is just set. I love serving them on a big plate in the middle of the table, because people naturally grab one, then come back for another.
Here are my favorite ways to serve them:
- With hot coffee or strong tea, especially if you like a not too sweet drink next to a sweet pastry
- With fresh berries on the side for a brunchy feel
- With a dusting of powdered sugar if you want them to look extra pretty
- With a small bowl of jam so people can add more fruit if they want
If you are making a bigger dessert spread, I like pairing them with something a little more “grown up” too. This Baileys cheesecake is a great option for later in the day when brunch turns into dessert, if you know what I mean.
Storage and Reheating Instructions
These store better than you might expect, which is great if you want to make them ahead or if you somehow end up with leftovers.
I let them cool completely first. Then I store them in an airtight container in the fridge. They will keep well for about 3 to 4 days. The rolls stay soft, and the filling stays creamy.
For reheating, I prefer the oven or toaster oven if I have time. A quick warm up brings back that fresh baked texture. If you are in a hurry, the microwave works too, just do short bursts so the filling does not get weirdly hot.
A few practical notes:
- If you plan to reheat later, you can glaze right before serving for the prettiest look.
- If they are already glazed, it is still fine. The glaze may soak in a bit, but the taste is still great.
- You can freeze them too. Wrap individually, freeze, then thaw in the fridge overnight and warm gently.
Common Questions
Can I make King’s Hawaiian Cheesecake Danish the night before?
Yes. Bake them, cool them, and store in the fridge. I usually add the glaze in the morning so they look fresh.
Do I have to use an egg in the filling?
It is best with the egg because it helps the filling set. If you skip it, the center can stay looser, but it will still taste good.
What if I do not have a baking dish?
Use a sheet pan and place the rolls close together. They might spread a bit more, but it works.
How do I stop the filling from overflowing?
Do not overfill and make sure your indent is deep enough to hold the filling. Also bake on the middle rack so the tops do not brown too fast while the center is still bubbling.
Can I add fruit without making them soggy?
Yes, just use a small amount of thicker jam or pie filling. Avoid adding a lot of watery fresh fruit directly into the center.
A sweet little send off
If you have been wanting a treat that feels special but is still simple, King’s Hawaiian Cheesecake Danish is the one I would tell you to try first. It is quick, cozy, and honestly kind of addictive, especially when it is warm with that glaze on top. If you like seeing how other home cooks make it, I enjoyed reading King’s Hawaiian Cheesecake Danish – Olla-Podrida and I also bookmarked King’s Hawaiian Roll Cream Cheese Danishes – Nomtastic Foods for extra ideas. Make a batch, pour your coffee, and do yourself a favor and eat one while it is still a little warm.
King’s Hawaiian Cheesecake Danish
Ingredients
Method
- Preheat the oven and line a baking dish.
- Place the rolls close together in the prepared dish.
- Gently press an indent into each roll to form small pockets.
- In a bowl, beat the cream cheese, sugar, vanilla, and egg until smooth.
- Spoon the cream cheese filling into each indent.
- Brush the tops of the rolls with melted butter.
- Bake until the rolls are golden and the filling is set, about 25 minutes.
- While the danishes cool, mix the powdered sugar with enough milk to create a drizzle.
- Zigzag the glaze over the tops of the cooled danishes.