Peanut Butter and Jelly Cookies are my fix for those days when you want something cozy and sweet, but you do not want to babysit a complicated dessert. I started making them when I was craving a PB and J but also wanted an actual cookie I could pack in lunches. They are soft in the middle, a little crisp on the edges, and they smell like peanut butter the second they hit the oven. The jelly part looks cute, tastes nostalgic, and honestly makes people think you tried harder than you did. If you have peanut butter, jelly, and basic baking stuff, you are already most of the way there.
How to make Peanut Butter and Jelly Cookies
These are the cookies I make when I want a guaranteed win. The dough is simple, the bake time is short, and you can tweak the jelly flavor depending on what is in your fridge. If you already love classic peanut butter cookies, you might also like my other peanut butter cookie obsessions, like these super easy 3 ingredient peanut butter cookies for when you are really keeping it minimal.

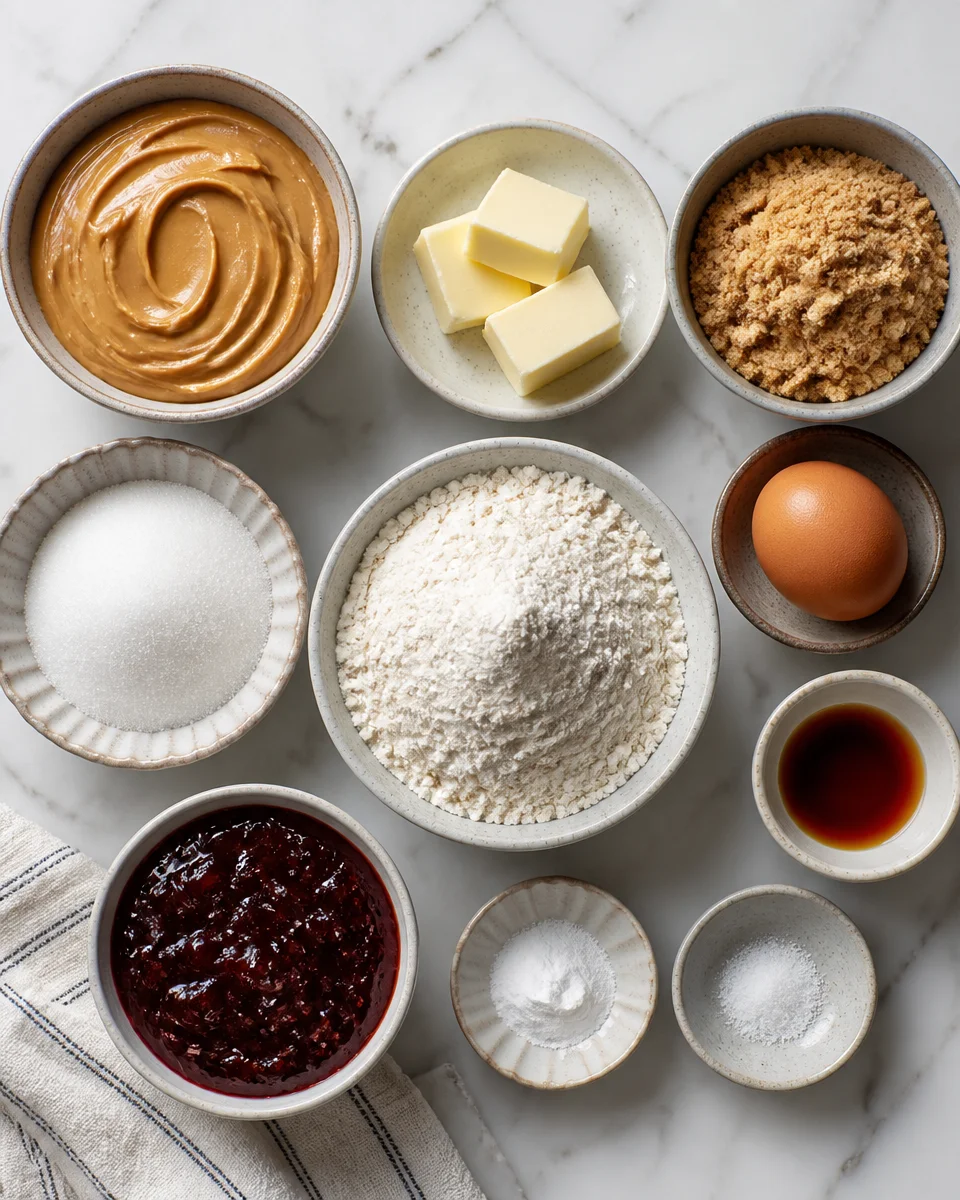
Ingredients and what you will need
- Creamy peanut butter: classic flavor and smooth dough
- Butter: softened, for that rich cookie texture
- Brown sugar and white sugar: for sweetness and a slightly chewy bite
- 1 egg: binds everything together
- Vanilla extract: optional but worth it
- All purpose flour
- Baking soda and a pinch of salt
- Jelly or jam: any flavor you love
Directions (my no stress method)
I keep this routine the same every time because it just works.
- Heat your oven to 350 F and line a baking sheet with parchment paper.
- Cream the butter, peanut butter, and both sugars until it looks fluffy and lighter in color.
- Mix in the egg and vanilla.
- Sprinkle in flour, baking soda, and salt. Mix just until the flour disappears.
- Scoop dough into balls, about 1 and a half tablespoons each, and space them out.
- Use your thumb or the back of a teaspoon to press a small well in the center.
- Spoon about 1 teaspoon of jelly into each well. Do not overfill or it can bubble over.
- Bake 9 to 11 minutes, until the edges look set but the centers still look a little soft.
- Let them cool on the pan for 10 minutes so they can firm up, then move to a rack.
The biggest tip I can give you is to not overbake. The cookies continue to set while they cool, and that is how you get that perfect soft middle. If you want another easy cookie that feels fun but requires basically zero oven attention, you should check out these chocolate peanut butter no bake cookies too.
“I made these for my kids after school and they disappeared in like ten minutes. The jelly centers stayed soft and the peanut butter flavor tasted like the real sandwich, just better.”
Can you use crunchy peanut butter?
Yes, you totally can. Crunchy peanut butter gives you little bits of peanut throughout the cookie, which is honestly kind of addictive if you like texture. The only thing to watch is that some natural crunchy peanut butters can be a bit oily or dry depending on the brand.
Here is what I do when I swap it in:
If the dough feels too soft, I pop it in the fridge for 20 minutes so the cookies hold their shape better. If the dough feels too stiff, I let it sit at room temp for 10 minutes before scooping. Either way, the flavor is great.
Also, crunchy peanut butter makes the thumbprint well a little more likely to crack at the edges. If that happens, just pinch the dough back together with your fingers. It does not have to look perfect to taste perfect.
When I want a really soft cookie vibe without thinking too hard, I sometimes use a shortcut recipe like these 4 ingredient cake mix peanut butter soft cookies. Not the same thing as Peanut Butter and Jelly Cookies, but they are great for busy weeks.
What kind of jelly can you use?
This is the fun part because you can make the same batch of Peanut Butter and Jelly Cookies feel different just by switching the jelly. I have made them with grape, strawberry, raspberry, and even apricot. They all work.
My best practical advice is to choose something that is thick and spoonable. Super runny jelly can melt fast and slide around. If all you have is a thinner jelly, stir it well first, then use a little less per cookie.
Some flavor ideas that actually taste amazing with peanut butter:
Strawberry jam for the classic kid lunch taste.
Grape jelly for straight up nostalgia.
Raspberry preserves if you like a tangy bite.
Orange marmalade if you want something a little grown up.
Mixed berry when you cannot decide.
If your jelly has big fruit chunks, it will still work, but filling the centers is messier. I usually save chunky preserves for toast and use smoother jam for cookies.
And if you are in a peanut butter dessert mood in general, I have to mention these Disneyland copycat peanut butter bars. They are rich, sweet, and basically disappear the moment you cut them.
Do I need to chill these cookies?
Most of the time, no. I make Peanut Butter and Jelly Cookies as a quick treat, so I usually bake the dough right away. But chilling can help in a few situations, and it is good to know when it matters.
Chill the dough for 20 to 30 minutes if:
You are using very soft butter and the dough feels greasy.
Your kitchen is warm and the cookies tend to spread.
You are using natural peanut butter that makes the dough looser.
You want a thicker cookie with a deeper peanut butter flavor.

If you do chill it longer, like overnight, let the dough sit out for 15 minutes before scooping so you do not fight with a rock hard bowl of dough. I have been there, and it is not fun.
One more thing: the jelly centers can sometimes sink a little if the dough is super warm. Chilling helps keep that little well in place so the jam stays nicely centered.
How to Assemble Peanut Butter and Jelly Cookies
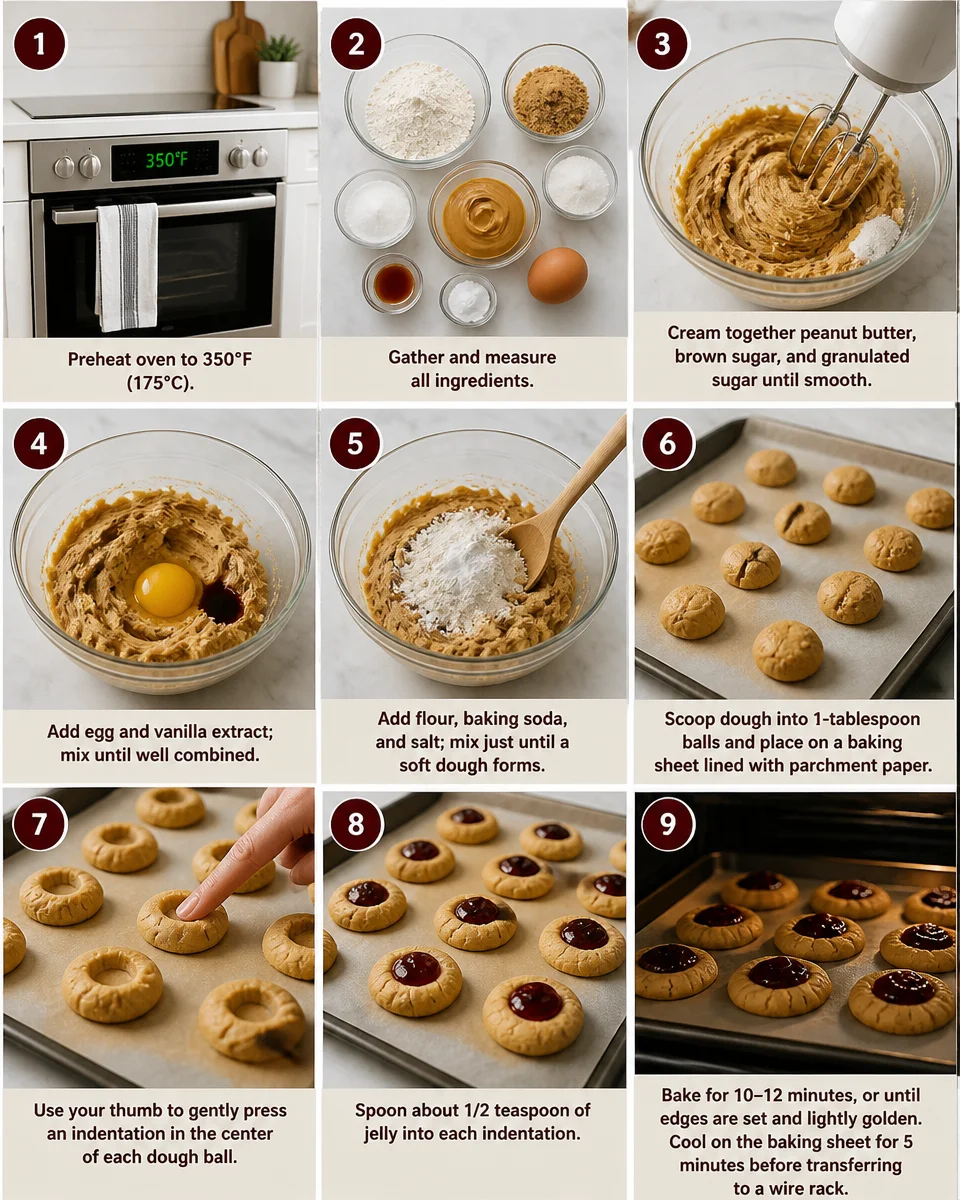
This part is where they go from regular peanut butter cookies to the cute little sandwich vibe everyone recognizes. Assembly is simple, but the small details make them look bakery nice.
Here is how I do it step by step:
1. Scoop first: Get evenly sized dough balls so they bake at the same speed.
2. Make the well: Press gently with your thumb. If the edges crack, smooth them with your fingers.
3. Add jelly carefully: Use a small spoon and aim for the center. About 1 teaspoon is plenty.
4. Do not flatten too much: These are not meant to be thin. A slightly thicker cookie holds the jelly better.
5. Cool before moving: The jelly is hot right out of the oven, and the centers need time to set.
If you want to make them extra pretty for a party, you can sprinkle a tiny pinch of sugar on top of the jelly before baking. It gives a little sparkle. Another fun move is to warm a spoon under hot water, dry it, and use it to make a clean jelly well without cracking the dough as much.
When I make cookie trays during the holidays, I like to mix these with other favorites so people can grab a few different kinds. If you need a festive classic, these Christmas cookies peanut butter blossoms always get picked first.
Common Questions
How do I store Peanut Butter and Jelly Cookies?
Keep them in an airtight container at room temp for up to 3 days. If your kitchen is hot, store them in the fridge so the jelly stays nice, then let them sit out a bit before eating.
Can I freeze them?
Yes. Freeze baked cookies in a single layer, then transfer to a freezer bag. They are best within 2 months. Thaw on the counter for about 30 minutes.
Why did my jelly bubble over?
Usually it is just too much jelly or the well was too shallow. Next time, use a little less and press a slightly deeper center.
Can I make them gluten free?
You can try a 1 to 1 gluten free baking flour. The texture may be a little softer, but it usually works fine. Keep an eye on bake time and do not overbake.
What is the best peanut butter to use?
A regular creamy peanut butter is the easiest for consistent results. Natural peanut butter can work, but stir it really well first and be ready to chill the dough if it feels loose.
A sweet little send off (and a nudge to bake)
If you want a cookie that feels familiar and fun, Peanut Butter and Jelly Cookies are such a good choice. You get that peanut butter comfort, the pop of fruity jelly, and a batch that is easy enough for a weeknight. If you want to compare methods or just browse another baker’s spin, I like reading Peanut Butter and Jelly Cookies – The Food Charlatan and Peanut Butter & Jelly Cookies – Handle the Heat when I am in cookie mode. Bake a batch, let them cool just enough so you do not burn your tongue on the jelly, and then tell me what flavor you used. I swear these disappear faster than you think.

Peanut Butter and Jelly Cookies
Ingredients
Method
- Preheat your oven to 350°F (175°C) and line a baking sheet with parchment paper.
- Cream together the butter, peanut butter, and both sugars until fluffy and lighter in color.
- Mix in the egg and vanilla extract until well combined.
- Gradually sprinkle in the flour, baking soda, and salt, mixing just until the flour disappears.
- Scoop dough into balls, about 1.5 tablespoons each, and place them on the baking sheet, spaced apart.
- Press a small well in the center of each dough ball using your thumb or the back of a teaspoon.
- Spoon about 1 teaspoon of jelly into each well, careful not to overfill.
- Bake for 9 to 11 minutes, until the edges look set but centers are still soft.
- Allow cookies to cool on the baking sheet for 10 minutes before transferring to a wire rack.
Notes