


Zebra Cake with Chocolate and Vanilla Layers is the bake I pull out when I want big reactions with very little stress. If you’ve ever tried to make a cake look fancy and ended up with a tasty mess, this one’s for you. The pattern builds itself with a simple alternating spoon method, so you don’t need special tools or a steadier hand than usual. The flavor is balanced, the crumb is soft, and it slices like a dream. I’ll walk you through the stripes, the frosting, and the easy storage plan so you can bake it today and enjoy it all week. Ready to stripe a cake together?
The Story Behind This Recipe
I’ve spent years testing recipes for Middle East Sector, and this Zebra Cake with Chocolate and Vanilla Layers is a keeper: crowd-pleasing with no weird tricks. Zebra Cake with Chocolate and Vanilla Layers is the bake I pull out when I want big reactions with very little stress. If you’ve ever tried…
What is zebra cake?
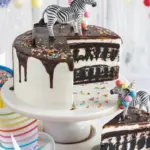
Zebra cake is a two-batter cake that bakes into bold stripes inside the layers. It looks complicated, but it’s honestly just about patience and a steady rhythm. You alternate spoons of vanilla and chocolate batter into the same spot in the center of your pan, and the batter gently spreads outward to build rings. When you stack the layers and slice, those rings turn into beautiful stripes.
For me, the best version is a tender vanilla batter and a cocoa batter with a hint of espresso to bump the chocolate flavor. That gives you the signature contrast without adding extra sweetness. It’s also the most reliable for clean slices and those dramatic lines everyone loves. If you want a cake that feels special with minimal fuss, this is it. And yes, I say the full name out loud every time because it deserves it: Zebra Cake with Chocolate and Vanilla Layers.
A quick expectation check helps. The pattern is bold, but it’s not a perfect print like a wallpaper. The charm is the organic, one-of-a-kind stripe in every slice. As long as you follow the alternating batter method and don’t shake the pan too much, you’ll get a gorgeous effect that looks way harder than it is.
How to make zebra stripe cake layers
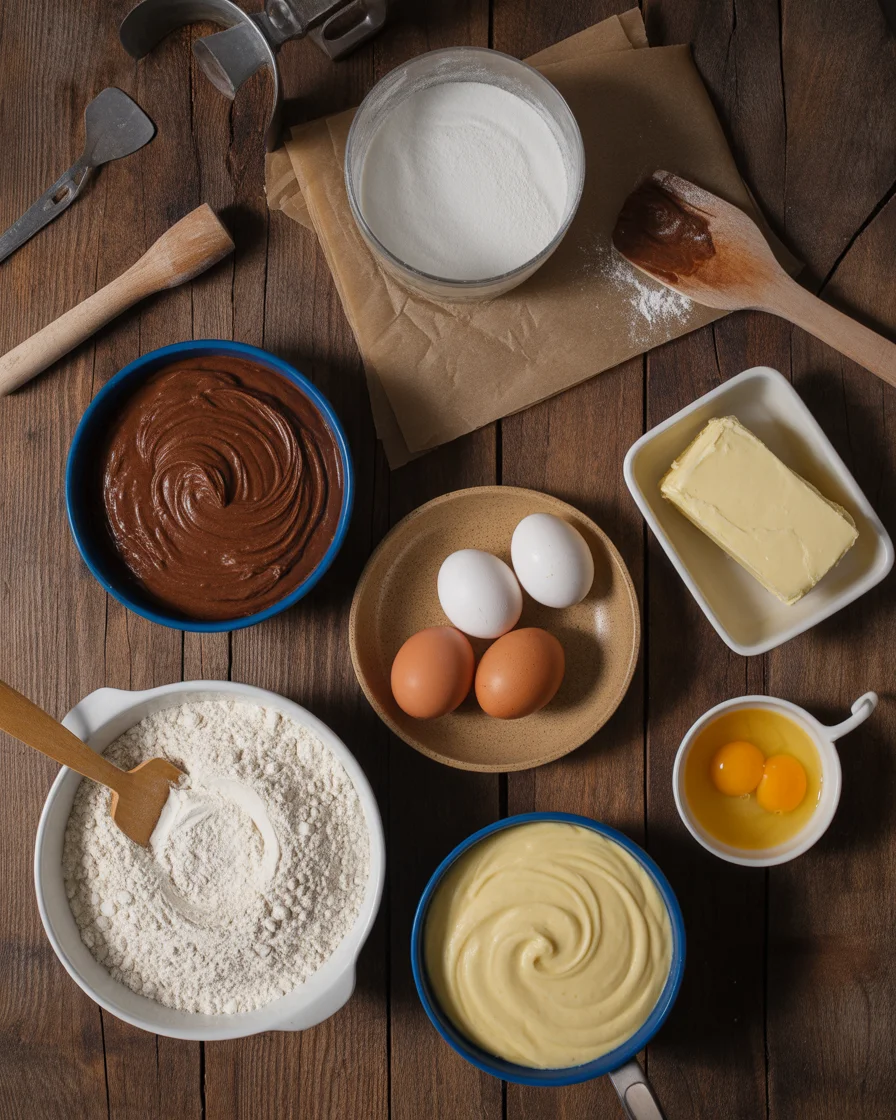
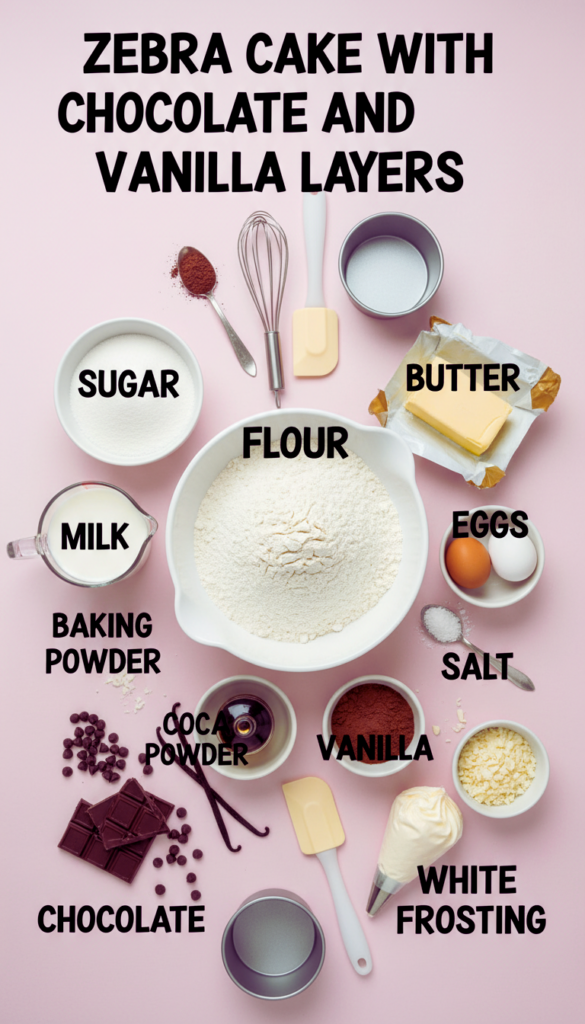
What you will need
- All-purpose flour and a little cornstarch for a soft, tender crumb
- Granulated sugar
- Baking powder and a pinch of salt
- Eggs at room temperature
- Whole milk and neutral oil for moisture
- Pure vanilla extract
- Unsweetened cocoa powder for the chocolate batter
- Optional 1 teaspoon espresso powder to deepen the chocolate flavor
Tools that help
- Two 8 inch or 9 inch round cake pans, greased and lined
- Kitchen scale or measuring cups that you trust
- Two medium bowls so you can separate the batters
- Two large spoons or small ladles, one for each batter
- Cooling racks
Step-by-step stripes
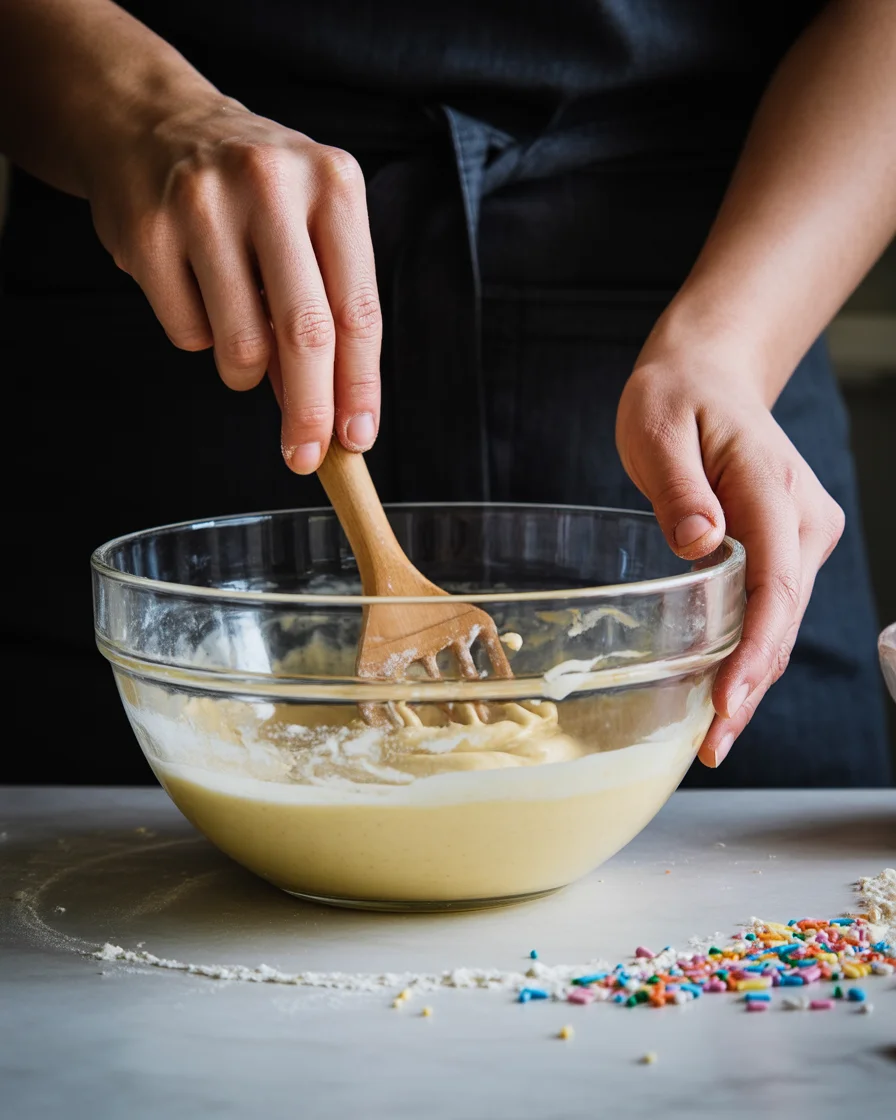
Start with one master batter. Mix dry ingredients in a bowl. In another bowl, whisk wet ingredients until smooth. Combine them until just blended. Don’t overmix, or you’ll lose that tender crumb. Split the batter evenly into two bowls. Stir cocoa and espresso powder into one bowl and an extra teaspoon of vanilla into the other.
Now the fun part. Spoon 2 tablespoons of vanilla batter right in the center of the first pan. On top of that, spoon 2 tablespoons of chocolate batter in the same center spot. Keep alternating, vanilla then chocolate, always aiming for the center. The rings will spread outward on their own. If your batter is very thick, give the pan a tiny wiggle, but avoid shaking or tapping too much or you’ll blur the lines. Repeat with the second pan and you’ll see matching targets of rings that bake into stripes.
Bake at 350 F until the centers spring back and a toothpick comes out clean. Cool in the pans for 10 minutes, then flip onto racks. The layers should be level, but if your oven runs hot, trim any domes with a long serrated knife. You’re now holding two striped layers that are surprisingly sturdy and easy to stack.
If you love visual bakes with patterns, you’ll probably enjoy the swirl action in my Strawberry Swirl Cake with Strawberry Glaze too. It’s another good practice cake for even layering and gentle spreading.
Chocolate cream cheese frosting
I like pairing this cake with chocolate cream cheese frosting because it’s tangy, rich, and not too sweet. It also spreads like a dream and sets up clean. Here’s my go-to plan. Beat softened cream cheese with unsalted butter until totally smooth. Add unsweetened cocoa powder, a pinch of salt, and sifted powdered sugar. Finish with vanilla and a spoon or two of milk to loosen as needed. The result is a glossy, sturdy frosting that hugs the cake and slices neatly.
Make sure your butter and cream cheese are truly soft. If they’re even a bit cold, you’ll get tiny lumps that won’t disappear easily. Sift the cocoa and powdered sugar for the same reason. When frosting the cake, do a light crumb coat first. Chill for 15 minutes. Then spread a thicker, final layer and swoop it with an offset spatula for texture. The frosting locks in moisture and protects the stripes inside.
“I made this for my niece’s birthday, and that first slice got an audible gasp. The frosting was silky, not too sweet, and the stripes looked pro even though I’m not. Keeping the spoons even was the trick.”
If you’re in a super chocolate mood while you wait for layers to cool, the chocolate lovers in my house also go wild for this Chocolate Fudge Truffle Cheesecake. It’s rich, smooth, and gives you that deep cocoa vibe that pairs nicely after a lighter slice of zebra cake.
The best frostings to use
Chocolate cream cheese frosting is my favorite, but you’ve got options depending on your mood and the occasion. A simple vanilla buttercream keeps the focus on the stripes and gives a sweet, classic finish. Whipped ganache offers a rich chocolate cloud that stays light and pipes beautifully. If you want something less sweet, stabilized whipped cream is delicate and very sliceable when chilled.
For a fancier dinner or a more bakery style finish, try a salted caramel buttercream or a mocha buttercream for a gentle coffee note. Both play nicely with the vanilla and chocolate balance inside the cake. If you lean vanilla, take a peek at this elegant French Vanilla Creme Brulee Layer Cake for flavor ideas you can adapt. Think vanilla bean paste, a hint of caramel, and a smooth, glossy finish.
Whatever you choose, aim for a frosting that’s not too sweet and sturdy enough to hold clean edges. Zebra cake is already a showstopper, so the frosting’s job is to support and highlight those lines. A good rule is to keep the frosting silky, spreadable, and balanced. That way, every bite tastes as good as it looks.
Storage tips and freezing instructions
Freezing method
The cake keeps well, which makes it perfect for planning ahead. Unfrosted layers can be wrapped tight in plastic, then in foil, and frozen for up to 2 months. I like to chill the layers first for 30 minutes so they firm up before wrapping. Thaw overnight in the fridge while still wrapped to avoid condensation on the surface.
Once frosted, the cake holds 3 to 4 days in the fridge. Keep it in a covered cake box or in a large container so it doesn’t absorb fridge smells. Bring slices to room temperature before serving for the best texture. If you need a quick dessert while this cake chills, try these easy Apple Pie Cheesecake Trifles. They’re manageable in parts, just like this cake, and perfect for make ahead serving.
You can also freeze frosted slices. Chill the cake until the frosting is firm, slice, then wrap each piece in plastic and slide into a freezer bag. Thaw in the fridge or on the counter until soft. The stripes look just as fun after a gentle thaw, and the crumb stays tender.
Common Questions
How do I keep the stripes from blurring? Avoid tapping or shaking the pans once you start layering the batter. Spoon in the center and let the batter spread naturally. If you need to nudge it, a tiny wiggle is enough.
Can I use buttermilk instead of whole milk? Yes. Buttermilk adds extra tenderness and a slight tang. If you do, reduce the added liquid by a tablespoon or two to keep the batter from getting too thin.
Do I have to weigh the batter halves? It helps. Splitting the batter evenly keeps your layers the same height. If you don’t have a scale, use a large measuring cup and aim for even visual amounts.
Why is my chocolate batter thicker? Cocoa can thicken batter. If needed, stir in 1 to 2 teaspoons of milk until both batters have similar flow. Matching consistency makes cleaner rings.
What size pans work best? Two 8 inch or 9 inch rounds both work. The 8 inch size bakes a bit taller. Keep an eye on bake time and test for doneness.
Your stripe showstopper is calling
When you want a dessert that gets compliments before the first bite, this cake delivers. You saw how the pattern builds with a simple rhythm, how the crumb stays soft, and how the chocolate cream cheese frosting ties it all together. Bake your own Zebra Cake with Chocolate and Vanilla Layers, cut into it, and enjoy those oohs and ahhs. If you want to compare techniques or explore more stripe ideas, I love the guidance in Zebra Cake – Sally’s Baking and the decorator tips in Zebra Layer Cake – Sprinkle Bakes. Have fun with it and let the stripes do the heavy lifting.
Zebra Cake
Ingredients
Method
- Preheat the oven to 350°F (175°C). Grease and line two 8 or 9 inch round cake pans.
- In one bowl, mix dry ingredients: flour, sugar, baking powder, and salt.
- In a separate bowl, whisk together wet ingredients until smooth: eggs, milk, oil, and vanilla.
- Combine wet and dry ingredients until just blended; avoid overmixing.
- Split the batter into two bowls. Stir cocoa and espresso powder into one and add extra vanilla into the other.
- Scoop 2 tablespoons of vanilla batter into the center of the first pan.
- Spoon 2 tablespoons of chocolate batter on top, repeating this process while alternating the batters in the center.
- Repeat with the second pan, ensuring the rings are centered.
- Bake for 30 minutes or until centers spring back and a toothpick comes out clean.
- Cool in the pans for 10 minutes, then flip onto racks to cool completely.
- Beat softened cream cheese and butter until smooth.
- Add cocoa powder, salt, and sifted powdered sugar, mixing well.
- Incorporate vanilla and a little milk if the frosting is too thick.
- Apply a light crumb coat of frosting and chill for 15 minutes, then apply a thicker final layer.
- Slice and serve the cake, ensuring to bring it to room temperature for the best texture.