


Italian Rainbow Cookies are one of those desserts that seem super fancy at the bakery, right? Every time I walk by the cookie case, my eyes go straight to those cheerful, tri-colored layers all stuck together with smooth jam and smug little chocolate tops. But honestly, trying to make them myself used to feel a bit overwhelming. All those layers? Cutting the bars? Getting the colors just right? Oh boy. Turns out, after a couple kitchen fails (and yes, a rainbow-tinted disaster), making Italian Rainbow Cookies is totally doable at home—with a few tricks up your sleeve. If you’ve ever wanted to know the secrets, you’re in the right spot.
The Story Behind This Recipe
Here’s why I love this Italian Rainbow Cookies: it bakes up beautifully and it tastes like a bakery treat. Italian Rainbow Cookies are one of those desserts that seem super fancy at the bakery, right? Every time I walk by the cookie case, my eyes…
What is an Italian Rainbow Cookie?
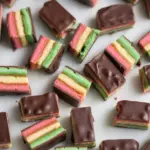
Okay, here’s the lowdown. Italian Rainbow Cookies aren’t really cookies in the classic sense—they’re more like tiny almond cake bars that somehow landed in cookie territory. You end up with three layers—pink, yellow, green (sometimes white if you’re a rebel)—sandwiched with seedless raspberry or apricot jam. Then comes the good stuff: a hefty coating of chocolate on both sides. I hear people call them Venetians or Tricolore cookies, too, but whatever you call ’em, they sure know how to steal the show on any cookie platter.
I weirdly remember the first time I tasted one at my cousin’s wedding and honestly… thought I’d found a five-star restaurant leftover hiding at the dessert table. That almond flavor is not just for show. It’s the deal here. It’s kind of like biting into a cloud, if that cloud was coated in chocolate and had jam in the middle. (You get me, right?) 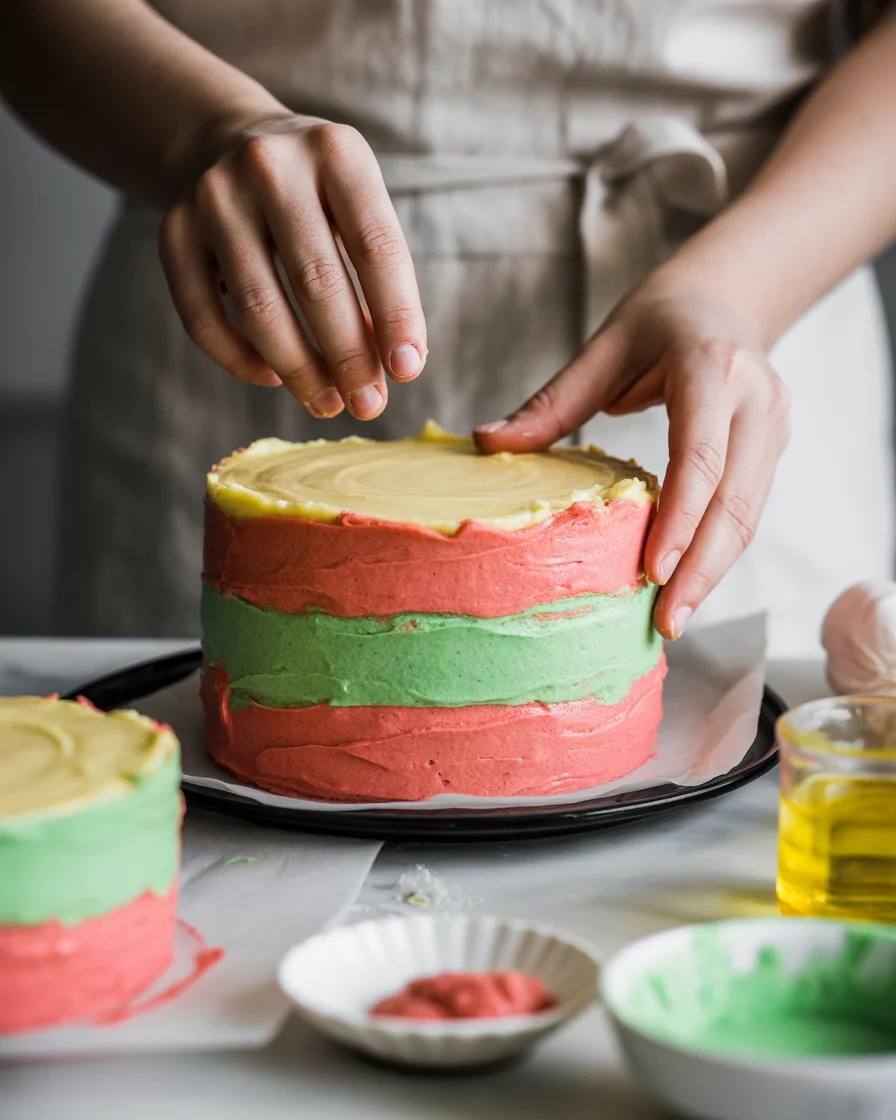
Key Steps for Making Bakery-Worthy Rainbow Cookies at Home
There’s a bit of magic behind Italian Rainbow Cookies looking and tasting just right. You really want that soft, almond-y texture in each bite—never dry or crumbly. First off, almond paste. Don’t skip it, don’t substitute it. It gives that signature flavor. Be patient with coloring the batter; go bold with the dye, not wimpy, or your layers will look sad (been there).
Baking each layer separate in their own parchment-lined pans is the only way to get that perfect stack. Assembling takes a steady hand but don’t stress, a little wonkiness honestly adds charm. The jam should be super smooth, too—lumps are a no-go or the layers slide around later. And—this is like, the most crucial—let your assembled cookies set up overnight pressed under something heavy. It brings everything together (and gives you an excuse to snack on the wonky edges). Want other bold bakes? Try these double chocolate snowball cookies for a more wintery treat, or my sneaky favorite, scrumptious carrot cake cookies, if you want a veggie excuse! 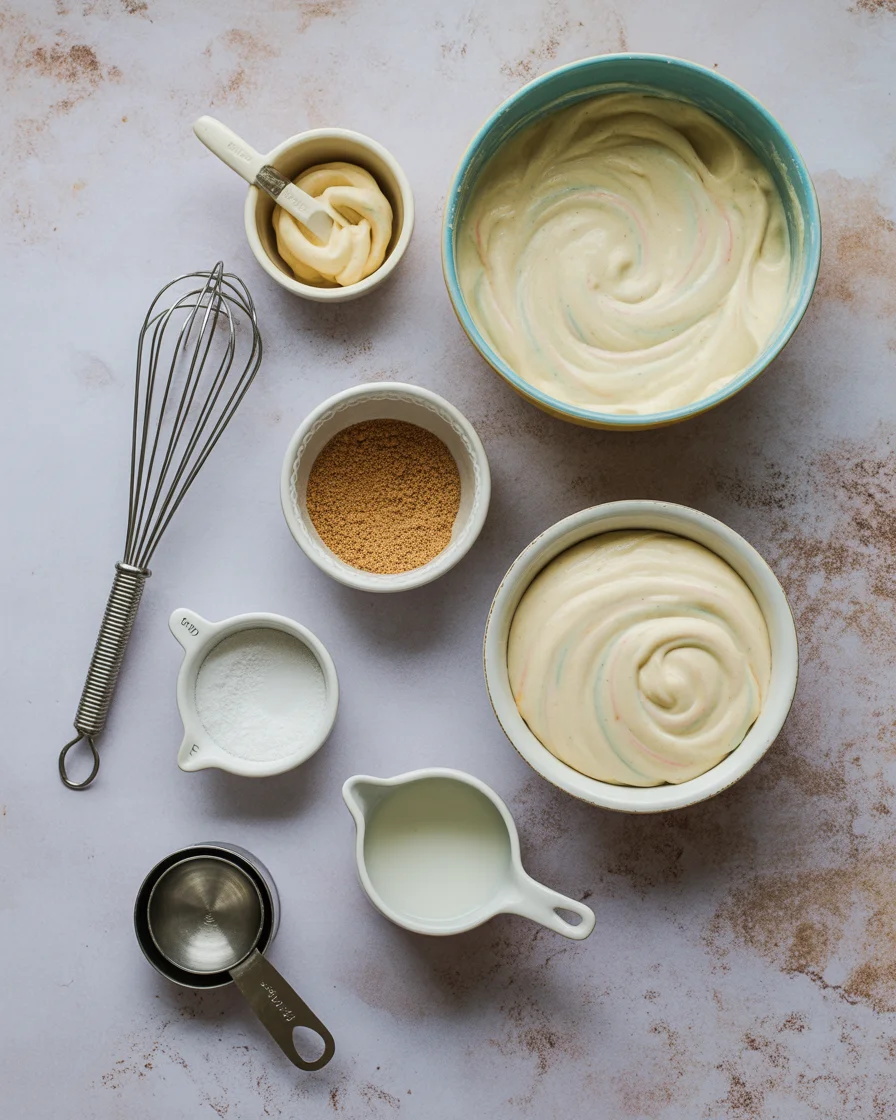
Authentic Italian Rainbow Cookies Recipe
Alright, rolling up my sleeves here. This is my go-to recipe, a mishmash of my Nonna’s advice, internet wisdom, and sheer stubbornness.
Ingredients:
- 1 cup (2 sticks) unsalted butter, softened
- 1 cup sugar
- 4 large eggs, separated
- 10 oz almond paste (not marzipan, trust me)
- 1 teaspoon almond extract
- 2 cups all-purpose flour
- Red and green gel food coloring (not liquid, please)
- 1 cup seedless raspberry OR apricot jam
- 1 1/2 cups semisweet chocolate chips
Directions:
- Preheat oven to 350F. Line three 9×13-inch pans with parchment and spray lightly.
- Beat almond paste, sugar, and butter till smooth. Beat in egg yolks and almond extract.
- Mix in flour just till combined—not too much.
- In a clean bowl, whip egg whites until stiff peaks form. Fold gently into almond batter.
- Divide batter equally into three bowls. Tint one bowl pink (go wild), one green, and leave one plain or yellow.
- Spread each color into its own prepared pan. Bake 10-12 minutes. Cool fully.
- Place green layer on plastic wrap. Spread with half the jam. Top with yellow. More jam. Finish with pink.
- Wrap tightly, then weigh down with heavy cutting board. Chill overnight.
- Melt chocolate chips. Unwrap layers, spread half choc on top, chill till firm. Flip, repeat on other side.
- Cut into small bars with a sharp knife. Pray for straight lines, but if not, just eat the scraps.
Seriously—it’s easier than you’d think, but feels like so much fancier than average cookies. Want to work your sweet tooth out even more? Peep these cookies cream red velvet brownies or even try fruity hawaiian pineapple coconut thumbprint cookies next time.
Expert Tips for Making Rainbow Cookies
Honestly, I swear by weighing down the assembled cookies overnight. My first batch, I didn’t, and it went all Jenga tower on me. Don’t be afraid to really go bold with that food coloring. The more vibrant, the better they look at a party, and if you’re sharing, you want that “ooh!” factor. Always use parchment—otherwise, you risk baking disasters (goodbye to sticking). Cut with a hot knife for cleaner lines, and don’t sweat if your layers aren’t perfectly even. Nobody’s checking with a ruler at the table. And store these beauties in the fridge, but let them hang out at room temp for a bit before serving. Otherwise, the chocolate’s too hard and you don’t want any dental emergencies at dessert.
If you’re craving something more savory after all this sugar, this Italian pot roast parmesan risotto is seriously worth a shot.
“Best rainbow cookies I ever made at home. My friends asked me what bakery I bought them from—total win!”
How to Store Italian Rainbow Cookies
Storing Italian Rainbow Cookies is simple, but you gotta know a couple small tricks so they don’t lose their magic taste and texture. After you cut them, stack in single layers between parchment or wax paper—don’t let ’em glue themselves together, that’s a mess. An airtight container is key or the jam will dry out and the chocolate will go whitish. Keep them tucked away in the fridge for up to a week.
If you want to freeze, wrap them well (like a little candy present) and stash them in the freezer. When you want a cookie, just let it come back to room temp before munching. The chocolate will sweat a tiny bit sometimes but no one’s ever complained, trust me.
Common Questions
Q: Can I use marzipan instead of almond paste?
A: Nope, not a good idea. Marzipan is sweeter and firmer, so the texture would be weird.
Q: My layers came out uneven—what did I do wrong?
A: Probably just uneven spreading, which happens to all of us. Next time, use an offset spatula and really eyeball the thickness.
Q: Is it possible to use other jams?
A: Sure thing! Apricot and raspberry are classics, but you can swap for strawberry if that’s your jam. (Bad pun. Sorry.)
Q: Can I make them gluten free?
A: Yep, sub in your favorite 1:1 gluten free flour blend, but double check the almond paste is gluten free, too.
Q: The chocolate cracked when I cut it. How do I fix this?
A: Let them sit at room temperature a bit to soften the chocolate, and warm your knife under hot water before slicing.
Time to Bake Up Some Colorful Magic
See? Italian Rainbow Cookies are not as intimidating as they look all stacked up behind bakery glass. If you follow these tips, you’ll have a tray that tastes as good as anything from a five-star bakery (honestly, maybe better cause they’re yours). Don’t forget, baking should be fun—not a stress test. Dive into the process, share your batch, and savor every gloriously messy, chocolatey bite. If you get inspired, try out Classic Italian Rainbow Cookies! (Video!) – Well Seasoned Studio or check Instagram for how other home bakers improvise these beauties. And if you’re still in the cookie mood, check those other recipes I linked—you won’t regret it.
Can’t wait to see your colorful creations!
Italian Rainbow Cookies
Ingredients
Method
- Preheat oven to 350F. Line three 9×13-inch pans with parchment paper and spray lightly.
- Beat almond paste, sugar, and butter until smooth. Beat in egg yolks and almond extract.
- Mix in flour just until combined—do not overmix.
- In a clean bowl, whip egg whites until stiff peaks form. Fold gently into the almond batter.
- Divide batter equally into three bowls. Tint one with red gel food coloring, one with green, and leave one plain or with yellow.
- Spread each color into its own prepared pan. Bake for 10-12 minutes. Allow to cool fully.
- Place the green layer on plastic wrap. Spread with half the jam, then top with yellow, more jam, and finish with pink.
- Wrap tightly, then weigh down with a heavy cutting board and chill overnight.
- Melt the chocolate chips. Unwrap the layers, spread half of the chocolate on top, and chill until firm. Flip and repeat on the other side.
- Cut into small bars with a sharp knife.