


HOMEMADE ANDES MINTS are one of those treats I make when I want something sweet but not heavy, and also when I need a quick win for a party tray. You know that moment when you have five minutes before guests show up and you realize you promised “something dessert-ish”? Yep, this is my go to. They taste like the classic restaurant mint, but fresher and a little creamier, with that chocolate and peppermint combo that just works. The best part is you do not need fancy tools or candy making skills. If you can stir and melt chocolate, you can absolutely do this. 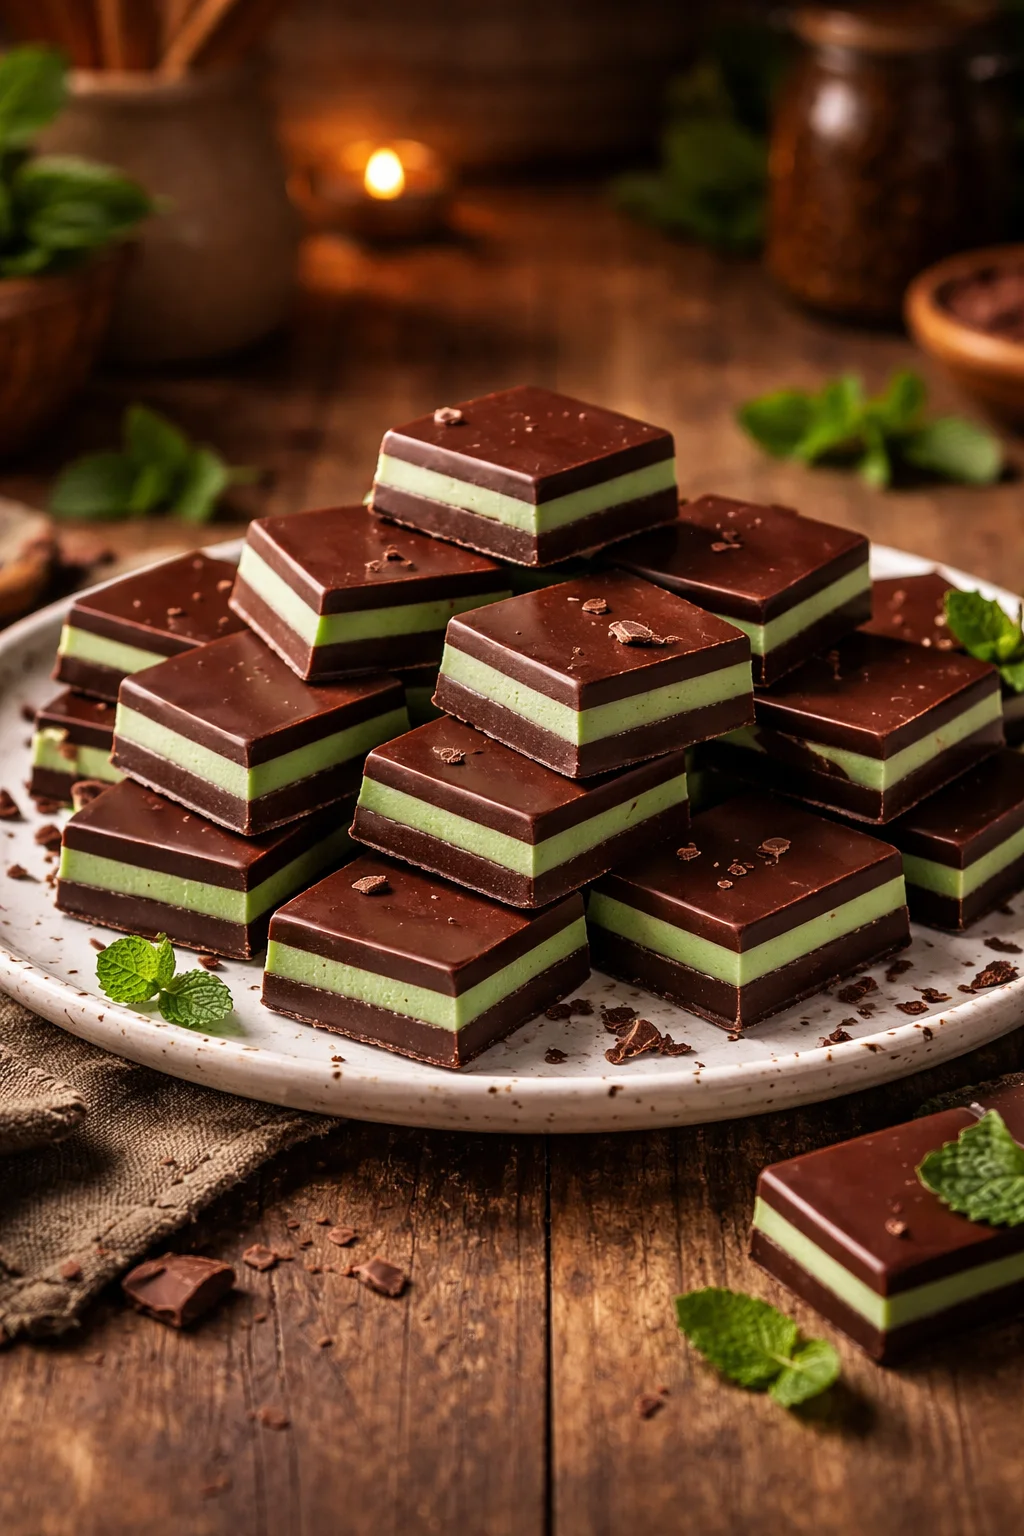
The Story Behind This Recipe
I’m Alexandraa, the cook behind this Homemade Andes Mints. On a rainy weekend, I dialed in the flavors so it’s easy and full of cozy vibes. HOMEMADE ANDES MINTS are one of those treats I make when I want something sweet but not heavy, and also when I need a quick win…
How to make Homemade Andes Mints
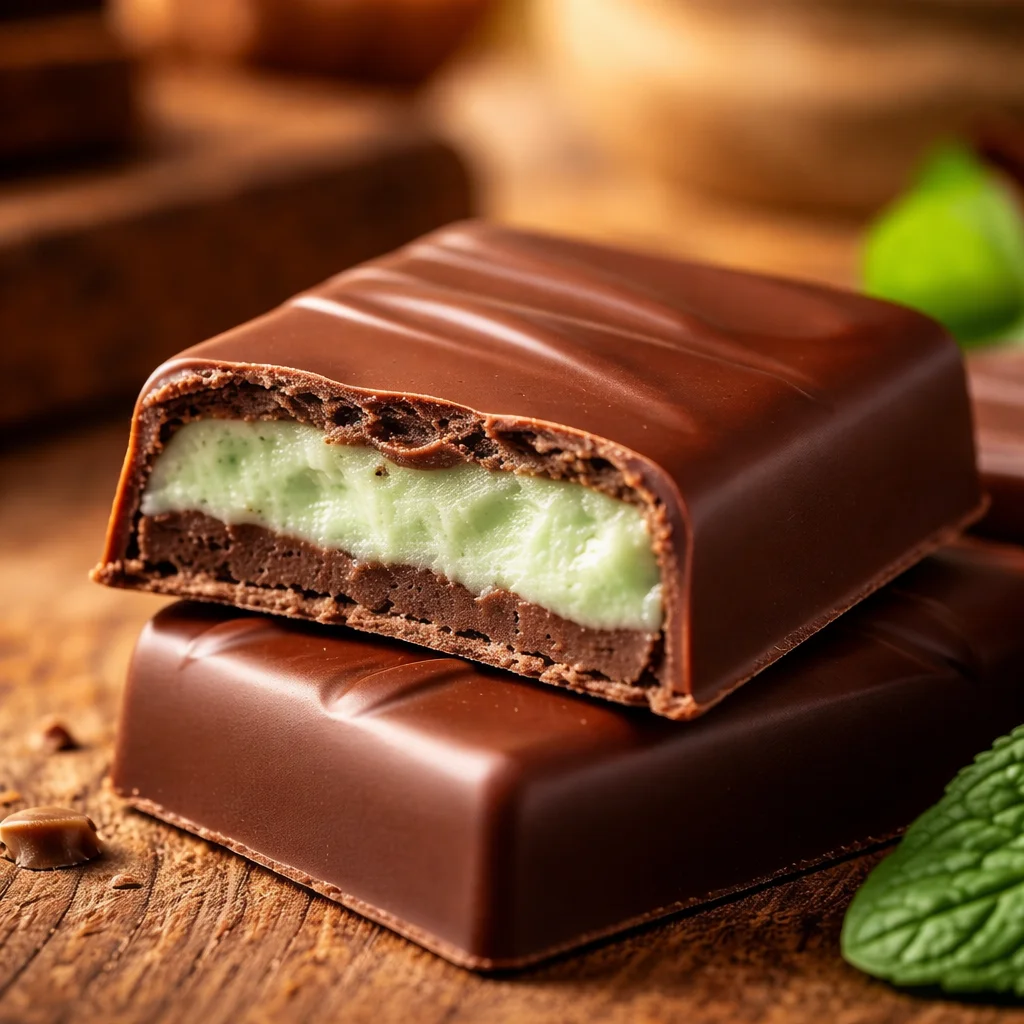
I started making HOMEMADE ANDES MINTS after realizing how fast a bag of store bought mints disappears in my house. I would buy them for a cookie platter and somehow they would vanish before I even baked the cookies. So I started testing a homemade version that hits the same vibe: soft mint layer, snappy chocolate top, and that clean peppermint finish.
These are great for holidays, baby showers, brunch dessert boards, and honestly just for keeping in the fridge for “one little bite” moments. If you love making little candies at home, you might also like these homemade cream cheese mints because they are also super simple and perfect for parties.
The basic idea is simple: you make a sweet mint dough, press it into a pan, chill it, then add melted chocolate in layers. After that, it is just slice and serve. The chilling steps matter because they help you get clean layers and nice cuts.
I like to store them in the fridge so the texture stays firm and the peppermint stays bright. And if you are making them for gifts, they look so cute in little treat bags with a twist tie.
Ingredients Needed
You only need a handful of everyday ingredients for HOMEMADE ANDES MINTS, and you can tweak the peppermint level based on your taste. I am going to be real with you: peppermint extract varies a lot by brand, so start a little light and adjust if you want more punch.
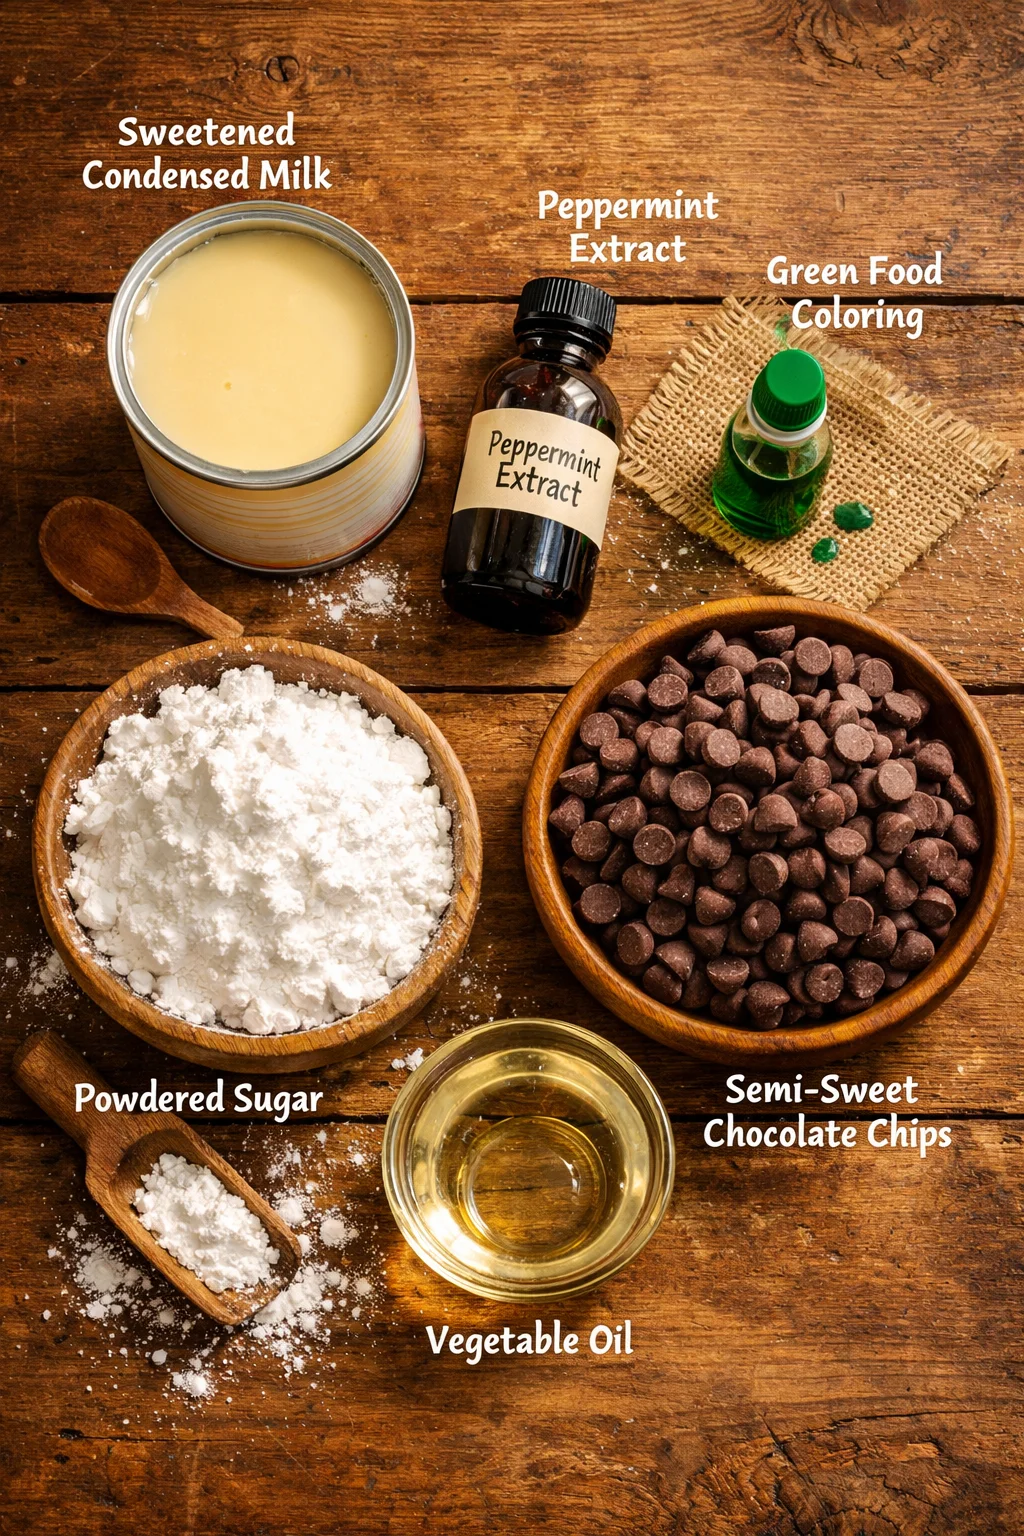
What you will need
- Sweetened condensed milk (this gives that smooth, creamy candy texture)
- Powdered sugar (for structure and sweetness)
- Peppermint extract (start small, you can add more)
- Green food coloring (optional, but it gives that classic mint look)
- Semi sweet chocolate chips (or chopped chocolate)
- Neutral oil or coconut oil (just a tiny bit helps the chocolate spread smoothly)
If you are into homemade candy bars too, I have to point you toward these 3 ingredient homemade Mounds bars. Same easy, snacky, homemade candy energy.
Quick note on chocolate: use something you actually like eating plain. The chocolate layer is not just decoration here, it is half the flavor. Also, if you want a darker vibe, go for dark chocolate. If you want a sweeter, more classic candy feel, stick with semi sweet.
Step-by-Step Instructions
This is the part where you will feel like a candy genius, because it comes together fast. I usually line my pan first so I am not wrestling with sticky candy later.
My easy method
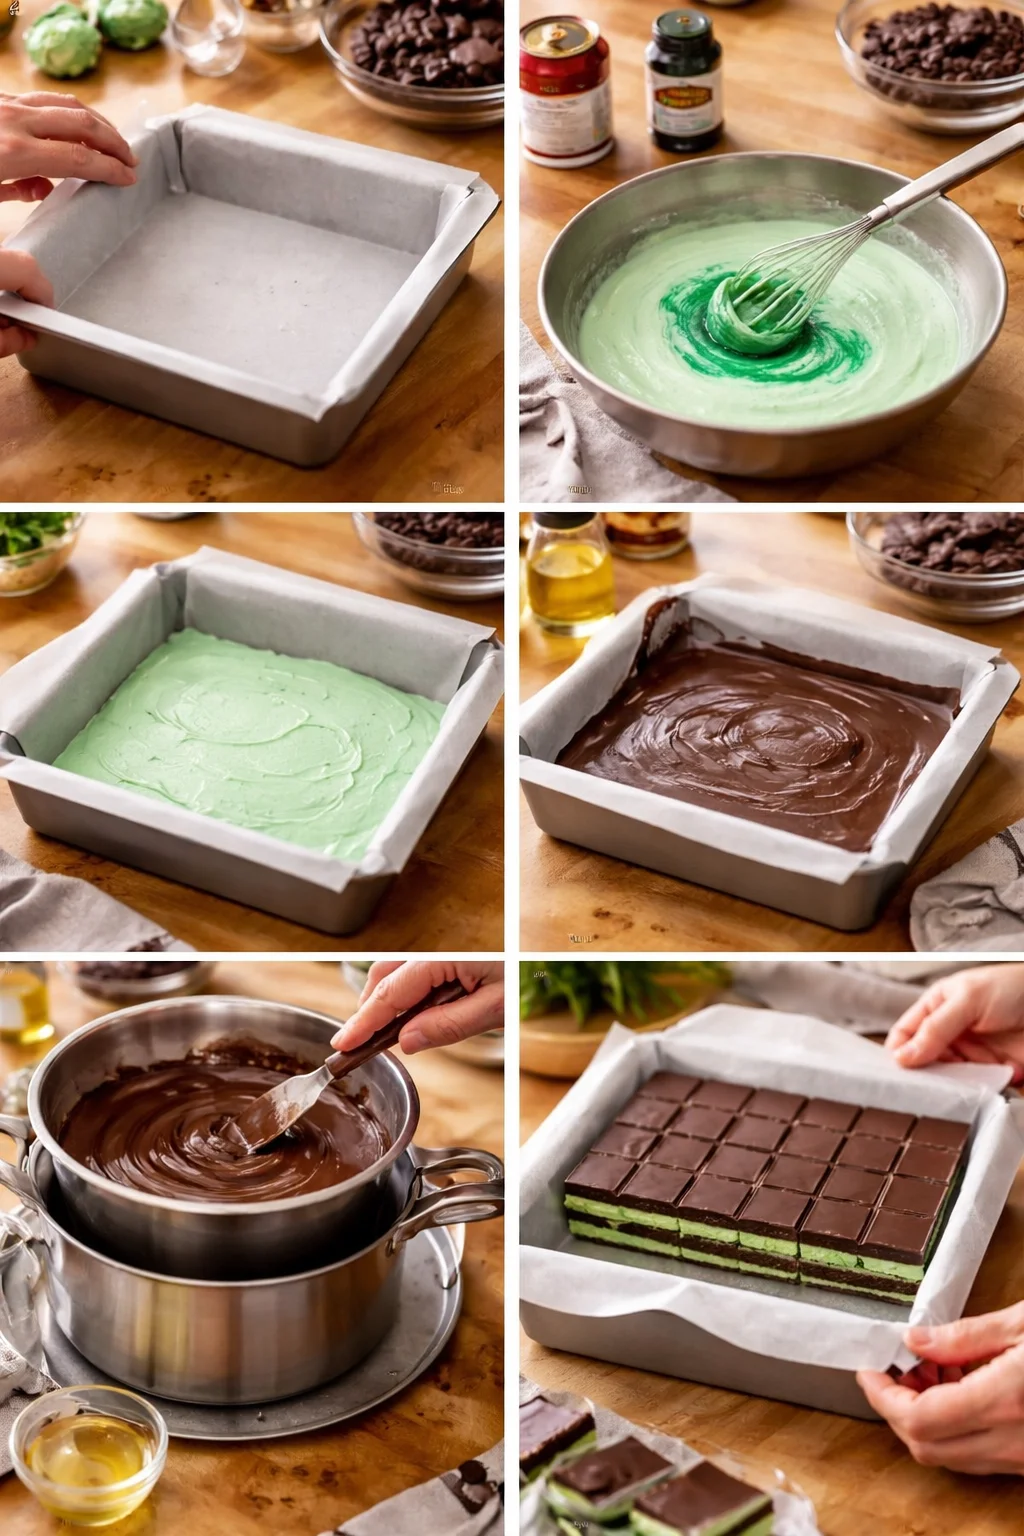
1) Prep the pan. Line an 8×8 inch pan with parchment paper, leaving a little overhang so you can lift the whole thing out later. Lightly spray the parchment if you want extra insurance.
2) Make the mint layer. In a bowl, stir together sweetened condensed milk, peppermint extract, and a drop or two of green food coloring if using. Then mix in powdered sugar a little at a time until you get a thick, soft dough. It should feel like play dough, not runny.
3) Press and chill. Press the mint mixture evenly into the pan. I use clean hands or the bottom of a measuring cup. Chill for about 20 to 30 minutes so it firms up.
4) Add the first chocolate layer. Melt half your chocolate with a tiny bit of oil. Spread it evenly over the chilled mint layer. Chill again until the chocolate is set, around 15 to 20 minutes.
5) Add the final chocolate layer. Melt the remaining chocolate and spread it on top. Chill until fully firm.
6) Slice. Lift out using the parchment overhang. Let it sit at room temp for just a few minutes so it is easier to cut without cracking. Slice into small squares or rectangles. Small pieces are perfect because these are rich.
If your chocolate cracks while slicing, it usually means it is too cold. Let it warm for 5 minutes, then try again. Also, a warm knife helps. I run mine under hot water, wipe it dry, and slice.
By the way, if you are in a baking mood and want something soft and cozy to go with these mints on a brunch table, try homemade angel biscuits. Not the same category, obviously, but they make people very happy.
Reader Favorites
I have made these for cookie swaps, potlucks, and one very chaotic school fundraiser table. Every time, the HOMEMADE ANDES MINTS are one of the first things to disappear. People love that they are bite sized and feel kind of fancy without being fussy.
Here are a few little tweaks readers and friends have loved:
Make them extra minty: Add peppermint slowly, taste a tiny bit of the mint dough, and stop when it tastes right to you. Remember the chocolate will mellow it a bit too.
Do a dark chocolate top: Dark chocolate plus mint tastes like a grown up after dinner treat.
Cut them super small: Mini squares make them feel like a candy shop treat and they stretch further on a platter.
“I made these for a holiday tray and my family thought I bought them. The layers were so clean and the mint flavor was perfect.”
If you want another fun homemade candy that is more like a retro treat, these homemade cherry mash bars are such a conversation starter. Totally different flavor, but same homemade sweetness vibe.
Featured Videos {video_youtube}
I know some people (me, depending on the day) like to watch the texture before committing. The biggest “tell” for success is the mint layer texture before pressing it into the pan. You want it thick enough to hold shape, not sticky like frosting.
When you watch a video, pay attention to these moments:
The mint dough consistency: It should clump and pull away from the bowl easily.
Chocolate spreading: Chocolate should pour and spread smoothly, not look thick and stiff.
Slicing: The best videos show letting it rest a few minutes before cutting, which helps a lot
Common Questions
1) Can I make HOMEMADE ANDES MINTS without food coloring?
Yes. They will be a creamy white mint color, and they still taste the same.
2) How long do they last?
In an airtight container in the fridge, they are great for about 1 to 2 weeks. You can also freeze them for a couple of months.
3) Why is my mint layer too sticky?
Usually it needs more powdered sugar. Add a little at a time until it turns into a soft dough you can press into the pan.
4) Can I use peppermint oil instead of extract?
You can, but be careful. Peppermint oil is often much stronger. Use a tiny amount and build slowly.
5) How do I keep the chocolate from cracking when I cut them?
Let the pan sit out for a few minutes before slicing, and use a warm knife. Cold chocolate is what causes most cracking.
A sweet little minty sign off
If you have been wanting a simple candy project that looks impressive but feels totally doable, HOMEMADE ANDES MINTS are it. Once you make them once, you will start thinking of all the times you can stash them in the fridge for quick hosting or gifting. If you want to compare methods and get more ideas, check out Homemade Andes Mints – Served From Scratch and Homemade Andes mints – Ashlee Marie – real fun with real food. Now go grab that bowl and some chocolate chips, and make a batch for your future self. You will be so glad you did.
Homemade Andes Mints
Ingredients
Method
- Line an 8×8 inch pan with parchment paper, leaving overhang for easy removal.
- In a bowl, stir together the sweetened condensed milk, peppermint extract, and green food coloring if using.
- Gradually mix in the powdered sugar until you achieve a thick, soft dough consistency.
- Press the mint mixture evenly into the prepared pan using clean hands or a measuring cup.
- Chill the mint layer in the refrigerator for about 20 to 30 minutes to firm up.
- Melt half of the chocolate with a tiny bit of oil and spread it evenly over the chilled mint layer.
- Chill until the chocolate is set, around 15 to 20 minutes.
- Melt the remaining chocolate and spread it on top of the first layer.
- Chill until fully firm.
- Lift out the candy using the parchment overhang and let it sit at room temperature for a few minutes before slicing.
- Using a warm knife, slice into small squares or rectangles for serving.