


Hershey Kiss Pretzels are my go to fix for those moments when you want something sweet and salty right now, but you also do not want to bake a whole cake. You know the feeling, it is 8 pm, you are craving chocolate, and the pantry looks kind of sad. This little snack has saved my movie nights, my last minute guests, and honestly my own willpower more times than I can count. It is simple, fast, and somehow always feels a little special because of that melty chocolate top. If you have kids around, they will hover near the oven like tiny snack detectives. 
The Story Behind This Recipe
From my kitchen to yours—Hershey Kiss Pretzels mixes everyday ingredients with a buttery finish. Tested, tasted, and ready for your table. Hershey Kiss Pretzels are my go to fix for those moments when you want something sweet and salty right now, but you also do not want…
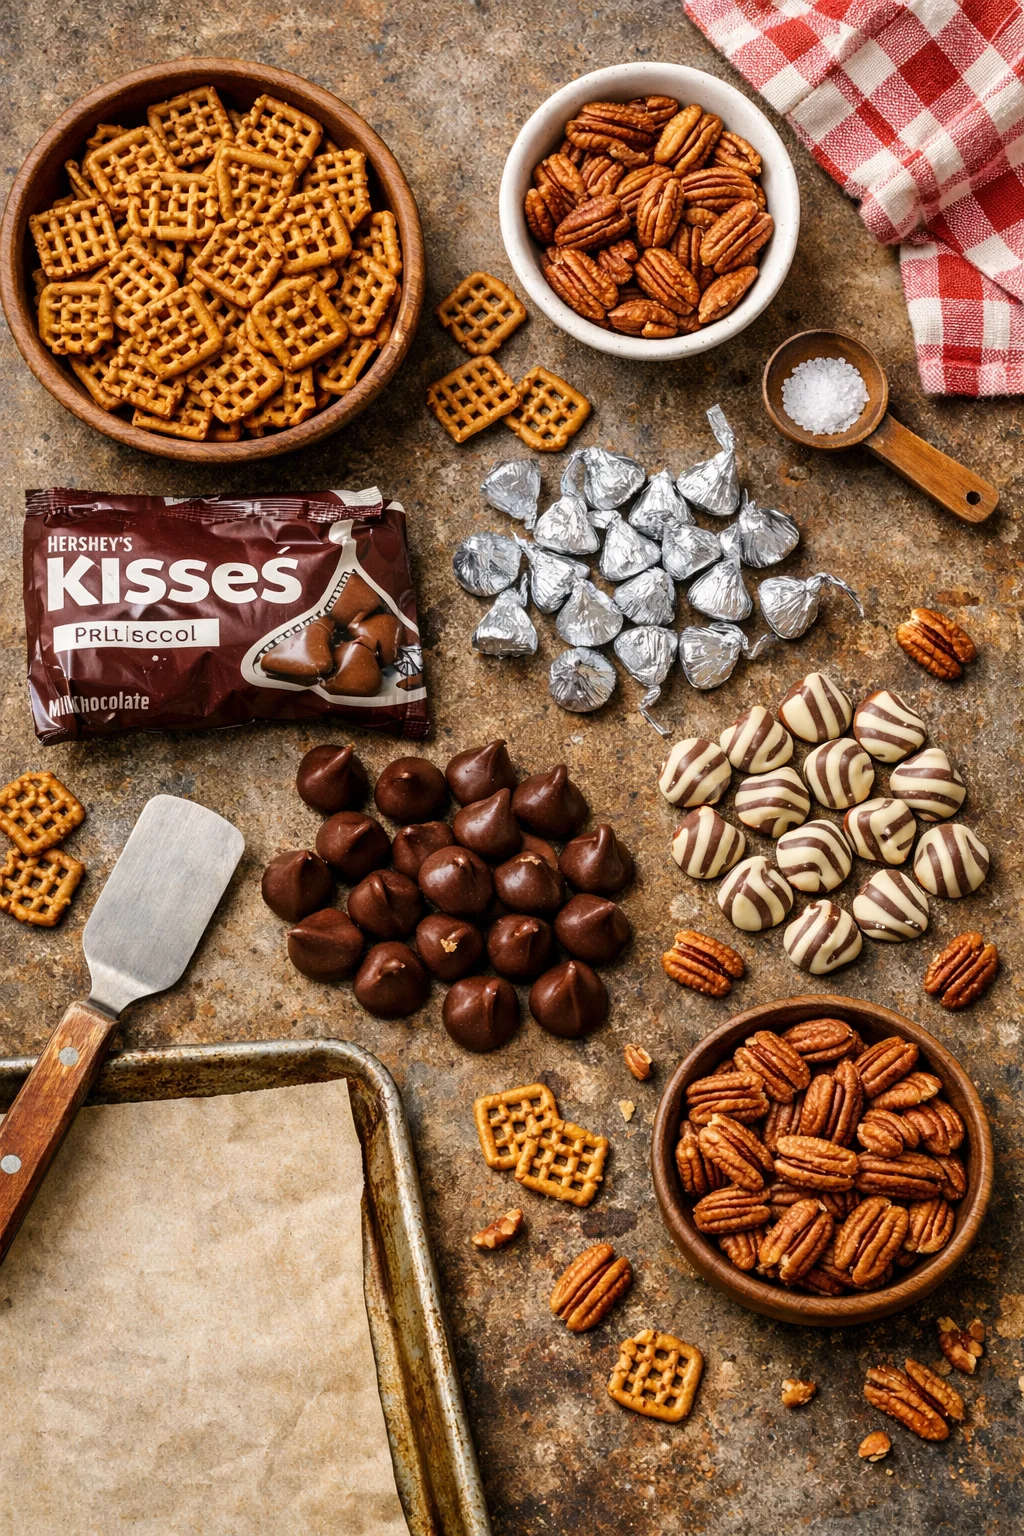
Ingredients for Hershey Kiss Pretzels
This recipe is wonderfully low effort, which is probably why I make it so often. You do not need fancy tools, and you do not need a big grocery run. I usually grab what I have and fill in the gaps.
- Pretzels (square pretzel snaps are easiest, but twists work too)
- Hershey Kisses (milk chocolate is classic, but any flavor is fair game)
- One topping (think pecan halves, M and Ms, sprinkles, or mini Reese style pieces)
If you like having a couple of dessert options on standby, these pair so well with bite sized treats like no-bake espresso kissed tiramisu truffles. I love doing a small plate with both when I am hosting because you get chocolate crunch and creamy coffee vibes in one spread.
One quick note on ingredients quality: this is such a short recipe that the chocolate matters. If your Kisses are older and have that dusty look, they will still melt, but the flavor is not as smooth. Fresh Kisses make the whole thing taste more like the candy aisle in the best way.
How to Make Hershey Kiss Pretzels
This is the part I love because it feels almost too easy. You are basically assembling little snacks, warming them up just enough, then giving them a cute finishing touch.
Quick step by step
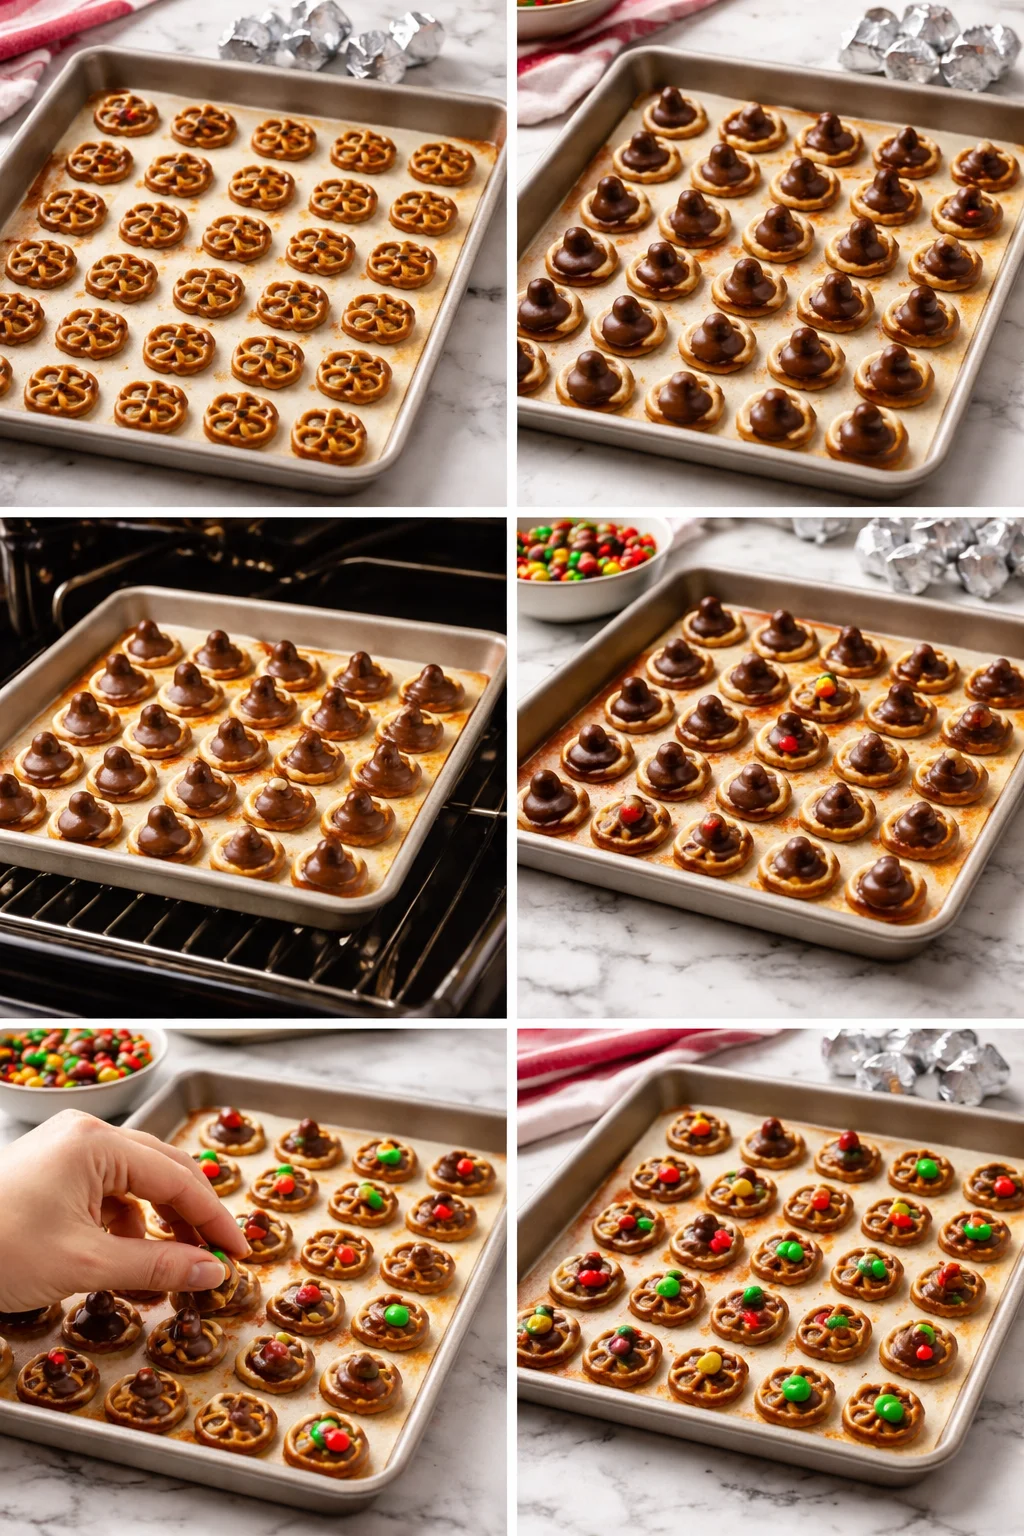
- Preheat your oven to 200 F to 250 F. You are not really baking, just softening the chocolate.
- Line a baking sheet with parchment paper or foil. It saves cleanup, trust me.
- Set pretzels in a single layer.
- Unwrap the Kisses and place one on each pretzel.
- Put the tray in the oven for about 3 to 5 minutes. Watch closely. The Kisses should look shiny and slightly slumped, not melted into a puddle.
- Pull the tray out and gently press your topping into the softened Kiss.
- Let them cool until the chocolate firms back up. You can speed it up in the fridge for about 15 to 20 minutes.
I have learned the hard way that the timing is everything. The first time I made Hershey Kiss Pretzels, I got distracted by a text and left them in too long. The chocolate went full melt mode and slid off the pretzels like it was trying to escape. Still tasty, just not as pretty.
“I brought these to a school potluck and they disappeared faster than brownies. People kept asking me where I bought them, and I loved getting to say I made them in 20 minutes.”
While you are in that no stress dessert mindset, you might also like these vanilla kissed ricotta almond clouds. They are totally different, softer and lighter, but still easy and sweet in a very snackable way.
Variations and Substitutions
This is where you can make the recipe feel new every time. The base stays the same, but the flavors can swing from holiday party to game day to fancy snack board, depending on what you top them with.
Fun topping ideas
Here are a few combos I keep coming back to:
Classic: milk chocolate Kiss plus pecan half. It tastes like a tiny turtle candy.
Birthday vibe: milk chocolate Kiss plus rainbow sprinkles. Kids go wild for this.
Holiday: candy cane pieces on top. Sweet, minty, and it looks festive without trying hard.
Peanut butter lover: use a peanut butter filled Kiss, then top with a roasted peanut.
Extra chocolate: dark chocolate Kiss plus a mini chocolate chip pressed in.
You can also swap the pretzel shape. Snaps are stable and easy to stack, but pretzel twists work if that is what you have. Just know they can be a little wobbly when you press the topping in.
And if you want to avoid nuts, no problem. Use mini marshmallows, candy pieces, or even a little pinch of flaky salt. That last one sounds simple, but it makes the chocolate taste deeper and richer.
For anyone who likes a dessert table with variety, I sometimes do a batch of Hershey Kiss Pretzels and a batch of no-bake espresso kissed tiramisu truffles side by side. The coffee flavor balances the sweet salty crunch in a really nice way.
Tips for Success
These are tiny, but there are a few small tricks that make them come out consistent and cute, especially if you are making a big batch for a party.
Little details that really help
Use low heat: You want the Kiss to soften, not melt flat. If your oven runs hot, stay closer to 200 F.
Unwrap everything first: It feels tedious, but it makes assembly fast and you will not panic while the chocolate is softening.
Press gently: You are not smashing it. A light press is enough to stick the topping and spread the chocolate a bit.
Chill to set: The fridge is your friend. If your kitchen is warm, leaving them on the counter can take a while.
Keep hands clean and dry: Warm fingers can smudge the chocolate and make candy coatings sticky.
I also like to set up a little assembly line if I am making more than one tray. Pretzels down first, then Kisses, then bake, then toppings. It makes you feel weirdly productive, like you are running a snack factory.
One more quick idea: if you are making these for a gathering, put them out with a couple other easy sweets, like vanilla kissed ricotta almond clouds. People love having choices, and you look like you really planned things out, even if you did it all last minute.
How to Store Hershey Kiss Pretzel Bites
Once they are fully set, storing them is simple. The main goal is keeping them cool and dry so the chocolate stays snappy instead of soft.
Room temperature: Store in an airtight container for up to 1 week, as long as your house is not too warm.
Fridge: Great if your kitchen runs hot. They will last about 2 weeks. Let them sit out for 5 minutes before serving so the chocolate is not too hard.
Freezer: Yes, you can freeze them. Place them in a freezer safe container with parchment between layers. They keep well for about 2 months. I like eating them slightly chilled, kind of like a crunchy frozen candy.
If you are stacking them in a container, do parchment or wax paper between layers. Otherwise the toppings can leave little dents in the chocolate on the layer above. Not a big deal, but if you are gifting them, it helps them look neater.
Common Questions
1. Can I make Hershey Kiss Pretzels without an oven?
Yes. You can use an air fryer on very low heat for a minute or two, or even microwave them in short bursts. Just be careful because the chocolate can go from soft to messy fast.
2. Why did my Kisses melt too much?
Your oven might be running hot or they stayed in too long. Next time, lower the temp and start checking at 2 minutes. You want shiny and soft, not collapsed.
3. What are the best pretzels to use?
Pretzel snaps are easiest because they are flat and stable. Twists work but they can tip when you press the topping in.
4. Can I make them ahead for a party?
Absolutely. I make them 1 to 3 days ahead and keep them in an airtight container. They travel well too, which is a huge win.
5. How do I keep toppings from falling off?
Press the topping in while the chocolate is still soft, then chill them so the chocolate sets quickly and locks everything in.
A sweet and salty snack you will keep coming back to
If you need a quick treat that makes people smile, Hershey Kiss Pretzels are the answer. You only need a few ingredients, the steps are easy, and the variations let you tailor them to any holiday or craving. I still get that happy little feeling when the tray comes out and they look like tiny candies you would buy at a fancy shop. For more inspiration, you can also check out Hershey Kiss Pretzels – Fav Family Recipes and Hershey Kiss Pretzels – Real Housemoms since they have their own fun spins on this classic. Make a batch, stash a few for yourself, and tell me you do not feel like a snack hero afterward.


Hershey Kiss Pretzels
Ingredients
Method
- Preheat your oven to 200°F to 250°F.
- Line a baking sheet with parchment paper or foil.
- Arrange pretzels in a single layer on the baking sheet.
- Unwrap the Kisses and place one on each pretzel.
- Bake for about 3 to 5 minutes, until Kisses are shiny and slightly soft.
- Remove from oven and gently press your chosen topping into each softened Kiss.
- Allow to cool until chocolate firms, or speed up the process by refrigerating for 15 to 20 minutes.