

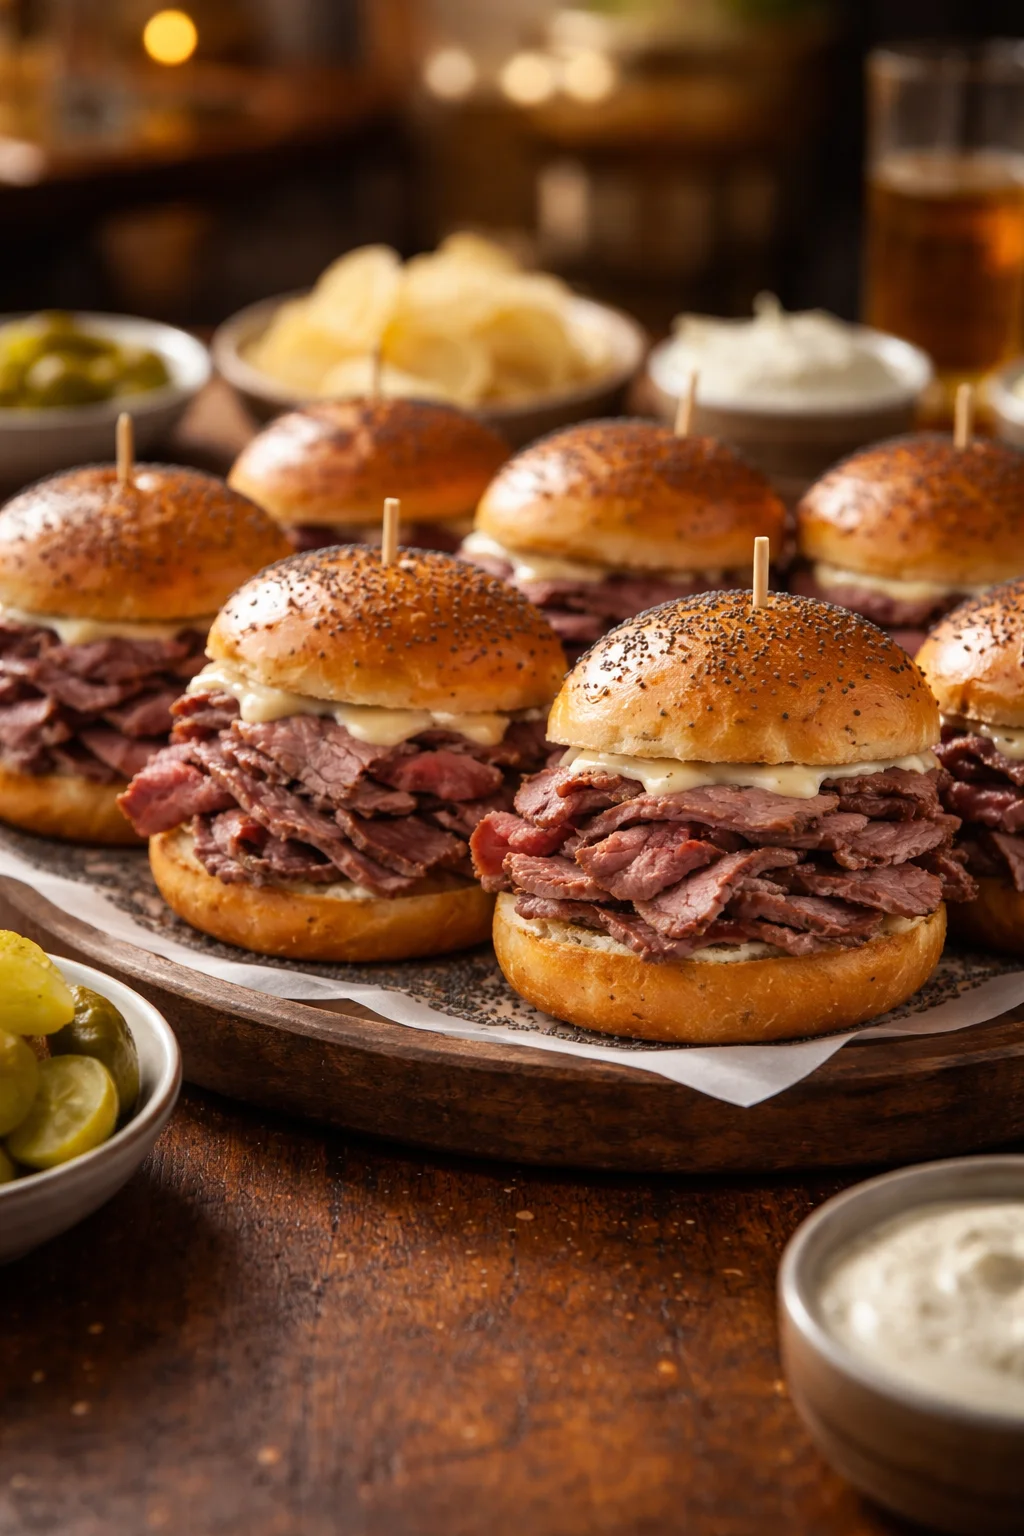
Roast Beef Sliders are my go to fix when I need something warm, cheesy, and totally crowd friendly without spending my whole evening cooking. You know those days when people are hungry right now, but you still want the food to feel a little special? This is that recipe. It’s simple, it’s cozy, and the smell alone gets everyone hovering around the kitchen. I started making these for game nights, but now I make them for random Tuesdays too because they are just that easy. Let’s get into it.
The Story Behind This Recipe
From my kitchen to yours—Roast Beef Sliders mixes classic comfort with a buttery finish. Tested, tasted, and ready for your table. Roast Beef Sliders are my go to fix when I need something warm, cheesy, and totally crowd friendly without spending my whole evening cooking. You know…
The Best Rolls for Sliders
The rolls matter more than you’d think. The filling is important, sure, but if your rolls are dry or too stiff, the whole slider situation feels off. I like rolls that are soft, a little sweet, and sturdy enough to hold the layers once they get warm and saucy.
If you’re standing in the bread aisle wondering what to grab, here’s what I look for:
- Soft slider rolls (Hawaiian style is a classic for a reason)
- Even sized rolls that are attached in a sheet (so slicing is easy)
- Freshness (if they feel dry in the bag, skip them)
My little trick is to keep the slab of rolls connected. I slice the whole sheet in half horizontally like a giant sandwich. That way, the sliders bake up evenly, and you are not fighting with 12 separate tops sliding around.
Also, if you love slider nights in general, you should check out these chicken parm sliders sometime. They’re messy in the best way and have that same party food vibe.
Layers of Roast Beef and Cheese
This is the part where you can make Roast Beef Sliders feel “basic” or feel like the best thing you’ve eaten all week. It’s all about the layers and how you stack them. I like thin sliced deli roast beef for this because it heats fast and stays tender. If you have leftover roast beef from a weekend dinner, even better. Just slice it as thin as you can.
Here’s how I build mine so every bite is balanced:
Layer order that works: bottom rolls, a little sauce, roast beef, cheese, more roast beef, a little more cheese, then the top rolls.
Yes, I do cheese twice sometimes. Not always, but often. It helps glue everything together and gives you that pull when you lift a slider out.
For cheese, provolone is my favorite because it melts smooth and tastes great with beef. Swiss is also classic, especially if you’re going for that deli sandwich feel. Cheddar works too, but it changes the vibe into something richer and sharper.
One more tip that saves sliders from being dry: don’t just pile the meat in the middle. Spread it all the way to the edges. Roast Beef Sliders should taste like roast beef in every bite, not just the center ones.
When I’m in a beef mood, I rotate these sliders with quick dinners like beef and broccoli. Totally different flavors, same “everyone’s happy” result.
Sauce for Roast Beef Sliders
This is where you can really make the recipe your own. You can keep it super simple, or you can do the full buttery topping that makes the rolls glossy and irresistible.
I usually do two sauces, kind of. One is the inside sauce, and the other is the brush on top situation.
My go to inside sauce
I like something creamy with a little tang. Here’s my easy mix:
Quick slider spread: mayo plus a little Dijon mustard, a pinch of garlic powder, and a tiny splash of pickle juice (optional but so good).
Spread it lightly on the bottom buns. Not too much, because the sliders will get extra moisture from the beef and melted cheese.
The buttery topping that makes people ask for the recipe
This is my favorite part, and it makes Roast Beef Sliders look and taste like you put in more effort than you did.
In a small bowl, mix melted butter with:
- Worcestershire sauce
- Onion powder
- Garlic powder
- Poppy seeds (optional, but classic)
- A little dried parsley
Brush it over the tops right before baking. The rolls turn golden, the edges get a little crisp, and the smell is honestly torture while you wait.
If you’re into sandwich style sliders, these french dip sliders are another fun direction, especially if you like dipping everything into au jus like I do.
“I made these for my kids and my husband, and they were gone in ten minutes. The buttery tops are unreal. I’m putting these on repeat for parties.”
Equipment Needed for Making Sliders
You don’t need anything fancy here, which is one reason I keep coming back to this recipe. Roast Beef Sliders are basically a bake and serve situation.
Here’s what you’ll want on the counter:
- 9×13 baking dish or a rimmed sheet pan
- Sharp bread knife (for slicing the rolls in one piece)
- Small bowl for mixing sauce and butter topping
- Pastry brush or spoon for spreading butter topping
- Foil (helps the cheese melt without over browning)
I usually bake covered for most of the time, then uncover for the last few minutes to get those tops golden. That is the sweet spot.
If you like easy beef meals that don’t use a ton of equipment, you might also like classic slow cooker pot roast. It’s a different comfort food lane, but it’s the same kind of low stress cooking that makes life easier.
Step by Step Photos
So I can’t actually hand you my phone gallery through the screen, but I can tell you exactly what each “photo moment” looks like so you can compare as you go. This is the part that helps if you’ve never made sliders before, because once you do it once, you’ll be like, oh, that’s it?
What you should see at each step
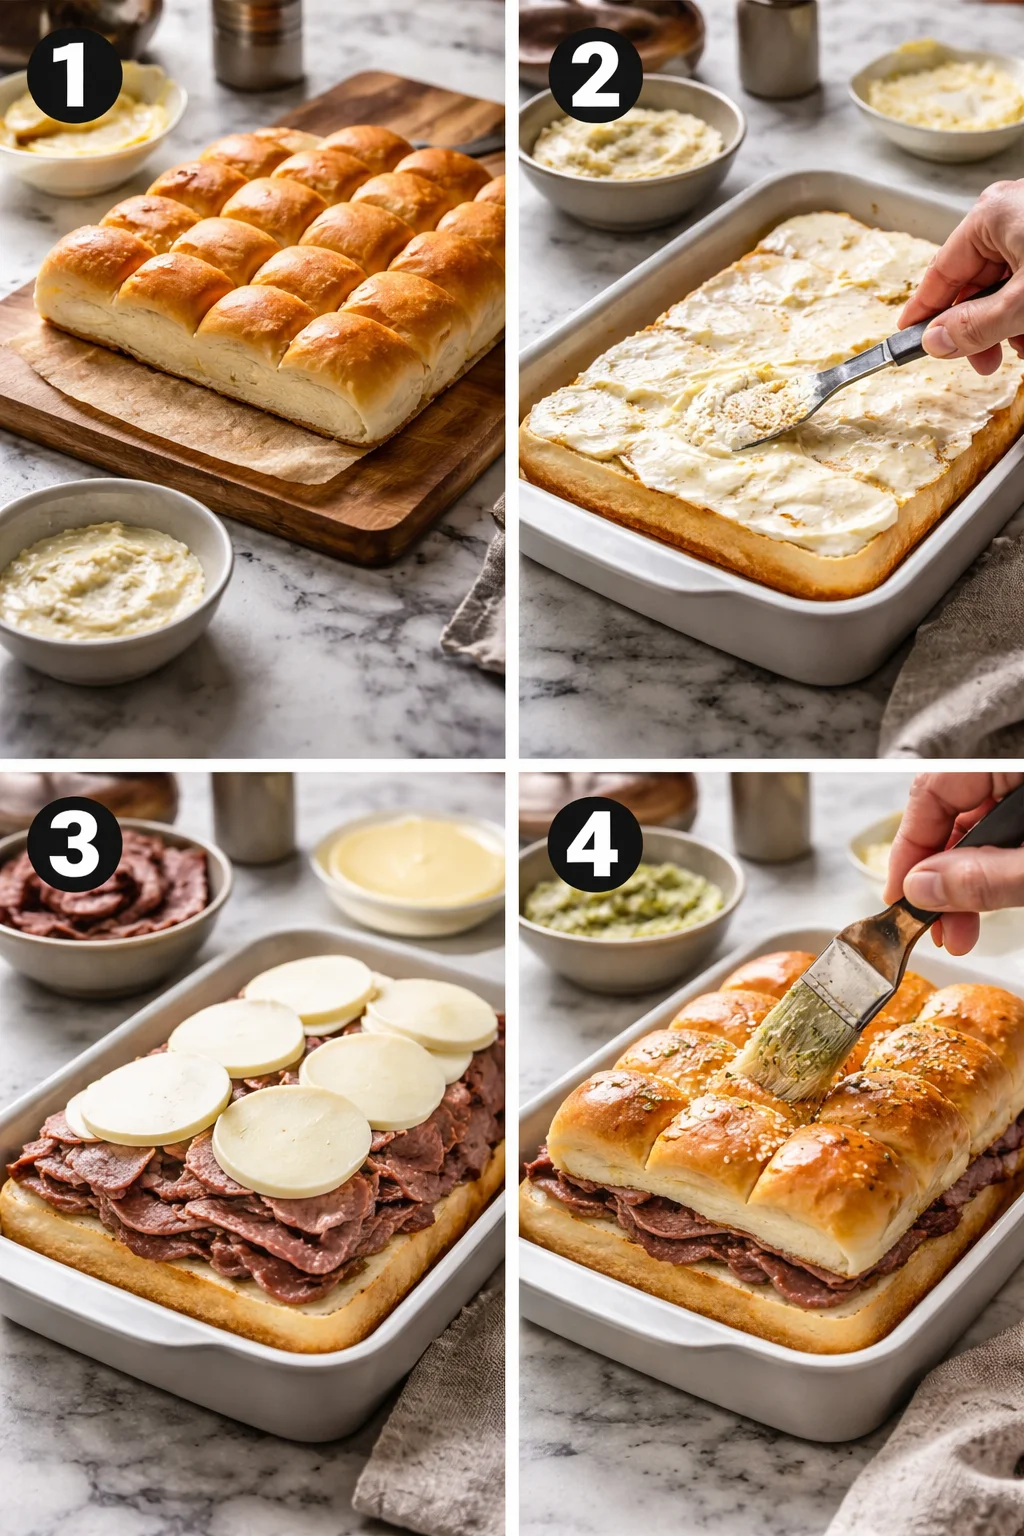
Photo step 1: The rolls sliced in half as one connected sheet. Bottom slab sitting in the baking dish.
Photo step 2: A thin layer of sauce spread on the bottom rolls. It should look light, not gloopy.
Photo step 3: Roast beef layered evenly across the whole surface. No tall mountain in the center.
Photo step 4: Cheese layer on top of the beef. If you do two cheese layers, you’ll see cheese, beef, cheese.
Photo step 5: Top slab of rolls placed on, then the buttery topping brushed all over. You want shiny coverage, especially at the edges.
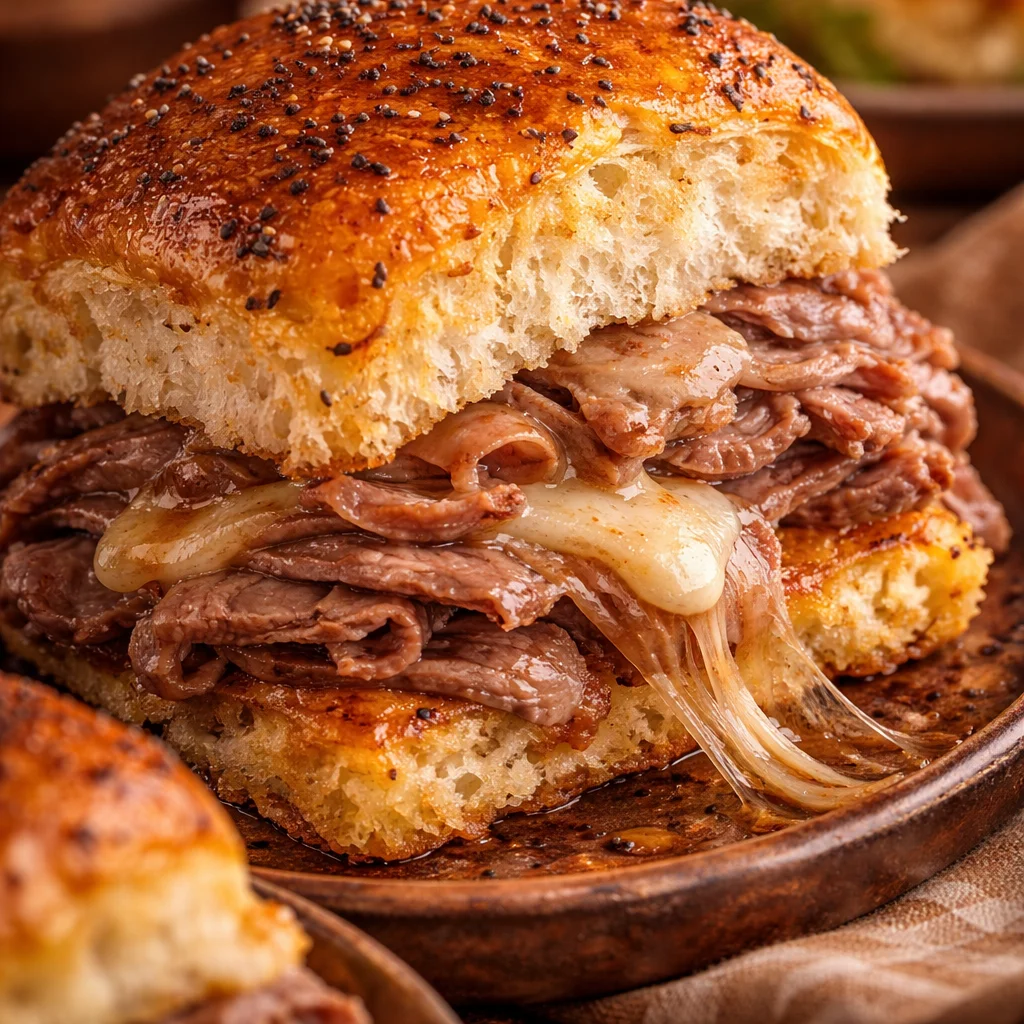
Photo step 6: After baking, the tops are golden and the cheese is melted. If you press lightly, it feels warm and soft, and you might see a little cheese peeking out the sides.
My baking routine is simple: 350 F, covered for about 12 to 15 minutes, then uncovered for 3 to 5 minutes to brown. If your sliders are packed with a lot of meat, they might need a couple extra minutes covered.
Let them rest for a few minutes before cutting. That tiny pause helps the cheese settle so the sliders don’t slide apart when you serve them.
Common Questions
1) Can I make Roast Beef Sliders ahead of time?
Yes. Assemble them, cover, and refrigerate for up to a day. Add the buttery topping right before baking so the tops don’t get soggy.
2) What roast beef works best?
Thin sliced deli roast beef is easiest and stays tender. If using leftover roast, slice it thin and add a little extra sauce to keep it moist.
3) How do I keep the bottoms from getting soggy?
Go easy on the inside sauce, and don’t overdo wet add ons. Also, bake on the middle rack and let the sliders rest a few minutes before serving.
4) What cheese is best?
Provolone and Swiss melt the nicest and match the beef flavor. If you want something bolder, try sharp cheddar, but keep it to one layer so it doesn’t overpower everything.
5) How do I reheat leftovers?
Wrap in foil and warm in the oven at 325 F until heated through. The microwave works, but the rolls can turn chewy.
A cozy little wrap up and what to try next
If you make these Roast Beef Sliders once, you’ll get why I keep them in my back pocket for busy nights and last minute guests. Soft rolls, warm beef, melty cheese, and that buttery top is basically comfort food with zero drama. If you want to compare methods and see other takes, I’ve looked at the Roast Beef Sliders Recipe – Foodal and also the Baked Roast Beef Sliders | Bunsen Burner Bakery, and it’s fun how small sauce tweaks can change the whole vibe. Try them your way, take notes, and next time you’ll make them even better.
Roast Beef Sliders
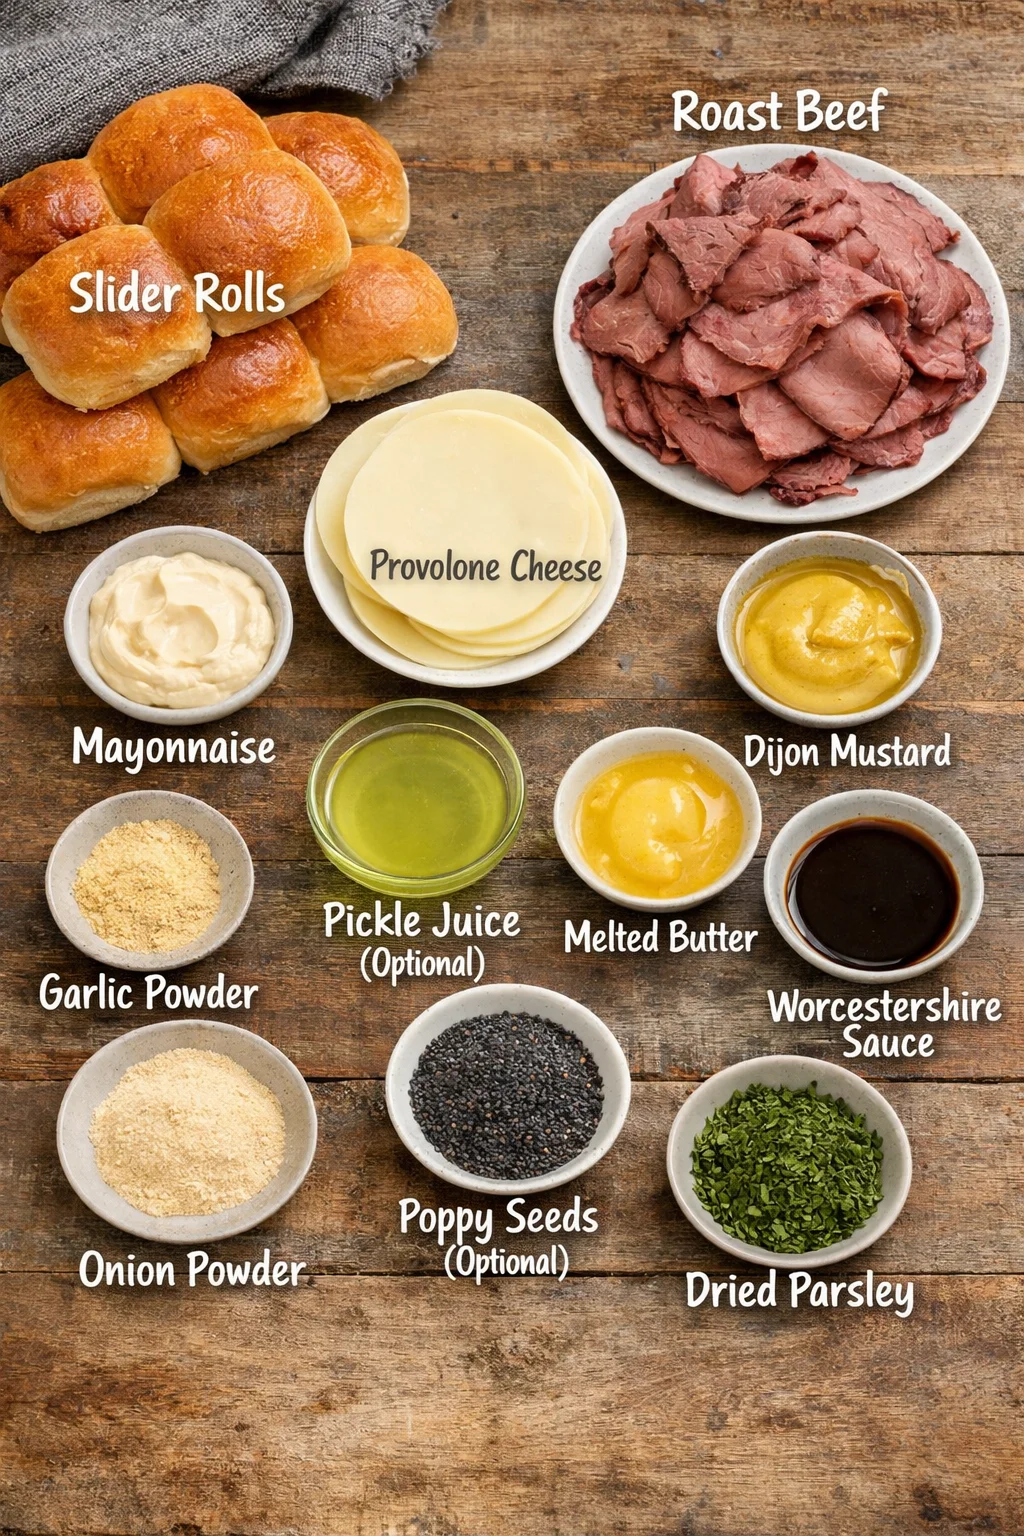
Ingredients
Method
- Slice the whole sheet of rolls in half horizontally to create a top and bottom slab.
- Spread a thin layer of inside sauce on the bottom halves of the rolls.
- Layer evenly with roast beef, adding some cheese slices, and a second layer of roast beef followed by more cheese.
- Place the top slab of rolls on the layered ingredients.
- Mix melted butter with Worcestershire sauce, onion powder, garlic powder, poppy seeds, and parsley, then brush generously over the top of the rolls.
- Preheat the oven to 350°F (175°C).
- Cover the baking dish with foil and bake for about 12 to 15 minutes.
- Remove the foil and bake for an additional 3 to 5 minutes until the tops are golden and crispy.
- Let rest for a few minutes before slicing to allow cheese to settle.