


Honeycomb Cheesecake is one of those desserts that just hits a little different, especially if you’re anything like me and you’ve struggled to make a dessert look as good as it tastes. I know the drill: you want something to impress but don’t want to fuss for hours or deal with disaster in the fridge. Been there. Plus, what’s with all those boring recipes where cheesecake just blends in with the crowd? Nope, not today. We’re making a showstopper. This beauty brings together smooth honey flavor, lush creamy filling, and the coolest honeycomb look that screams “five-star restaurant,” even if you’re just in your tiny apartment kitchen with an ancient hand mixer.
The Story Behind This Recipe
I’m Alexandraa, the cook behind this Honeycomb Cheesecake. sp, I dialed in the flavors so it’s approachable and full of cozy vibes. Honeycomb Cheesecake is one of those desserts that just hits a little different, especially if you’re anything like me and you’ve struggled to make a dessert…
Key Ingredients
First thing you need to know? The ingredients here are pretty straightforward. If you’ve made cheesecake before, you’re way ahead. But if not, don’t sweat it. You’ll need cream cheese (go full fat, trust me), honey (local is best but any will do), graham crackers or those cute digestive biscuits, melted butter, and eggs. Toss in a little sour cream for tang, a sprinkle of vanilla extract for warmth, and maybe—if you want that golden glow—a touch of turmeric or even a spot of saffron. The star, though, is honey. Don’t get stingy. Let it actually taste like honey.
Also, pro tip: If you want the true honeycomb effect, grab some honeycomb candy (those crunchy bits from the candy aisle) or even a silicone mold that mimics honeycomb. Nothing too fancy, just whatever gives you that fun texture.
Everyone’s pantry is a bit random, honestly. Substitute if you have to. That’s real-life cooking. 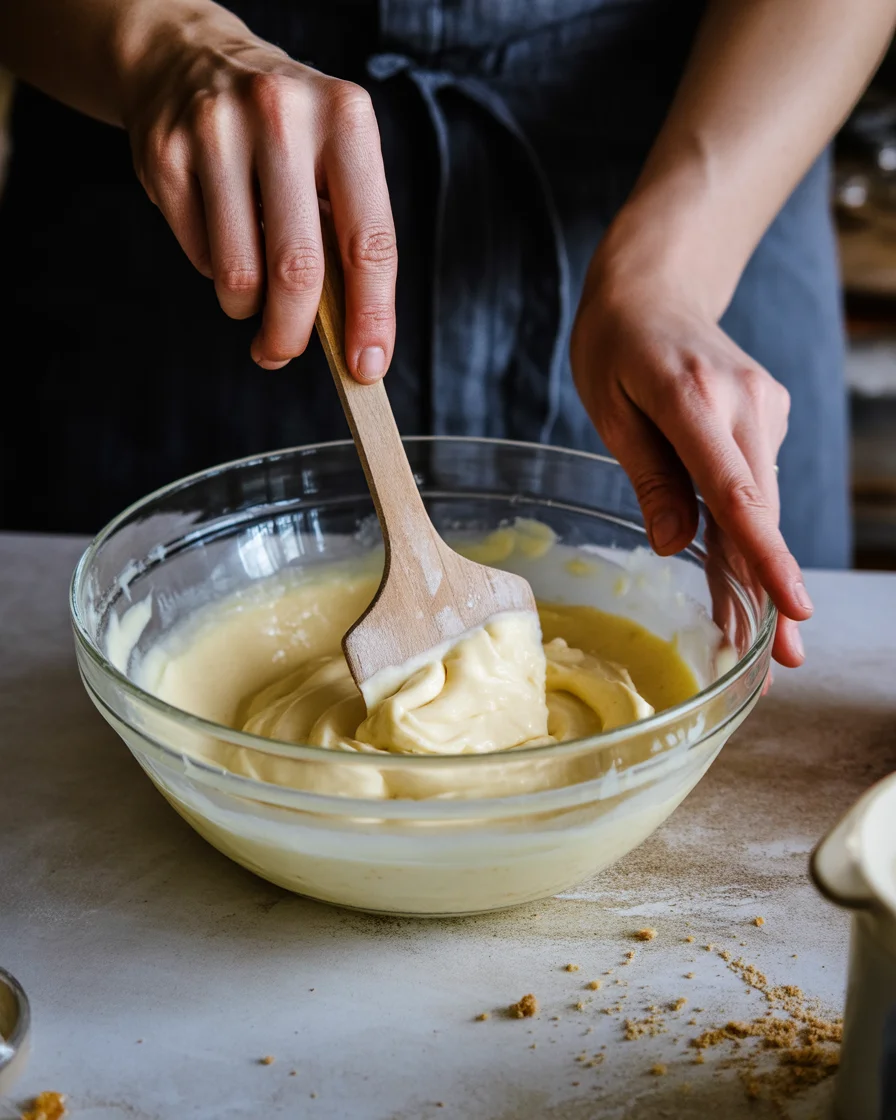
How to Make Honey Cheesecake
I used to panic about baking cheesecakes, worried I’d open the oven and find a cracked Sahara desert or, worse, a slippery cheesy puddle. Here’s how I manage now: crush your crackers, mix with melted butter, press into the pan (seriously, use your knuckles, it’s weirdly satisfying). Chill the crust.
For the filling, whip cream cheese, then add honey, eggs, vanilla, sour cream, and a little lemon zest if you want freshness. Pour over the crust. Bake low and slow. A water bath is optional, but it helps if you want to show off. Don’t stress if it jiggles in the middle—a little wobble is cheesecake’s secret handshake.
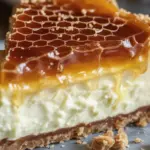
The honeycomb effect? Scatter broken honeycomb candy on top after baking, or pour a thin layer of honey over the top and use a spatula or a fancy silicone mold to create a hexagon pattern. Cool, then chill for hours. Overnight is best, but honestly, who can wait? Cut yourself a ‘test’ slice, no shame. 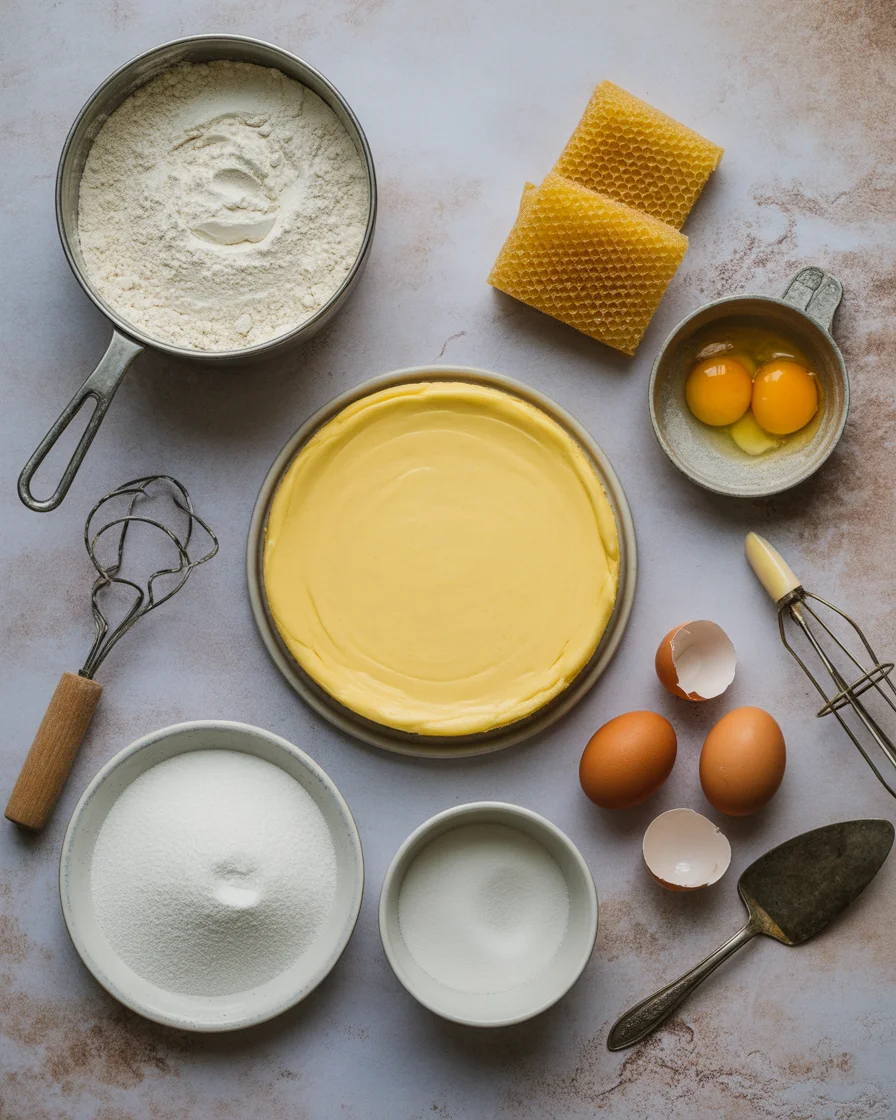
Tips for Honey Cheesecake
Here comes the real talk. If you want your honeycomb cheesecake to be, like, actually memorable, keep a few things in mind. First, every ingredient should be at room temp. No cold eggs or you’ll fight lumps. I’ve learned the hard way.
Second, bake slow at a moderate temp. High heat means cracks happen, and they’re not cute. Cover the cheesecake gently with foil if it gets golden too fast.
Oh, and line the pan with parchment. That way, you don’t need to do acrobatics to get a perfect slice out.
Don’t slice right away. The longer it chills, the more the flavors party together. Wait it out, I promise. And if in doubt, drizzle just a little more honey on top (because, why not).
“I almost gave up making cheesecakes, but this recipe changed everything. Even the honeycomb topping was easy, and it looked gorgeous for my dinner party!”
Cheesecake Toppings
So, toppings. This is where you get to play. Honestly, sometimes I just want to eat it plain—nothing wrong with that—but here are my favorite finishing touches:
- Fresh berries or figs for color (they pop against the golden honey)
- Extra honeycomb candy if you can find it
- Drizzle of wildflower honey right before serving
- Crushed pistachios or toasted almonds for a crunch
Each one does something different. If you wanna show off for guests, stack a few toppings together. If you’re solo on your couch, just use whatever you have in the kitchen. The main idea? Have fun with it.
Storage and Leftovers
Okay, so maybe you didn’t eat it all in one night—good for you. You’ll want to stash any leftover honeycomb cheesecake in the fridge, covered tight so it doesn’t absorb weird fridge smells (who left the onion uncovered, honestly?). Should keep for up to five days, and I swear the flavor gets deeper.
Freezer? Sure. Slice and wrap each piece in cling film, then stash in a freezer bag. Thaw in the fridge overnight, not on the counter if you don’t want a soggy crust. I honestly can’t remember a time I had leftovers for long, though!
Common Questions
Q: Can I use low-fat cream cheese?
A: You can, but the texture might not be as creamy and luscious. Go full-fat if you can—it’s worth it.
Q: My cheesecake cracked, now what?
A: Don’t panic! Just cover those cracks with toppings or drizzle extra honey. No one will know.
Q: What’s the best honey to use?
A: Local, raw honey gives great flavor, but any honey you like will do just fine.
Q: Can I make it in advance?
A: Yep. In fact, chilling overnight makes it even better.
Q: Do I have to use a water bath?
A: It helps with even baking, but it’s not mandatory. Just don’t overbake.
Your Next Go-To Dessert Adventure
Alright, if you’re after an easy show-off dessert, Honeycomb Cheesecake checks all my boxes—plus it’s always a crowd favorite. Smooth, tangy, dripping with honey flavor, and somehow even better on day two. If you want to branch out, check out Honey Cheesecake (Biscoff Crust) – Two Cups Flour for an irresistible Biscoff spin. I’ve also seen this honeycomb cheesecake is a work of art online and, let me tell you, it totally lives up to the hype.
So, try it, play around, and make it your own. The best cheesecake stories start in normal kitchens, just like yours.
Honeycomb Cheesecake
Ingredients
Method
- Preheat the oven to a low temperature, approximately 160°C (320°F).
- Crush the graham crackers or digestive biscuits until fine.
- Mix the crushed crackers with melted butter and press into the base of a springform pan. Chill the crust in the refrigerator.
- In a large bowl, whip the cream cheese until smooth.
- Add honey, eggs, vanilla extract, sour cream, and lemon zest to the cream cheese. Mix until well combined.
- Pour the filling over the chilled crust.
- Bake in the preheated oven for about 60 minutes, or until the center is just slightly wobbly.
- Remove from the oven and let cool before chilling in the refrigerator for at least 4 hours or overnight.
- Once the cheesecake is chilled, scatter the broken honeycomb candy on top.
- Drizzle additional honey over the cheesecake if desired.
- Add fresh berries or nuts for garnish before serving.