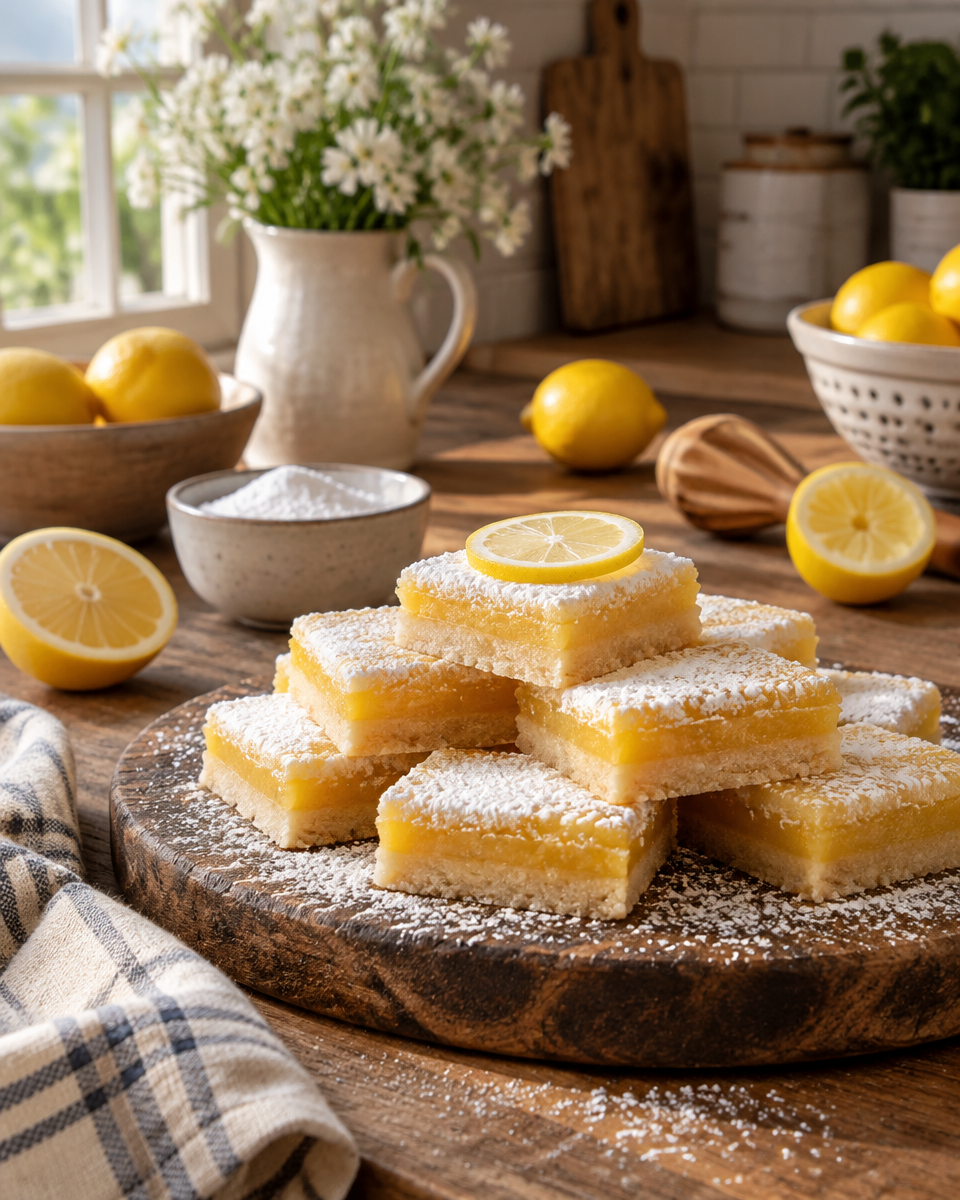

Lemon Bar Recipe days usually start the same way for me. Someone texts that they are “bringing something” and then shows up with chips. Or I volunteer dessert, then remember I have exactly one hour before people arrive. That is when I reach for this trusty pan of bright, tangy bars that taste like you planned ahead. You get a buttery base, a soft lemon layer, and that snowy sugar top that makes everyone grab a second square.
Why This Lemon Bar Recipe Works
The big reason I keep coming back to this Lemon Bar Recipe is balance. The crust is rich and sturdy, so it actually holds the filling without turning soggy. The lemon layer is tangy but not sharp enough to make you squint, and it sets up into clean slices after it cools.
I also like that the steps are simple and forgiving. You do not need fancy tools, just a bowl, a whisk, and a pan. If you can stir and pour, you can make these.
And honestly, the vibe is right. These bars feel homemade in the best way. Not fussy, not overly sweet, just that classic lemony comfort.
If you are in a lemon mood and want another easy citrus dessert for later, I have a soft spot for these lazy day lemon cream pie bars too. They are a different texture, but still bright and snackable.

Key Ingredients for Perfect Lemon Bars
A good Lemon Bar Recipe is all about using the right basics and not overcomplicating it. Here is what I use and why it matters.
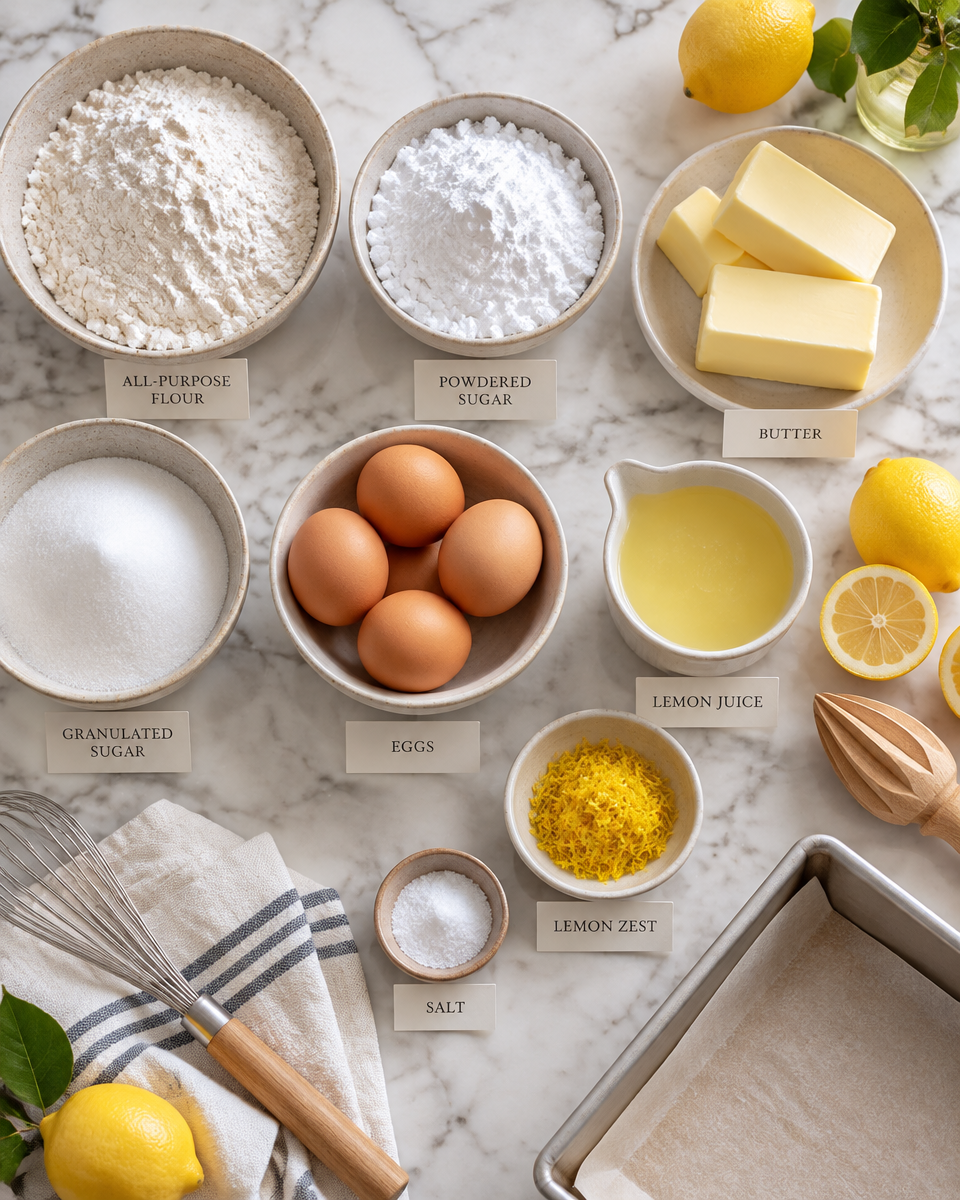
What you will need
- All purpose flour: builds the crust and helps thicken the filling.
- Powdered sugar: for the crust and for that classic dusting on top.
- Butter: real butter, not margarine. This is where the crust gets its flavor.
- Granulated sugar: sweetens the filling and keeps it smooth.
- Eggs: they set the filling so it slices cleanly.
- Fresh lemon juice: this is the whole point, so squeeze real lemons if you can.
- Lemon zest: optional but strongly recommended for a bigger lemon flavor.
- Salt: a pinch makes the sweetness and lemon pop.
A quick note on lemons: bottled juice works in a pinch, but fresh tastes brighter and less flat. I usually zest the lemons first, then cut and juice them. Saves you a little frustration.
If you like baking bar desserts in general, you might also enjoy these lemon lime cherry pistachio cheesecake bars when you want something more playful and colorful.
Pro Tips for the Best Result
This is the part where I save you from learning things the hard way, because I have absolutely made every lemon bar mistake at least once.
My simple step by step method
I am keeping this super practical, like I would text it to a friend.
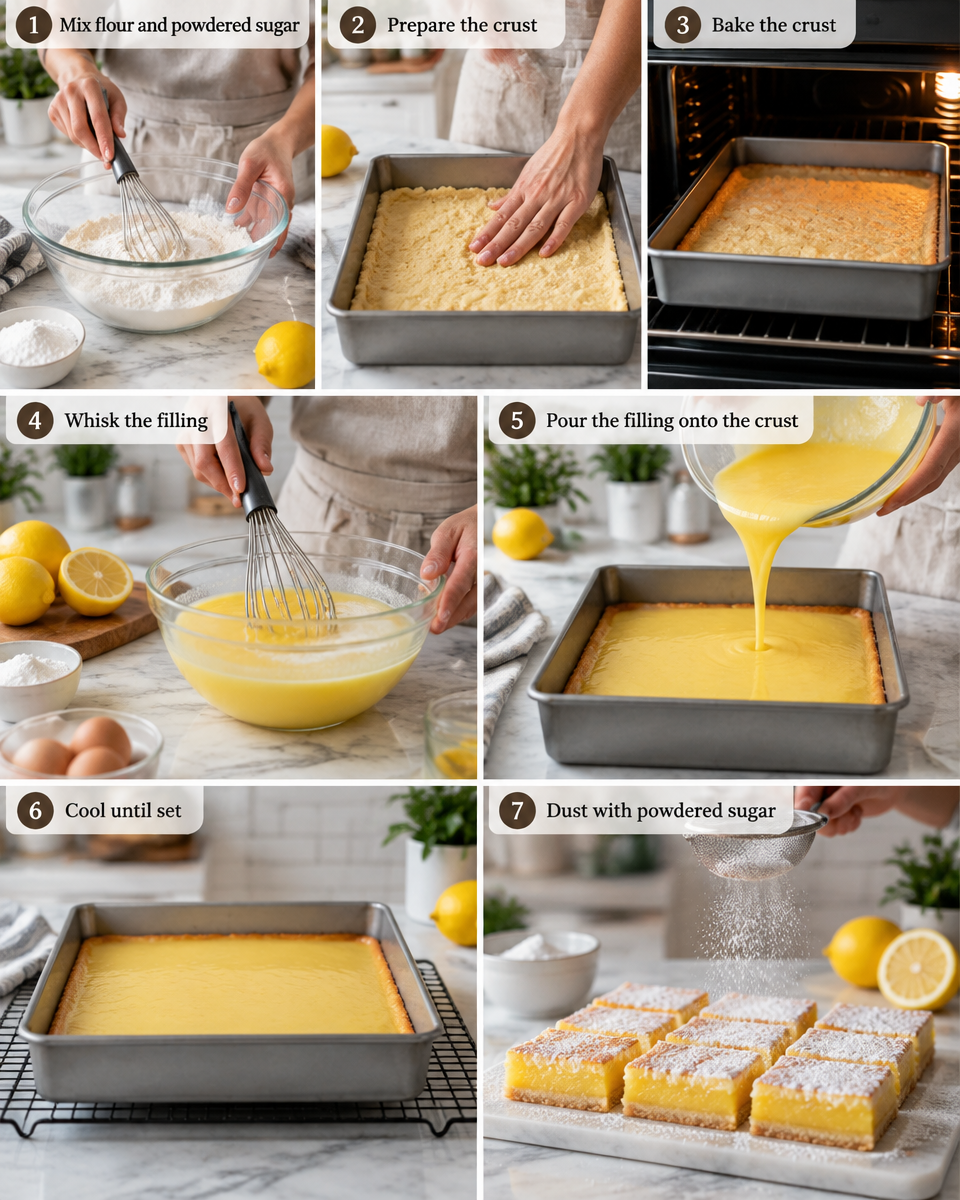
- Heat your oven to 350 F. Line an 8×8 pan with parchment if you want easy lifting.
- Make the crust: mix flour, powdered sugar, a pinch of salt, then cut in melted or softened butter until it looks like damp sand. Press it firmly into the pan.
- Bake the crust for about 18 to 22 minutes, until it looks lightly golden at the edges.
- While it bakes, whisk the filling: eggs, granulated sugar, flour, lemon juice, zest, and a pinch of salt. Whisk until smooth.
- Pour filling onto the hot crust and bake again about 18 to 22 minutes, until the center is set and does not jiggle like liquid.
- Cool at room temp, then chill at least 2 hours before slicing.
- Dust with powdered sugar right before serving.
A few extra tips that actually matter:
- Use room temperature eggs if possible. They mix smoother.
- Let the bars chill before cutting. Warm lemon bars are delicious, but messy.
- For neat slices, wipe your knife between cuts.
If you are the kind of person who loves that crisp buttery base, you should peek at these lemon bars with shortbread crust. It is another great option when you want the crust to really shine.
And while we are talking kitchen energy, these bars pair so well with an afternoon drink. If you want a fun treat on the side, try making one of these iced coffee recipes at home barista style. Lemon and coffee sounds odd, but somehow it works, especially if your coffee is not too sweet.
I made these for a weekend family dinner and the pan was basically scraped clean. Even my picky cousin asked for the recipe, which never happens. The lemon flavor tasted fresh, not like candy.
Common Mistakes to Avoid
This Lemon Bar Recipe is easy, but a few small choices can mess with the texture.
Overbaking the filling
If the top gets deeply golden and the edges look dry, it is probably overdone. You want it set, not stiff. The center should look firm with a tiny bit of softness.
I get it, the smell is intense and you want “just a small piece.” But if you cut while it is warm, the filling can slide and look messy. Chill first for clean squares.
If the crust is loosely packed, it can crumble when you lift a piece. Use the bottom of a measuring cup and really press it down.
You can do it without parchment, but lifting bars out of the pan is so much easier when you line it. Less stress, less scraping.
If your lemons are dry or have been sitting around forever, the juice is weaker and the flavor falls flat. Fresh lemons make the whole thing taste more alive.
If you want a little wellness sidekick on baking day, I sometimes make this ginger lemon turmeric shot recipe when I need a quick boost while I wait for the bars to chill. Totally optional, but it is a fun citrus moment.
Storage and Freezing Tips
These are the kind of bars that taste even better after they have had time to chill, so storage is your friend.

How to store:
- Keep them in an airtight container in the fridge.
- They are best within 4 to 5 days.
- Dust with powdered sugar right before serving, because it tends to melt into the top over time.
How to freeze:
- Slice the bars and place them on a tray to freeze for about 1 hour.
- Wrap each piece in plastic wrap, then store in a freezer bag.
- Freeze up to 2 months.
- Thaw in the fridge overnight for the best texture.
One more real life tip: if you are stacking bars in a container, put a little parchment between layers so they do not stick.
Common Questions
Can I double this Lemon Bar Recipe for a bigger pan?
Yes. Double it and bake in a 9×13 pan. The bake time may go up a bit, so watch for a set center.
How do I know when the lemon layer is done?
Gently shake the pan. If the center does not slosh like liquid and looks set, you are good.
Can I use lime instead of lemon?
You can. It will taste different, a little sharper, but still good. I like doing half lemon and half lime when I want a twist.
Why is my crust soggy?
Usually the crust did not bake long enough before you added the filling, or the bars were cut before cooling fully. Bake the crust until lightly golden and let the finished bars chill.
Do I have to use powdered sugar on top?
No, but it gives that classic look and a soft sweetness. If you skip it, the bars will still taste great.
A sweet little wrap up
If you want a dessert that feels sunny and reliable, this Lemon Bar Recipe is the one I pull out again and again. Focus on a firm crust, fresh lemon juice, and giving the bars enough chill time for clean slices. If you want another trusted reference, I also like checking out Lemon Bars Recipe with Shortbread Crust – Preppy Kitchen for extra perspective on ratios and technique. Now go grab a couple lemons and make a pan, because you deserve a dessert that tastes like a good day.
Lemon Bars
Ingredients
Method
- Preheat your oven to 350 degrees F.
- Line an 8×8 pan with parchment paper for easy lifting.
- In a bowl, mix flour, powdered sugar, and a pinch of salt.
- Cut in melted or softened butter until it resembles damp sand.
- Press firmly into the bottom of the pan.
- Bake the crust for 18 to 22 minutes, until lightly golden.
- While the crust bakes, whisk together eggs, granulated sugar, flour, lemon juice, lemon zest, and a pinch of salt until smooth.
- Pour filling over the hot crust and bake for another 18 to 22 minutes.
- The center should be set and not jiggle like liquid.
- Let the bars cool to room temperature, then chill in the fridge for at least 2 hours.
- Dust with powdered sugar before slicing and serving.
Notes