


No-Bake Lemon Tart Recipe got me through one chaotic week when my oven broke the night before a family dinner. I needed something bright, quick, and ridiculously creamy that looked like I tried much harder than I did. This tart checks all the boxes. It zings with fresh lemon, sets up in the fridge, and slices like a dream. If you’ve got a few pantry staples, you’re already halfway there. Let’s make dessert without turning on the oven.
The Story Behind This Recipe
I’m Alexandraa, the cook behind this No-Bake Lemon Tart Recipe. When the craving hit, I dialed in the flavors so it’s weeknight-friendly and full of cozy vibes. No-Bake Lemon Tart Recipe got me through one chaotic week when my oven broke the night before a family dinner. I needed something bright, quick, and…
Recipe Snapshot
This is the kind of dessert that makes people pause after the first bite and say wow. The crust is buttery and slightly salty, which plays so well with the creamy lemon filling. It’s sweet but not heavy, citrusy without being sour. I love it for holidays, birthdays, or Tuesdays when you just need a win.
What you can expect with this tart:
Flavor: bright lemon with a creamy, cheesecake-like finish. Texture: silky, spoonable but sliceable. Effort: minimal. Time: 20 minutes of hands-on work, then the fridge takes over. Make-ahead: best chilled overnight.
If you love citrus but want something even lighter, try my creamy lemon cousin over here: lemon cheesecake mousse. It disappears fast at my house.
Pro tip: use fresh lemon juice and zest for the cleanest flavor. Bottled juice works in a pinch, but fresh is worth it.
Easy No Bake Lemon Tart Recipe
This recipe leans into simple, reliable ingredients that set beautifully after a good chill. It’s the same base I’ve used for years, and it hasn’t let me down. If you’ve never made a tart before, don’t stress. You’re about to nail it.
Ingredients
- 2 cups fine graham cracker or digestive biscuit crumbs (about 200 g)
- 8 tablespoons unsalted butter, melted (113 g)
- 2 tablespoons granulated sugar (optional, for a sweeter crust)
- Pinch of fine salt
- 8 ounces cream cheese, room temperature (226 g)
- 1 can sweetened condensed milk (14 oz or about 396 g)
- 1/2 cup freshly squeezed lemon juice (120 ml)
- 1 tablespoon finely grated lemon zest
- 1 teaspoon vanilla extract
- 1 cup cold heavy cream, whipped to soft peaks (240 ml)
- Optional garnish: extra whipped cream, fresh berries, thin lemon slices, mint
Directions
- Make the crust: Combine crumbs, melted butter, sugar, and a pinch of salt. Stir until the mixture looks like wet sand.
- Press into a 9-inch tart pan with a removable bottom, or use a 9-inch pie dish. Pack it tight using the bottom of a measuring cup for clean edges.
- Chill the crust for 15 minutes while you prepare the filling.
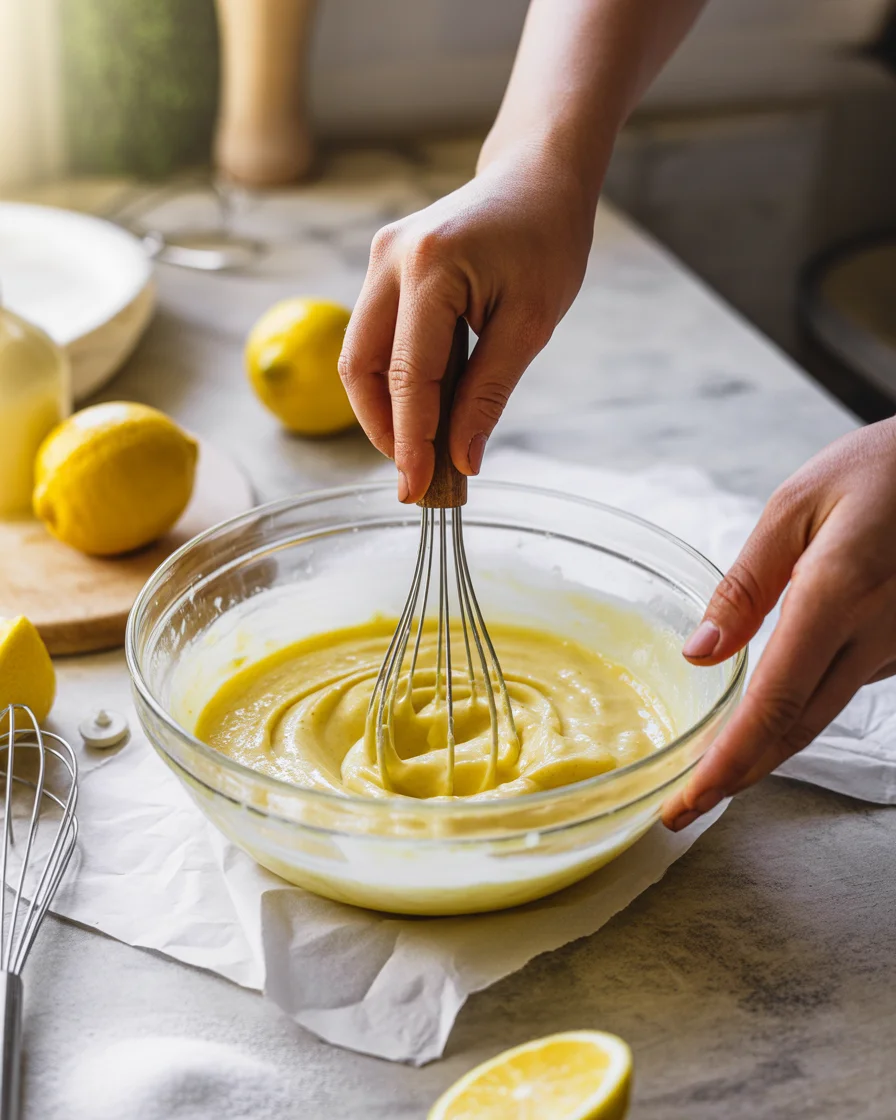
- Beat the cream cheese until perfectly smooth. This step is key for a silky filling.
- Slowly stream in the sweetened condensed milk, scraping the bowl as needed. Blend until creamy.
- Mix in lemon juice, zest, and vanilla. The filling will thicken slightly as the lemon works its magic.
- In a separate bowl, whip the cold heavy cream to soft peaks. Fold it gently into the lemon mixture to keep the filling light.
- Pour into the chilled crust. Smooth the top. Tap the pan gently to pop any air bubbles.
- Cover and refrigerate for at least 6 hours, but overnight is best for clean slices.
- Garnish before serving. Slice with a thin knife and wipe the blade between cuts for the neatest wedges.
Pro Tips for a Perfect Set
For the creamiest texture, use full-fat cream cheese and cold heavy cream. Don’t rush the chill time. Acid from the lemon helps the filling thicken, but time in the fridge is what sets it firm. If you prefer a firmer slice, dissolve 1 teaspoon powdered gelatin in 1 tablespoon cool water, melt it gently, and whisk into the filling before folding in the whipped cream. Also, avoid overmixing once the whipped cream goes in.
Make-Ahead, Storage, and Freezing
Make the crust up to 2 days ahead and keep it covered in the fridge. The assembled tart keeps well for 3 days in the refrigerator. To freeze, chill the tart first, then slice and wrap each piece tightly. Freeze for up to a month. Thaw in the fridge, not on the counter, to keep the texture smooth.
If you like chilled, creamy lemon desserts with minimal effort, you might also love these lazy day lemon cream pie bars. Same mood, different format.

Comments and Feedback
I could talk about this tart for days, but I love hearing how it goes for you. Did your aunt ask for the recipe? Did someone sneak a second slice before dinner? Share your tweaks, your toppings, or your dramatically short chill times. I’ve been there. Still tasted great.
“I made this for my book club and it was the first dessert gone. Even my not-a-dessert person husband asked for a second slice. The texture was restaurant-level and I didn’t turn on the oven.”
Don’t forget to rate the recipe if you try it. Your reviews help other readers decide what to make next, and they honestly make my day.
Recipe Ratings
When you rate, think about a few simple points: flavor balance, texture, and ease. Did it slice neatly after the full chill? Was the lemon punchy enough for you? If you prefer a sweeter tart, you can add an extra tablespoon of sugar to the crust or garnish with a honey drizzle. If you want more zing, add an extra half tablespoon of zest. Your notes help me keep perfecting this for all of us.
Similar Posts
Craving more citrus or something playful and sweet? Try these reader-loved treats next:
Blueberry Lemon Loaf for brunch vibes and a soft, lemony crumb that’s irresistible with coffee.
Need a fun, crunchy twist on creamy lemon? These no-bake lemon cheesecake rice krispie treats hit the sweet-tart-crisp trifecta and are so easy for kids to help with.
Common Questions
Can I use a store-bought crust?
Yes. A premade graham crust works great. If the filling goes close to the top, chill a bit longer to make slicing easier.
Is bottled lemon juice okay?
If that’s what you have, yes. But fresh juice and zest give the brightest flavor and the best aroma. Fresh is worth it here.
My filling is too soft. What happened?
Most likely it didn’t chill long enough. Give it a full overnight chill. For a firmer set next time, use the optional gelatin or reduce the lemon juice by 1 tablespoon.
What kind of pan should I use?
A 9-inch tart pan with a removable bottom makes the prettiest slices. A 9-inch pie dish or springform pan works too, just line the bottom with parchment if you can.
Can I make this dairy-free?
You can try dairy-free cream cheese, coconut cream, and dairy-free condensed milk. The flavor is good, but the set may be a bit softer, so the gelatin option helps.
A Sweet, Bright Finish
That’s the whole story. A creamy, zesty dessert that looks fancy and comes together in minutes. This No-Bake Lemon Tart Recipe is the kind of back-pocket treat you’ll make again and again for its speed and flavor. If you want more inspiration, take a peek at this take from another kitchen: No Bake Lemon Tart – For the Love of Gourmet, and a flexible, cozy version here too: No Fuss Lemon Tart. – Half Baked Harvest. I hope you grab some lemons and give it a whirl tonight.

Easy No-Bake Lemon Tart
Ingredients
Method
- Make the crust: Combine crumbs, melted butter, sugar, and a pinch of salt. Stir until the mixture looks like wet sand.
- Press into a 9-inch tart pan with a removable bottom, or use a 9-inch pie dish. Pack it tight using the bottom of a measuring cup for clean edges.
- Chill the crust for 15 minutes while you prepare the filling.
- Beat the cream cheese until perfectly smooth. This step is key for a silky filling.
- Slowly stream in the sweetened condensed milk, scraping the bowl as needed. Blend until creamy.
- Mix in lemon juice, zest, and vanilla. The filling will thicken slightly as the lemon works its magic.
- In a separate bowl, whip the cold heavy cream to soft peaks. Fold it gently into the lemon mixture to keep the filling light.
- Pour into the chilled crust. Smooth the top. Tap the pan gently to pop any air bubbles.
- Cover and refrigerate for at least 6 hours, but overnight is best for clean slices.
- Garnish before serving. Slice with a thin knife and wipe the blade between cuts for the neatest wedges.