


Deliciously Simple Chocolate Thumbprint Cookies are the kind of treat you make when you want something sweet, cozy, and guaranteed to make people smile. Maybe you need a fast dessert for a friend visit. Maybe your week has been long and chocolate is the answer. Or maybe you just love a soft, fudgy cookie with a melty chocolate center. Same here. I’ve baked a lot of cookies, and this one always hits the mark because it’s easy, dependable, and truly delicious. Let’s make a batch you’ll be proud to share, or not share at all.
The Story Behind This Recipe
Here’s why I love this Deliciously Simple Chocolate Thumbprint Cookies You’ll Love: it uses pantry staples and it tastes like home. Deliciously Simple Chocolate Thumbprint Cookies are the kind of treat you make when you want something sweet, cozy, and guaranteed to make people smile. Maybe you…
Why You’ll Love These Chocolate Thumbprint Cookies
If you’re after a cookie that’s tender on the outside, rich in the middle, and feels a little fancy without any fuss, this is it. The dough comes together fast, the chocolate center sets into a soft truffle-like bite, and they look bakery-ready with almost no effort. I love these for last-minute get-togethers because you don’t need special tools or an all-day plan. Just one bowl, a pan, and your thumb. Or use the back of a measuring spoon for a neat look.
These are perfect on a dessert tray with something crunchy to balance them out. If you want a variety plate, add a couple of crisp holiday classics like Double Chocolate Snowball Cookies and you’ve got a crowd pleaser mix. These cookies also make a great edible gift since they hold their shape and travel well.
And let’s be honest. The name says it all. Deliciously Simple Chocolate Thumbprint Cookies really are that simple. No complicated steps. No hard-to-find ingredients. Just a chocolatey, reliable cookie that tastes even better than it looks.
“I made these for a small family gathering and everyone asked for the recipe. They’re rich but not too sweet, and the chocolate center stayed silky even the next day.”
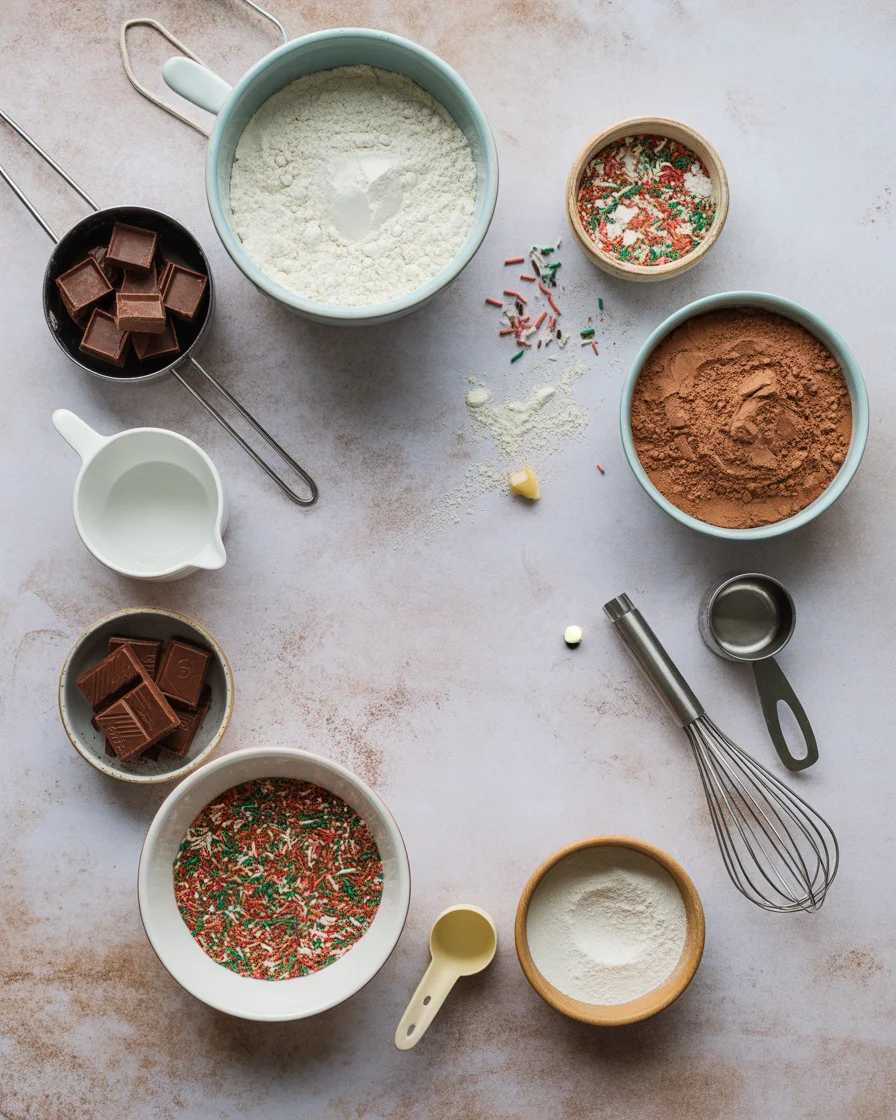
What You’ll Need
Here’s exactly what I use when I want a quick, chocolate-forward cookie that tastes like it came from a bakery. The list is short, the process is simple, and the results are consistent.
- Unsalted butter 1/2 cup, softened to room temp
- Granulated sugar 1/2 cup
- Large egg yolk 1
- Vanilla extract 1 teaspoon
- All-purpose flour 1 cup plus 2 tablespoons (about 140 g)
- Cocoa powder 1/3 cup, Dutch process if you have it
- Salt 1/4 teaspoon
- Milk 1 tablespoon, only if the dough needs a touch more moisture
- For the chocolate center: 4 ounces semi-sweet chocolate chips or chopped chocolate, 3 tablespoons heavy cream, and 1 teaspoon butter for shine
- Optional finishes: flaky sea salt, finely chopped nuts, or festive sprinkles
Tools are basic: mixing bowl, hand mixer or sturdy whisk, sheet pan, parchment, a teaspoon measure or your thumb for the indent, and a small saucepan for the ganache. That’s it. If you’re doing a cookie assortment box, these pair really well with tropical fruity options like Hawaiian Pineapple Coconut Thumbprint Cookies for color and contrast.
For anyone counting, this recipe makes about 16 cookies. If you need more, it doubles easily. I like to keep the dough in the fridge for a few hours if I’m tight on time, then bake right before guests arrive. And because the name is a mouthful in the best way, I like to label them as Deliciously Simple Chocolate Thumbprint Cookies when gifting. People light up just reading it.
How to Make Chocolate Thumbprint Cookies
Don’t overthink this. The steps are very doable and forgiving. Your biggest job is not to eat too many before the filling sets.
Make the dough
Preheat your oven to 350°F or 175°C. Line a baking sheet with parchment. In a large bowl, beat the softened butter and sugar together until creamy and a bit fluffy, about 2 minutes. Add the egg yolk and vanilla and mix until smooth.
In a separate bowl, whisk the flour, cocoa, and salt to break up any clumps. Add the dry ingredients to the butter mixture and mix on low just until combined. If the dough looks a little dry or crumbly, splash in the milk and mix again. You want a soft, easy-to-roll dough. If it’s sticky, chill it for 15 minutes.
Shape and bake
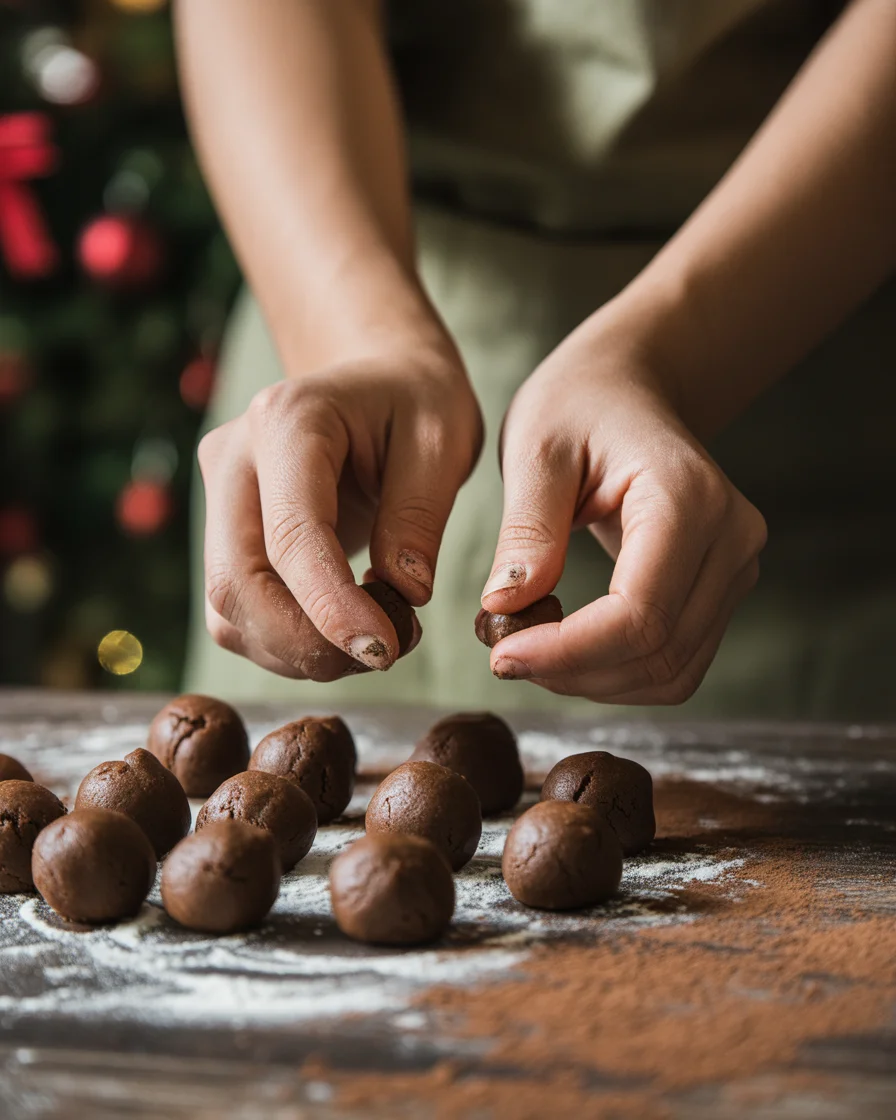
Roll the dough into 1 tablespoon balls and place them a couple inches apart on the pan. If you’d like extra sparkle and a tiny crunch, roll each ball in a little sugar before setting them on the pan. Press a neat indentation in the center using your thumb or the back of a 1/2 teaspoon measuring spoon. Don’t go all the way through the dough. You want a well, not a tunnel.
Bake for 9 to 11 minutes. They should look set around the edges but not dry in the center. If the indent puffed up while baking, press it again gently right after you take them out of the oven. Let them cool on the pan for 5 minutes, then move to a rack.
Fill and finish
Warm the heavy cream in a small saucepan until steaming and just starting to simmer around the edges. Pour it over the chopped chocolate in a heat-safe bowl, wait 1 minute, then stir until glossy and smooth. Add the butter and stir again. Let the ganache thicken for a few minutes so it’s spoonable, not runny.
Spoon the chocolate into the indent of each cookie. If you like a little contrast, add a pinch of flaky salt on top. Let the chocolate set at room temp for about 30 minutes, or pop the tray in the fridge for 10 to 15 minutes to speed it up. That’s it. Deliciously Simple Chocolate Thumbprint Cookies ready for snacking.
Tips for Success
Use butter at room temperature. Too cold and it won’t cream properly. Too warm and the dough gets greasy. You want a gentle thumb press to leave a smooth indent without cracking.
Measure your flour right. Spoon it into the cup and level it off. Too much flour can make the dough dry and the cookies crumbly. If it still feels dry, add milk a teaspoon at a time.
Chill the dough for 15 to 30 minutes if it feels warm or sticky. Chilled dough holds its shape better, which means a neat well for the chocolate and cleaner edges.
Press gently. If you press too hard, the sides crack. If you do get cracks, just nudge them back together with your fingers before baking. A measuring spoon often makes a neater indent than your thumb, so use whichever gives you better control.
Make it your own. Sprinkle chopped pistachios for color, crushed candy canes for winter, or a little espresso powder in the dough for depth. If you want a no-bake option for variety on your dessert board, try these crunchy Chocolate Quinoa Crunch Bars alongside the cookies for texture contrast.
Finally, keep the flavor honest and the process stress-free. If you’re new to baking, you’ll still nail this. And if you bake all the time, you’ll appreciate how efficient and flavorful these are. I’ve been making Deliciously Simple Chocolate Thumbprint Cookies for years and the results stay consistent with these simple habits.
Proper Storage
Store fully cooled cookies in an airtight container at room temperature for up to 3 days. If your kitchen is warm, refrigerate them to keep the chocolate center set. They’ll last up to a week in the fridge. I like to separate layers with parchment so the tops stay pretty.
Freezing works great. Freeze unfilled baked cookies for up to 2 months in a freezer bag, then thaw at room temp and fill with fresh ganache. Or freeze the rolled dough balls on a sheet pan, transfer to a bag, and bake from chilled. Just add a minute or two to the bake time and don’t forget to indent before baking if you froze them without the thumbprint.
Gifting tip: pack cookies in a snug tin so they don’t move around. For a classic holiday box, mix them with something buttery and simple like Christmas Butter Cookies. The texture balance is perfect and the whole box looks festive.
One more suggestion if you’re building a dessert spread. Pair these with a rich slice of Chocolate Fudge Truffle Cheesecake for the ultimate chocolate lover lineup. Just add coffee or milk and you’re set.
Common Questions
Can I use milk instead of heavy cream for the filling?
You can, but the ganache will be thinner and set a little softer. If you use milk, start with 2 tablespoons and add more only if needed to reach a smooth, spoonable texture.
Do I have to chill the dough?
Not always, but it helps. If your dough is soft or your kitchen is warm, a brief chill keeps the cookies from spreading too much and preserves the indent.
How do I keep the cookies from cracking?
Roll the dough into very smooth balls, press gently, and re-smooth any cracks before baking. Using the back of a measuring spoon can prevent uneven pressure.
Can I make these gluten-free?
Yes. Use a 1-to-1 gluten-free flour blend. Add the milk slowly to adjust the dough if it seems dry. The rest of the steps stay the same.
What other fillings work?
A spoonful of thick jam or caramel is great. For a fun twist, check out gooey bar-style ideas like Gooey S’mores Chocolate Bars and adapt the flavors you love into your thumbprint center.
A Sweet Little Finish
I love recipes that are relaxing to make and generous with flavor, and these deliver every time. With a soft cocoa cookie and a silky chocolate center, Deliciously Simple Chocolate Thumbprint Cookies feel special without asking for much in return. If you want even more thumbprint inspiration, you can peek at this helpful guide for Chocolate Thumbprint Cookies – In Bloom Bakery and compare techniques to see what you like best. Now it’s your turn to bake, taste, and share. Make a batch, snap a pic, and let me know how it goes.

Chocolate Thumbprint Cookies
Ingredients
Method
- Preheat your oven to 350°F (175°C) and line a baking sheet with parchment.
- In a large bowl, beat the softened butter and sugar together until creamy and fluffy, about 2 minutes.
- Add the egg yolk and vanilla extract, mixing until smooth.
- In a separate bowl, whisk together the flour, cocoa powder, and salt.
- Add the dry ingredients to the butter mixture and mix on low until combined.
- If the dough looks dry, splash in the milk until you have a soft, easy-to-roll dough. If it’s sticky, chill it for 15 minutes.
- Roll the dough into 1 tablespoon balls and place them a few inches apart on the baking sheet.
- Press an indentation in the center of each ball using your thumb or the back of a 1/2 teaspoon measuring spoon.
- Bake for 9 to 11 minutes until set around the edges but not dry in the center.
- If the indent puffed up while baking, press it again gently immediately after removing them from the oven.
- Let the cookies cool on the pan for 5 minutes before transferring them to a rack.
- Warm the heavy cream in a small saucepan until steaming and pour it over the chopped chocolate in a heat-safe bowl.
- Wait 1 minute, then stir until glossy and smooth. Add the butter and stir again.
- Let the ganache thicken for a few minutes before spooning it into the center of each cookie.
- If desired, sprinkle a pinch of flaky salt on top and let the chocolate set at room temperature for about 30 minutes.