
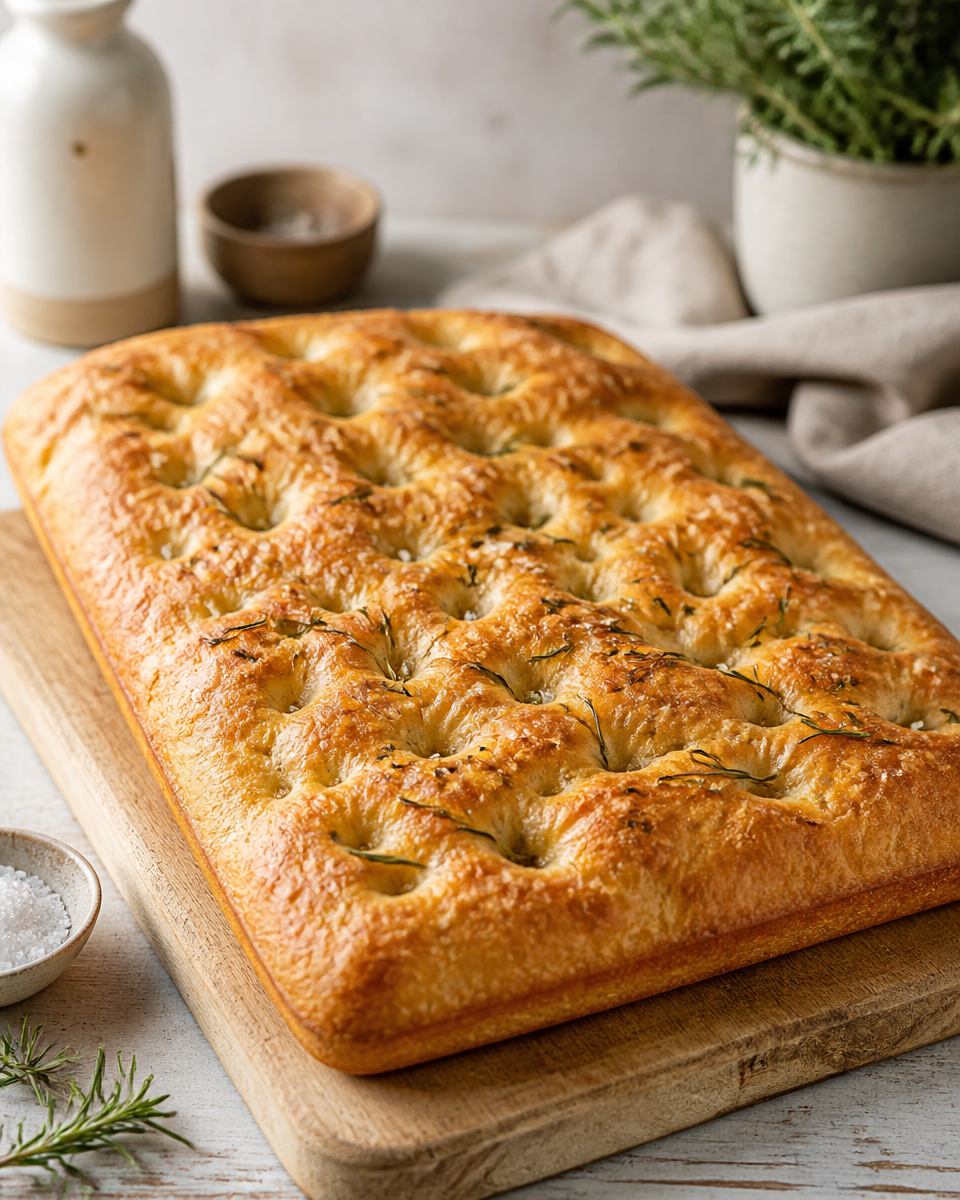
Light and Airy Focaccia Bread is my go to move when I want fresh baked bread but I do not want to babysit dough all day. Maybe you have had focaccia that felt greasy, heavy, or weirdly dry around the edges, and you just assumed that is how it goes. I used to think that too, until I started paying attention to a couple tiny details that change everything. This version bakes up fluffy inside, crisp on the bottom, and full of those little salty olive oil pockets on top. If you are craving bakery vibes at home without stress, you are in the right place.
Two Secrets for the Best Focaccia
I have made a lot of focaccia trials in my kitchen, including a few batches that could have doubled as doorstops. The good news is the fix was simple. These are my two secrets for consistently getting Light and Airy Focaccia Bread instead of a dense slab.
Secret 1: Give it time, not extra flour
When dough feels sticky, the instinct is to dump in more flour. I get it. But too much flour is the fastest way to lose that soft, open crumb. Instead, I let time do the work. A longer rise makes the dough easier to handle and gives you that airy texture.
Quick tip: if your kitchen is chilly, I set the bowl near the oven while it preheats. Not on the stovetop, just nearby.
Secret 2: Be generous with olive oil in the pan
That crispy bottom and those fried edges everyone fights over? That is olive oil doing its job. I use enough to fully coat the pan, plus a little extra. It sounds like a lot, but focaccia is supposed to be a bit indulgent.
Also, if you love bread projects, you might enjoy this sweet, cozy one later: cinnamon donut bread delight. Totally different vibe, but same comfort factor.
How This Focaccia Recipe Differs from Others
Some recipes push super high heat and a short rise, and they can be fine. But they often bake up with a tight crumb and a top that dries out before the inside is fully fluffy. My version leans into a wetter dough and a calmer approach, so you get that light interior without turning it into a complicated science project.
Here is what is different in plain language:
- Higher hydration (more water) for an airy bite and better bubbles.
- Two rises, so the dough relaxes and puffs up naturally.
- Gentle handling, meaning no aggressive kneading marathon.
- Flavor boost from a little extra salt and a good olive oil.
One more practical thing: I bake it in a metal pan most days. It gives me a better bottom crust than glass. If you bake a lot in cast iron, you should absolutely read this guide because it saved my skillet from my bad habits: 10 cast iron care rules grandma wouldnt break.
How to Make Focaccia Bread, Step by Step
This is the part where you can relax. You do not need fancy tools. A bowl, a spoon, a pan, and your fingers are basically the whole deal. I will walk you through it the way I actually do it on a weeknight.
What you will need
- Large mixing bowl
- 9×13 inch metal pan (or similar)
- Measuring cups and spoons
- Spoon or spatula
Ingredients
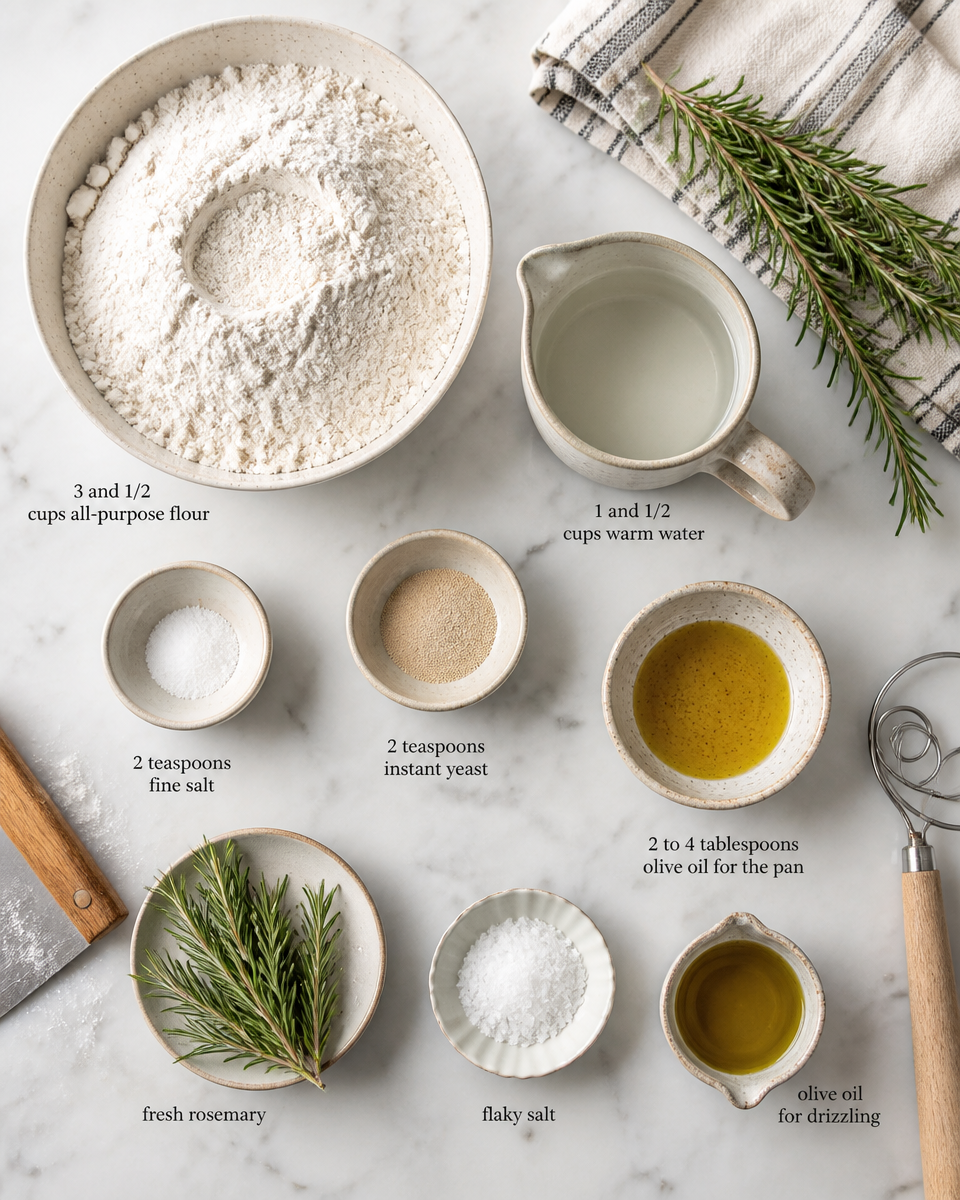
- 3 and 1/2 cups all purpose flour
- 1 and 1/2 cups warm water (not hot)
- 2 teaspoons fine salt
- 2 teaspoons instant yeast
- 2 to 4 tablespoons olive oil for the pan, plus more for topping
- Flaky salt and rosemary (optional but so good)
Directions
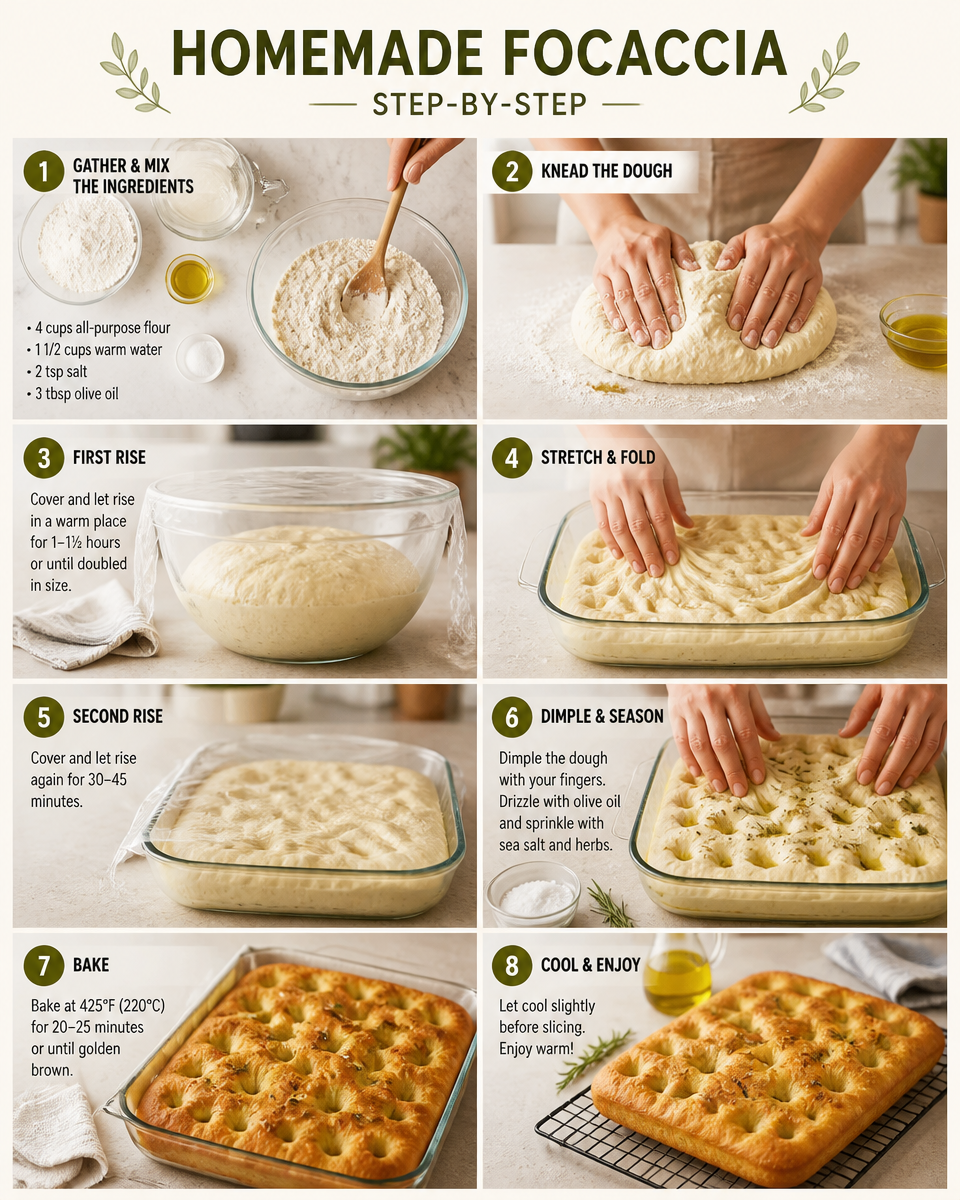
- Mix: In a big bowl, stir flour, salt, and yeast. Pour in warm water and mix until you have a sticky, shaggy dough. It will look messy, that is correct.
- First rise: Cover the bowl and let it rise until puffy, about 60 to 90 minutes at room temp.
- Oil the pan: Pour olive oil into your pan and spread it around well, including corners.
- Move dough: Scrape the dough into the pan. Turn it once so it is coated in oil. If it resists stretching, wait 10 minutes, then gently stretch again.
- Second rise: Cover the pan and let it puff up about 30 to 45 minutes.
- Dimple: Drizzle a bit more olive oil on top. Use your fingers to press deep dimples all over. Sprinkle flaky salt, rosemary, or whatever topping you like.
- Bake: Bake at 425 F for 20 to 25 minutes until golden. If you want extra crisp edges, give it 2 to 3 more minutes.
- Cool: Let it sit 10 minutes, then lift it out and cool on a rack if you can. This keeps the bottom crisp.
“I made this for a family dinner and it disappeared before the pasta was even served. The inside stayed fluffy, and the salty top was perfect. I am officially done buying store focaccia.”
Leila, home cook and bread fan
Small serving idea: I love it with soup, but it also makes an unreal sandwich bread if you slice it horizontally. And if you are building a full comfort food spread, this side is a fun one for later: southern skillet cornbread with jalapeno and cheddar.
Ingredient Notes
This recipe is simple, which means ingredients matter. Not in a stressful way, just in a pay attention kind of way.
Flour: All purpose flour works beautifully. Bread flour can make it a little chewier, but still tasty. If you swap, keep the water the same and judge by feel.
Yeast: Instant yeast is easiest because you can mix it right in. If you only have active dry yeast, you can still use it. Just dissolve it in the warm water first and wait until it looks a little foamy, about 5 minutes.
Olive oil: Use one you actually like the taste of because you will notice it. This is not the time for the dusty bottle hiding behind the soy sauce.
Salt: Fine salt in the dough, flaky salt on top. That combo gives you flavor throughout plus those little pops of crunch.
Toppings: Rosemary is classic, but you can do sliced tomatoes, thin onions, olives, or even a little grated parmesan. Just do not overload it or the dough can struggle to lift.
Random kitchen note that helps: if your sheet pans or counters smell like last night’s garlic marathon, a simple scrub makes the whole baking experience nicer. I use this trick all the time: 10 things clean with lemon and salt.

The Secret to the Best Focaccia? The Three Ts
When people ask me why their focaccia is not fluffy, it usually comes down to one of these. I call them the three Ts. Not fancy, just memorable.
Time: You cannot rush the rise and still expect Light and Airy Focaccia Bread. Give the yeast time to do its thing.
Temperature: Warm water helps, and a comfy room temp rise helps. If your kitchen is cold, your dough is going to move slower. That is normal.
Touch: Be gentle. Stretch, do not fight. Dimple confidently at the end, but do not mash it like you are angry at it.
If you want to make it ahead, you can refrigerate the dough after the first rise, then bring it back to room temp before you pan it. The flavor gets even better with that slow rest, and your schedule feels a lot more in control.
Common Questions
1) Why is my focaccia dense?
Usually it is too much flour, not enough rise time, or the dough did not get a full second rise in the pan. Sticky dough is normal here.
2) Can I make this without rosemary?
Yes. Just do olive oil and flaky salt, or try cherry tomatoes or olives. The base bread is the star.
3) How do I store leftover focaccia?
Wrap it and keep it at room temp for up to 2 days. Rewarm in the oven for 5 to 8 minutes to bring back the crisp edges.
4) Can I freeze focaccia?
Absolutely. Slice it, wrap well, and freeze. Reheat straight from frozen at 375 F until warm.
5) What should I serve with it?
Soups, salads, pasta, or as sandwich bread. If you want a sweet dessert after, this one is very much a crowd pleaser: grandmas cherry delight dessert.
A warm, salty finish (and your next bake)
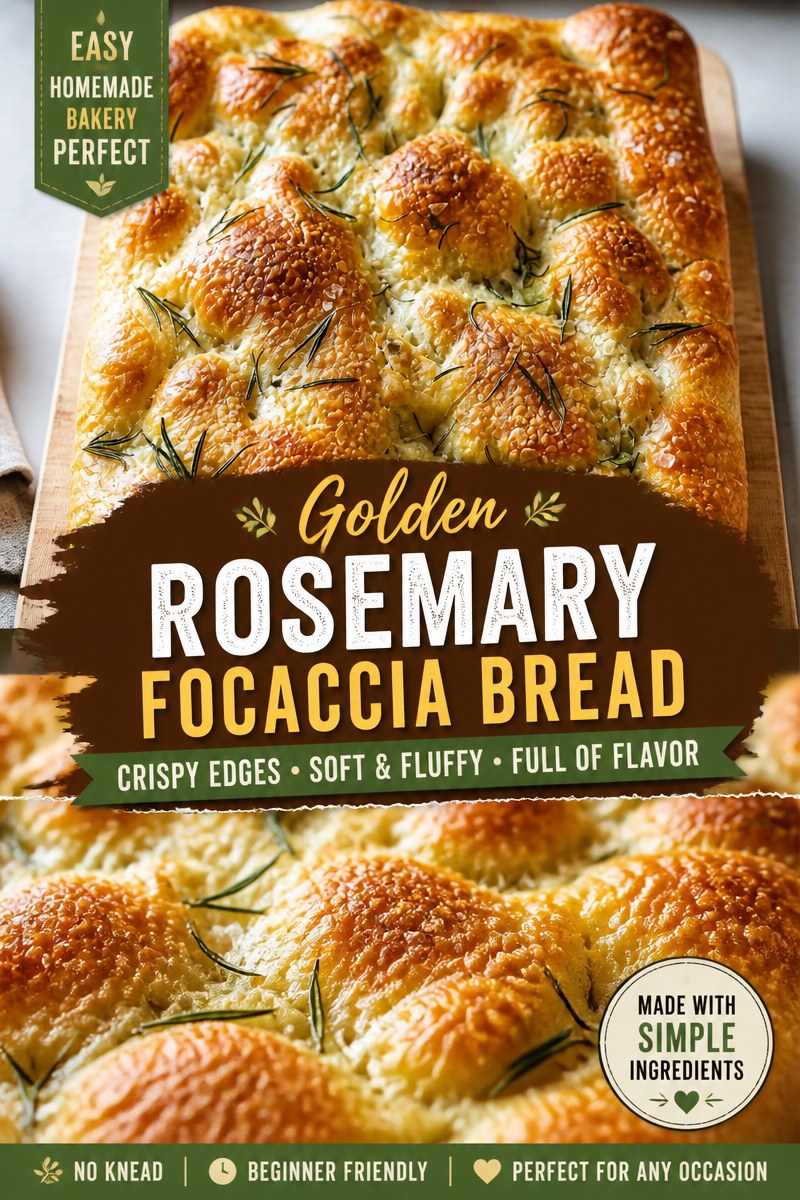
If you take anything from this, let it be this: Light and Airy Focaccia Bread is mostly about patience, a good splash of olive oil, and not overthinking it. Once you nail the feel of the dough, you can top it a hundred different ways and it will still come out beautiful. If you like comparing methods, I have learned a lot from The Best, Easiest Focaccia Bread Recipe – Alexandra’s Kitchen, and the testing tips in Focaccia That’s Light as Air | America’s Test Kitchen are genuinely helpful too. Now go make a pan, listen for that crackly crust, and try not to eat the whole corner piece before dinner.
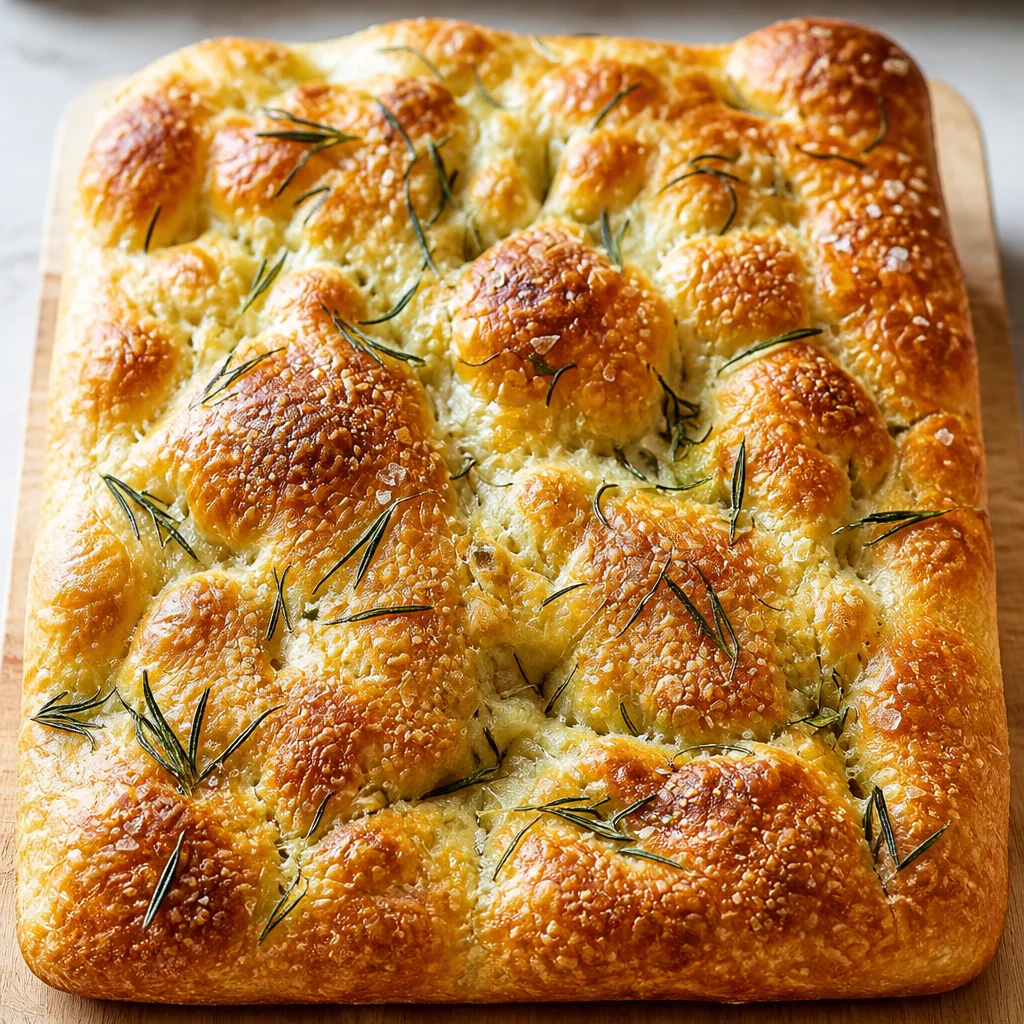
Light and Airy Focaccia Bread
Ingredients
Method
- In a large mixing bowl, stir together flour, salt, and yeast.
- Pour in warm water and mix until you have a sticky, shaggy dough.
- Cover the bowl and let it rise until puffy, about 60 to 90 minutes.
- Pour olive oil into the pan and spread it around well, including corners.
- Scrape the dough into the pan and turn it once to coat in oil. If resistant, wait 10 minutes to stretch gently.
- Cover the pan and let it puff up for about 30 to 45 minutes.
- Drizzle additional olive oil on top, use fingers to create dimples all over, and sprinkle with flaky salt and toppings.
- Bake at 425°F (220°C) for 20 to 25 minutes until golden. If you want extra crisp edges, bake for an additional 2 to 3 minutes.
- Let it cool for 10 minutes before lifting it out to cool on a rack to keep the bottom crisp.
