
Peanut Butter Cup Lava Cake is my go to dessert for those nights when you want something warm and melty, but you do not want a whole sink full of dishes. You know that feeling when you are craving chocolate, but a regular brownie just will not hit the spot? This is the fix. It has that soft cake outside, and the middle is basically a cozy chocolate peanut butter puddle. I started making it when I wanted a restaurant style dessert at home without any fancy steps. If you have peanut butter cups in the pantry, you are already halfway there. 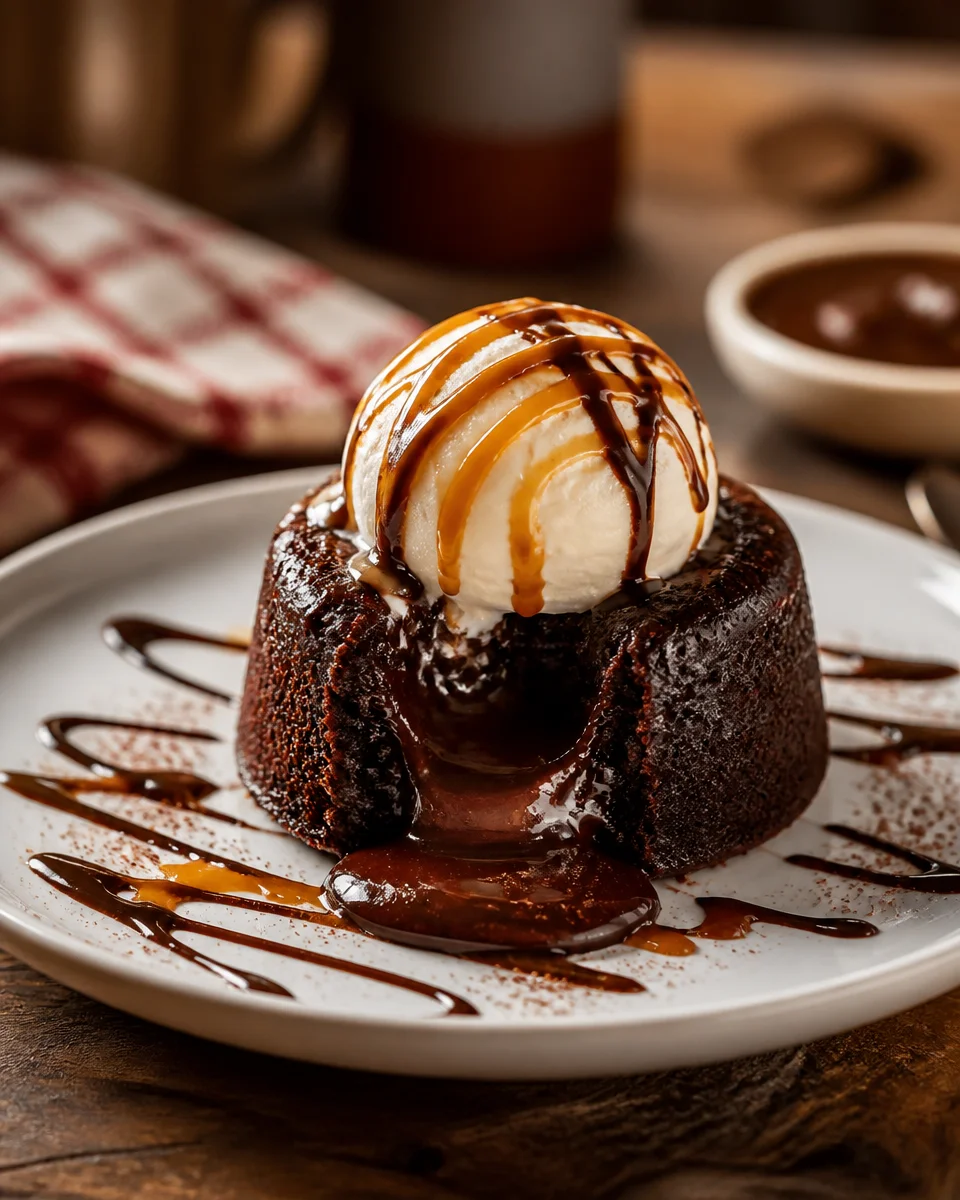
What Makes Peanut Butter Chocolate Lava Cakes Special?
I love a classic lava cake, but adding peanut butter cups makes it feel extra fun and a little nostalgic. You get chocolate, you get peanut butter, and you get that surprise center that makes everyone pause after the first bite. The best part is how fast it comes together. It feels like you planned ahead, even if you decided to bake it at the last second.
Here is what makes Peanut Butter Cup Lava Cake such a keeper in my house:
That molten center is not just chocolate. It is chocolate mixed with the peanut butter cup filling, so it tastes like a warm candy bar.
It is portioned, which means you are not staring at a whole pan of dessert wondering what a normal serving is.
It is customizable. You can make it more chocolatey, more peanut buttery, or even add a pinch of espresso powder if you like that deeper flavor.
Also, if you are the kind of person who loves peanut butter and chocolate desserts as a category, you will probably want to peek at this Frozen Peanut Butter Cup Ice Cream Cake for another crowd pleasing option when you want something cold instead of gooey.
I made these for a small family dinner and everyone thought they came from a bakery. The center was perfect and the peanut butter cup flavor really comes through.
Essential Ingredients for Peanut Butter Chocolate Lava Cakes
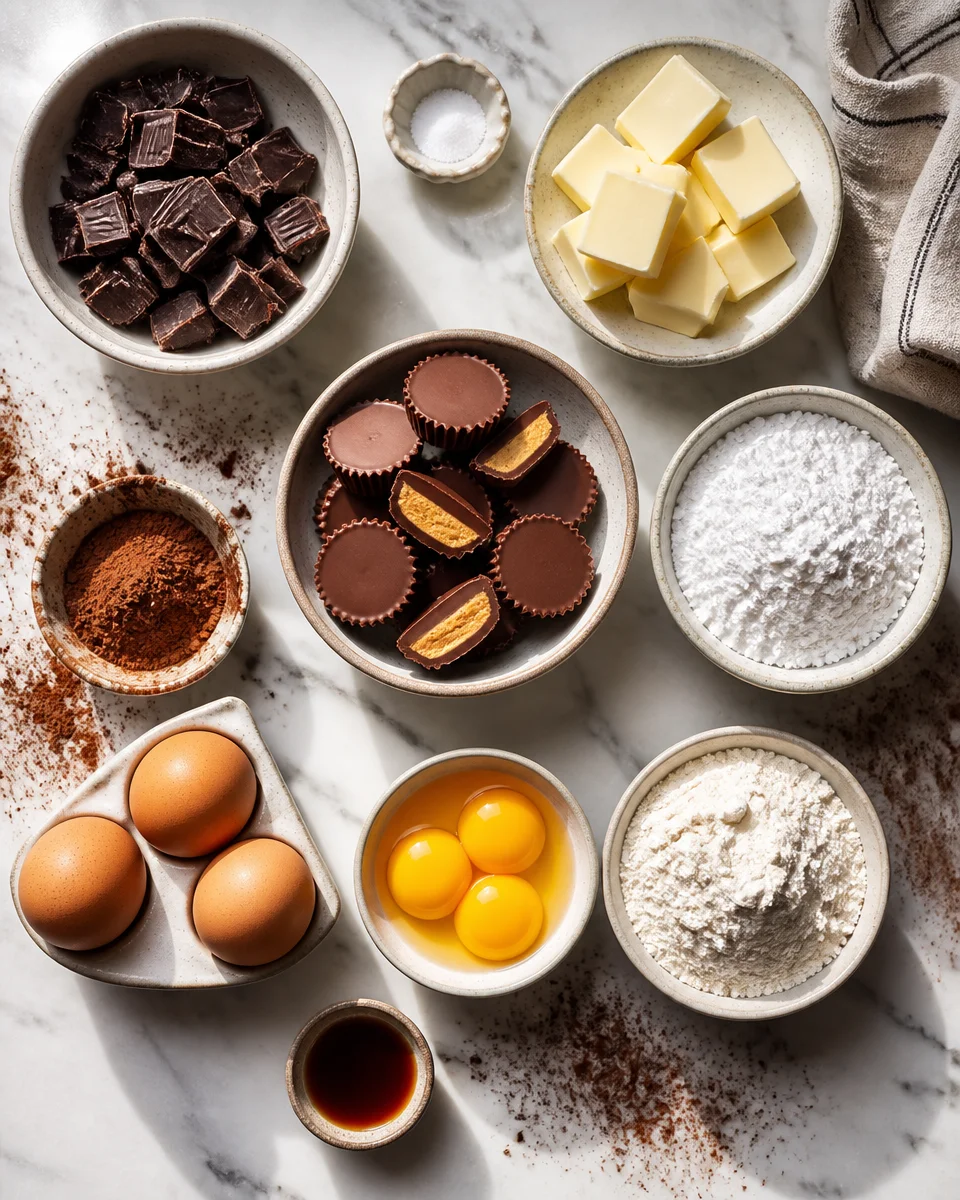
This is not one of those recipes with a long list of mystery items. The ingredients are simple, and you probably have most of them already. The only thing I strongly suggest is using decent chocolate. It does not have to be expensive, just something you actually like the taste of on its own.
Ingredient list and easy swaps
- Semi sweet chocolate: chips or chopped bar chocolate both work.
- Unsalted butter: if you only have salted, just skip added salt later.
- Powdered sugar: helps the batter stay smooth and gives structure without fuss.
- Eggs and egg yolks: the yolks help make that rich center happen.
- All purpose flour: just a little, you are not making a full cake here.
- Pinch of salt: makes the chocolate taste more like chocolate.
- Vanilla: optional, but it rounds out the flavor.
- Peanut butter cups: the star of the show, use mini cups or chopped regular ones.
- Cocoa powder or butter for the ramekins: so they do not stick.
If you are out of peanut butter cups but still want the vibe, you can tuck a teaspoon of peanut butter in the middle with a couple chocolate chips. But honestly, Peanut Butter Cup Lava Cake is at its best when you use the real candy because it melts into that creamy center so nicely.
And if your kitchen is in a peanut butter mood lately, I have to mention these 4 Ingredient Cake Mix Peanut Butter Soft Cookies. They are a totally different texture, but they are the easiest thing to bake when you want something sweet and comforting.
Step-by-Step Guide for Making Perfect Lava Cakes
This is the part where people get nervous, but it is honestly straightforward. The only thing you need to pay attention to is the bake time. Lava cakes do not forgive overbaking. I usually set a timer and also stay nearby because a minute can make the difference between lava and just cake.
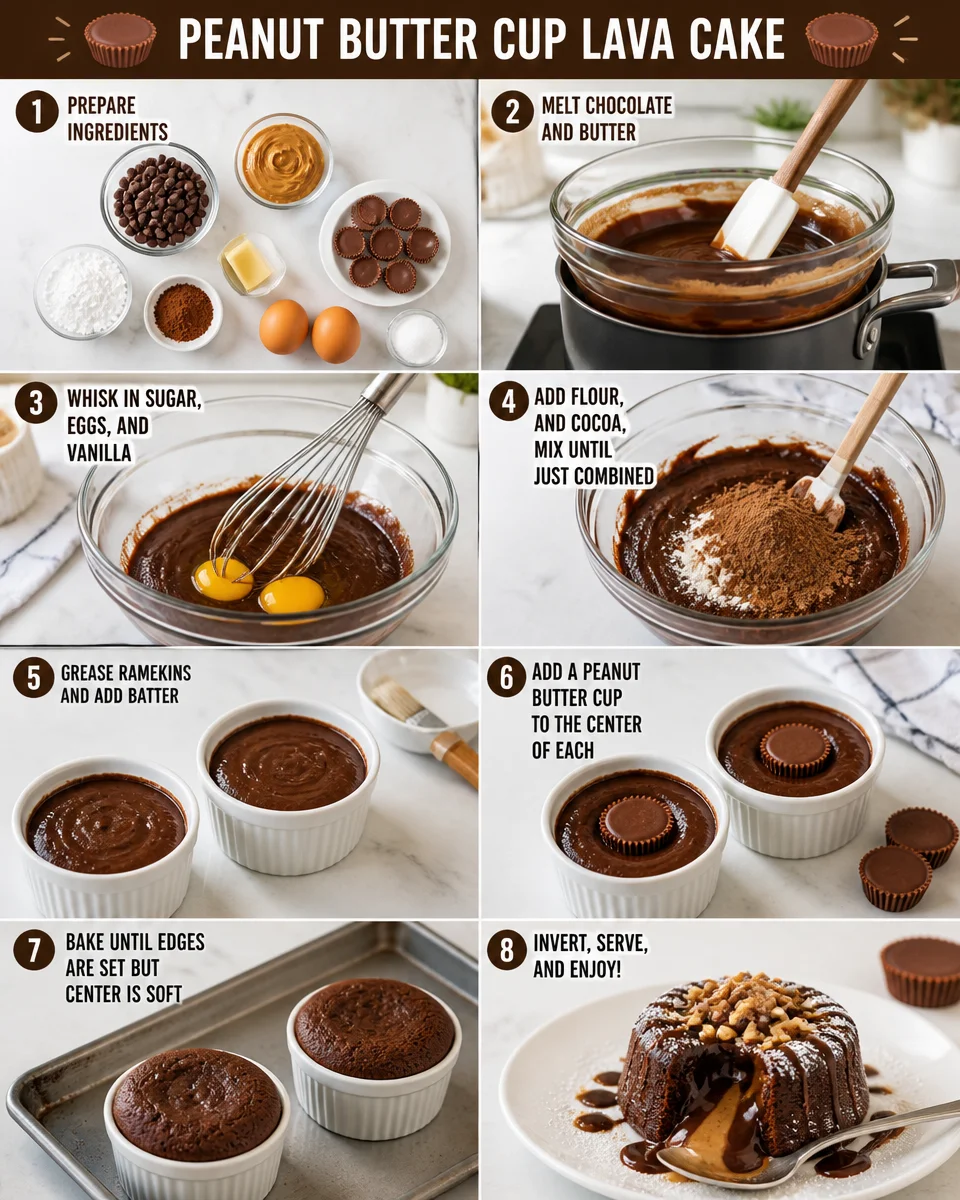
Directions that actually work in a real home kitchen
- Preheat your oven to 425 F. Grease 4 ramekins well, then dust with cocoa powder or a tiny bit of flour.
- Melt the chocolate and butter together. I do this in the microwave in short bursts, stirring each time, until smooth.
- Whisk in powdered sugar until it looks glossy and thick.
- Add the eggs and yolks, then whisk until the batter looks silky. Stir in vanilla and a pinch of salt.
- Fold in the flour gently. Do not overmix. You just want it combined.
- Spoon batter into the ramekins about halfway. Add a peanut butter cup or a few chunks in the center. Cover with more batter until they are about three quarters full.
- Bake 10 to 12 minutes. The edges should look set, but the center should still look a little soft.
- Rest 1 minute, then run a knife around the edges and flip onto a plate, or just eat it straight from the ramekin if you are feeling casual.
My personal serving suggestion is a small scoop of vanilla ice cream or a spoon of whipped cream. If you want a little extra, a drizzle of warm peanut butter on top is kind of ridiculous in the best way.
One more tip from real life: if you are making these for guests, prep the batter, fill the ramekins, and keep them in the fridge for up to a few hours. Then bake right before serving. Just add about 1 extra minute to the bake time since they are cold.
If you love this flavor combo, you might also like these Reeses Peanut Butter Cupcakes. They hit that same candy bar sweetness, but in cupcake form for parties or lunchbox treats.
Recommended Baking Tools for Lava Cakes
You do not need specialty gear, but a couple tools make the process smoother. I am all for low stress baking, and anything that helps prevent sticking or uneven baking is worth it.
Here is what I actually use:
Ramekins: 6 ounce is the sweet spot. You can also use a muffin tin in a pinch, but ramekins hold heat better.
Microwave safe bowl: for melting chocolate and butter without dirtying a saucepan.
Whisk: makes the batter come together fast and smooth.
Rubber spatula: for folding in flour and scraping every bit of chocolate out of the bowl.
Baking sheet: set the ramekins on it so they are easy to move in and out of the oven.

If you are worried about flipping the cakes out, just serve them in the ramekins. No one complains when the dessert tastes like Peanut Butter Cup Lava Cake and they get to dig in with a spoon.
Additional Recipes to Try with Peanut Butter and Chocolate
Once you start baking with peanut butter and chocolate together, it is hard to stop. It is that perfect salty sweet thing that feels like a treat even when you keep the recipe simple.
If you want a few more ideas for your baking list, here are some I have been making on repeat:
For a fruity twist that still feels like dessert heaven, these Peanut Butter Banana Heaven Cupcakes are surprisingly comforting. Banana and peanut butter are best friends, and the chocolate option on top is never a bad idea.
And if you like the idea of warm, rich flavors but want a break from chocolate for a minute, this Brown Butter Peach Heaven Cupcakes is a fun change of pace. I still think chocolate is king, but peach and brown butter can definitely steal the show sometimes.
Common Questions
How do I know when the lava cakes are done?
The edges should look set and slightly puffed, but the center should still look softer. For most ovens, 10 to 12 minutes at 425 F does it.
Can I make Peanut Butter Cup Lava Cake ahead of time?
Yes. Fill the ramekins and refrigerate for a few hours. Bake when you are ready to serve, adding about 1 extra minute.
What if I do not have ramekins?
You can use a muffin tin. Grease it well, and check the bake time early since muffin tins can cook a bit faster.
Why did my center not turn molten?
Most likely it baked too long. Next time, pull them out a minute earlier. Also make sure your oven is fully preheated.
Can I freeze them?
You can freeze baked cakes, but the texture is best fresh. If you do freeze them, reheat gently so the center warms without drying the edges.
A sweet little pep talk before you bake
If you have been wanting to try a molten dessert at home, Peanut Butter Cup Lava Cake is a really friendly place to start. You do not need fancy skills, just good timing and ingredients you actually enjoy eating. If you want to compare methods or see other tested versions, I have bookmarked Peanut Butter Chocolate Lava Cakes – Sally’s Baking Addiction and Peanut Butter Chocolate Molten Lava Cake – RecipeTin Eats because they are both super helpful references. Now grab those peanut butter cups, set your timer, and let the oven do its thing. Once you crack into that warm center, you will get why I keep coming back to Peanut Butter Cup Lava Cake.
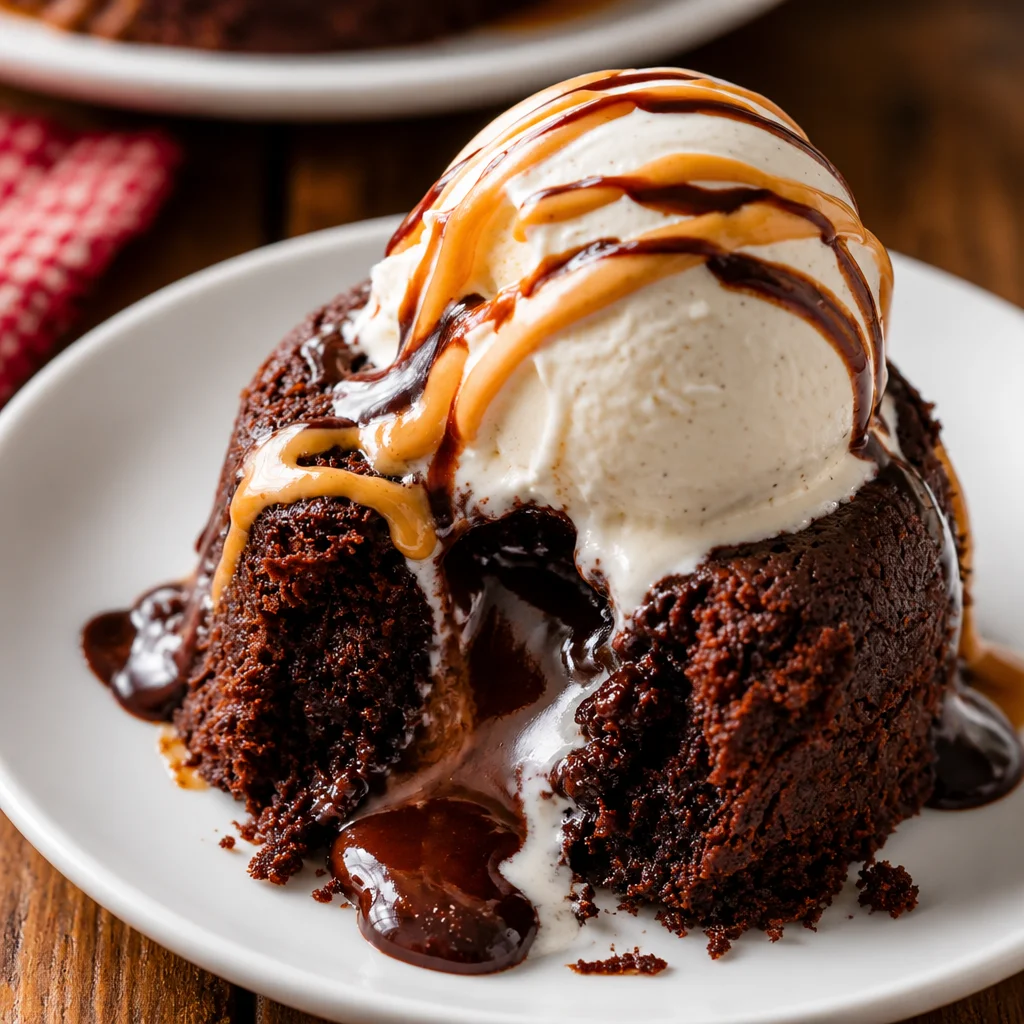
Peanut Butter Cup Lava Cake
Ingredients
Method
- Preheat your oven to 425°F (220°C). Grease 4 ramekins well, then dust them with cocoa powder or a tiny bit of flour.
- Melt the chocolate and butter together in the microwave in short bursts, stirring each time until smooth.
- Whisk in powdered sugar until the mixture looks glossy and thick.
- Add in the eggs and yolks, and whisk until the batter is silky. Stir in vanilla and a pinch of salt.
- Fold in flour gently, ensuring not to overmix. You’re just looking to combine.
- Spoon batter into the ramekins about halfway. Add a peanut butter cup or a few chunks in the center. Cover with more batter until they are about three quarters full.
- Bake for 10 to 12 minutes, until the edges look set but the center is still soft.
- Rest for 1 minute, then run a knife around the edges to flip onto a plate, or eat directly from the ramekin if preferred.
