


CHOCOLATE BIRD NEST is my go to treat when I need something cute, chocolatey, and fast for spring parties, school events, or that moment when you realize you promised to bring dessert and totally forgot. It is the kind of recipe that looks like you tried really hard, but secretly it is mostly stirring and scooping. I first made these when I wanted an Easter dessert that did not involve turning my kitchen into a flour storm. The best part is that you do not need an oven, and you can easily make a whole batch while chatting or watching a show. If you like crunchy, melty, sweet bites with a little pop of candy on top, you are in the right place.
The Story Behind This Recipe
Here’s why I love this Chocolate Bird Nest: it uses pantry staples and it tastes like a bakery treat. CHOCOLATE BIRD NEST is my go to treat when I need something cute, chocolatey, and fast for spring parties, school events, or that moment when you…

No-Bake Bird Nest Cookies
These no bake nests are basically a chocolate base mixed with something crunchy, then shaped into little nests with a dip in the middle for candy eggs. When they set, they hold their shape and you get that perfect combo of crisp and creamy in every bite.
I love making CHOCOLATE BIRD NEST treats because they are so forgiving. If your nests are not perfectly round, they still look adorable and homemade, which is the vibe I actually want. Plus, kids can help with the candy eggs part, and honestly that is the only step they care about anyway.
If you are already in a chocolate mood, you might also like something a little fancier but still fun like chocolate covered strawberry brownies. I make those when I want big “wow” energy, but for quick holiday trays, these nests win.
Texture wise, you get a snap from the crunchy “twigs” and then that chocolate melt. The top is the best part because you can decorate each nest differently, which makes the whole platter look extra special without extra work.
What You’ll Need
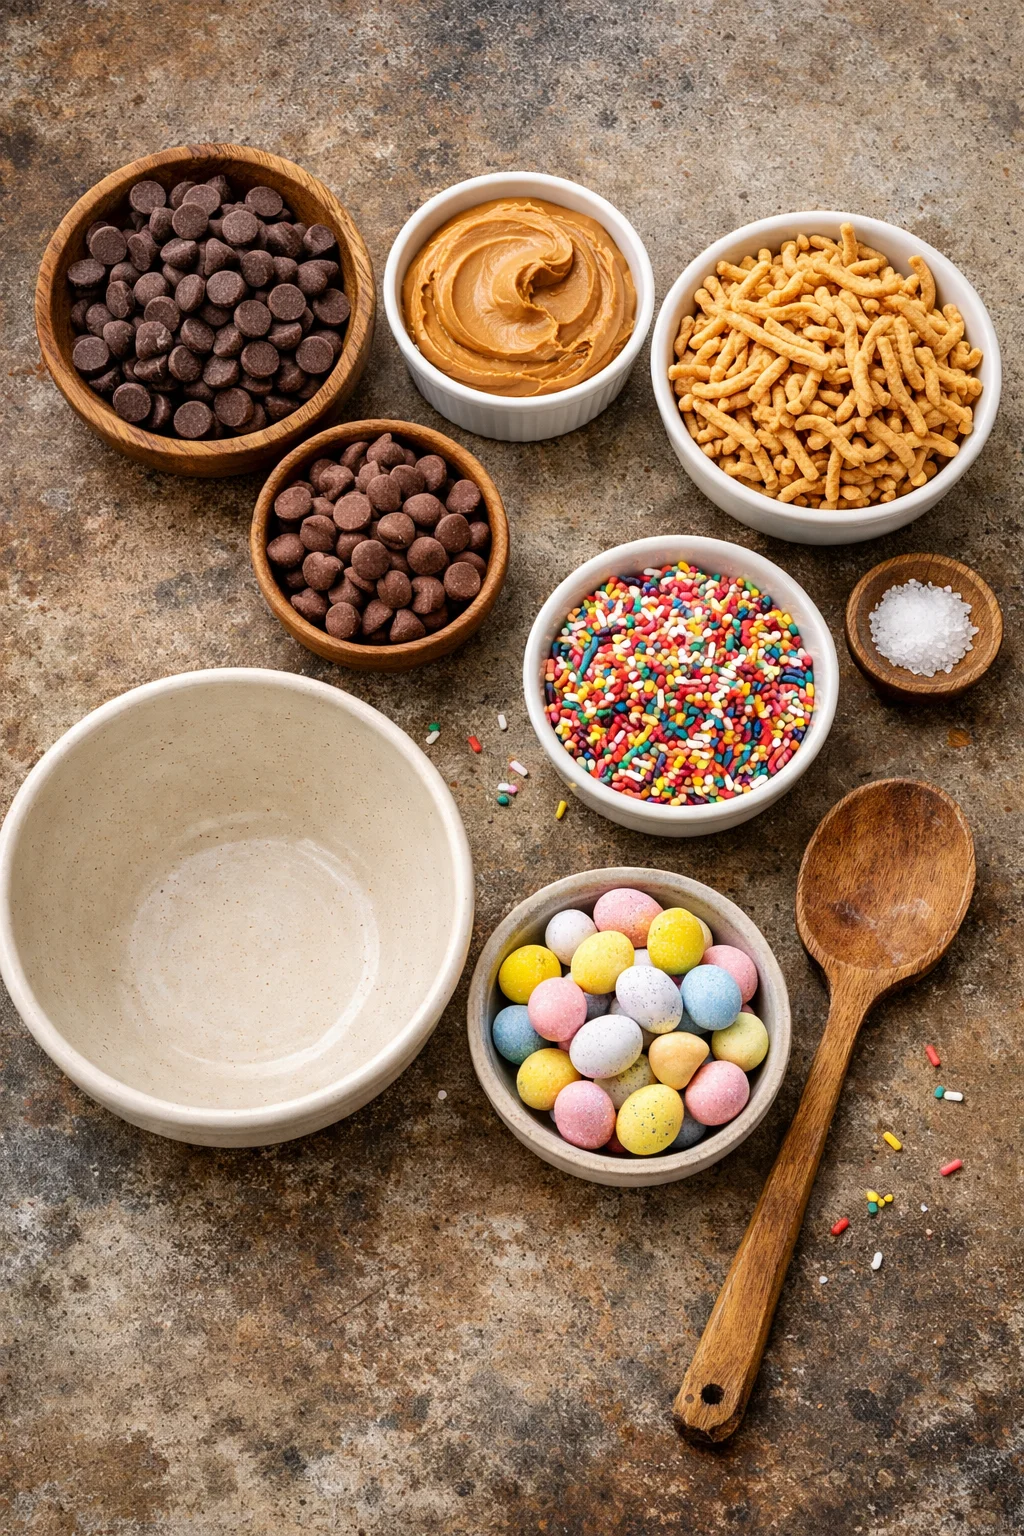
Here is the simple shopping list. I am giving you a classic version, but you can swap things based on what you like or what you have.
- Chocolate: semi sweet chocolate chips, milk chocolate chips, or a mix
- Peanut butter or cookie butter: optional, but it helps the chocolate set with a smoother bite
- Crunchy base: chow mein noodles are the classic “nest” look, or you can use pretzel sticks broken up
- Mini candy eggs: chocolate eggs or pastel candy eggs
- Pinch of salt: especially helpful if your chocolate is very sweet
- Optional sprinkles: if you want extra color
For tools, you just need a microwave safe bowl, a spoon, and a baking sheet lined with parchment paper. A small cookie scoop helps with even sizes, but a spoon works fine.
Quick note on chocolate: use decent chips or a bar you like eating. Since the flavor is front and center, it really matters here. If you are into creamy layered chocolate desserts too, bookmark chocolate cheesecake trifle for another easy crowd pleaser.
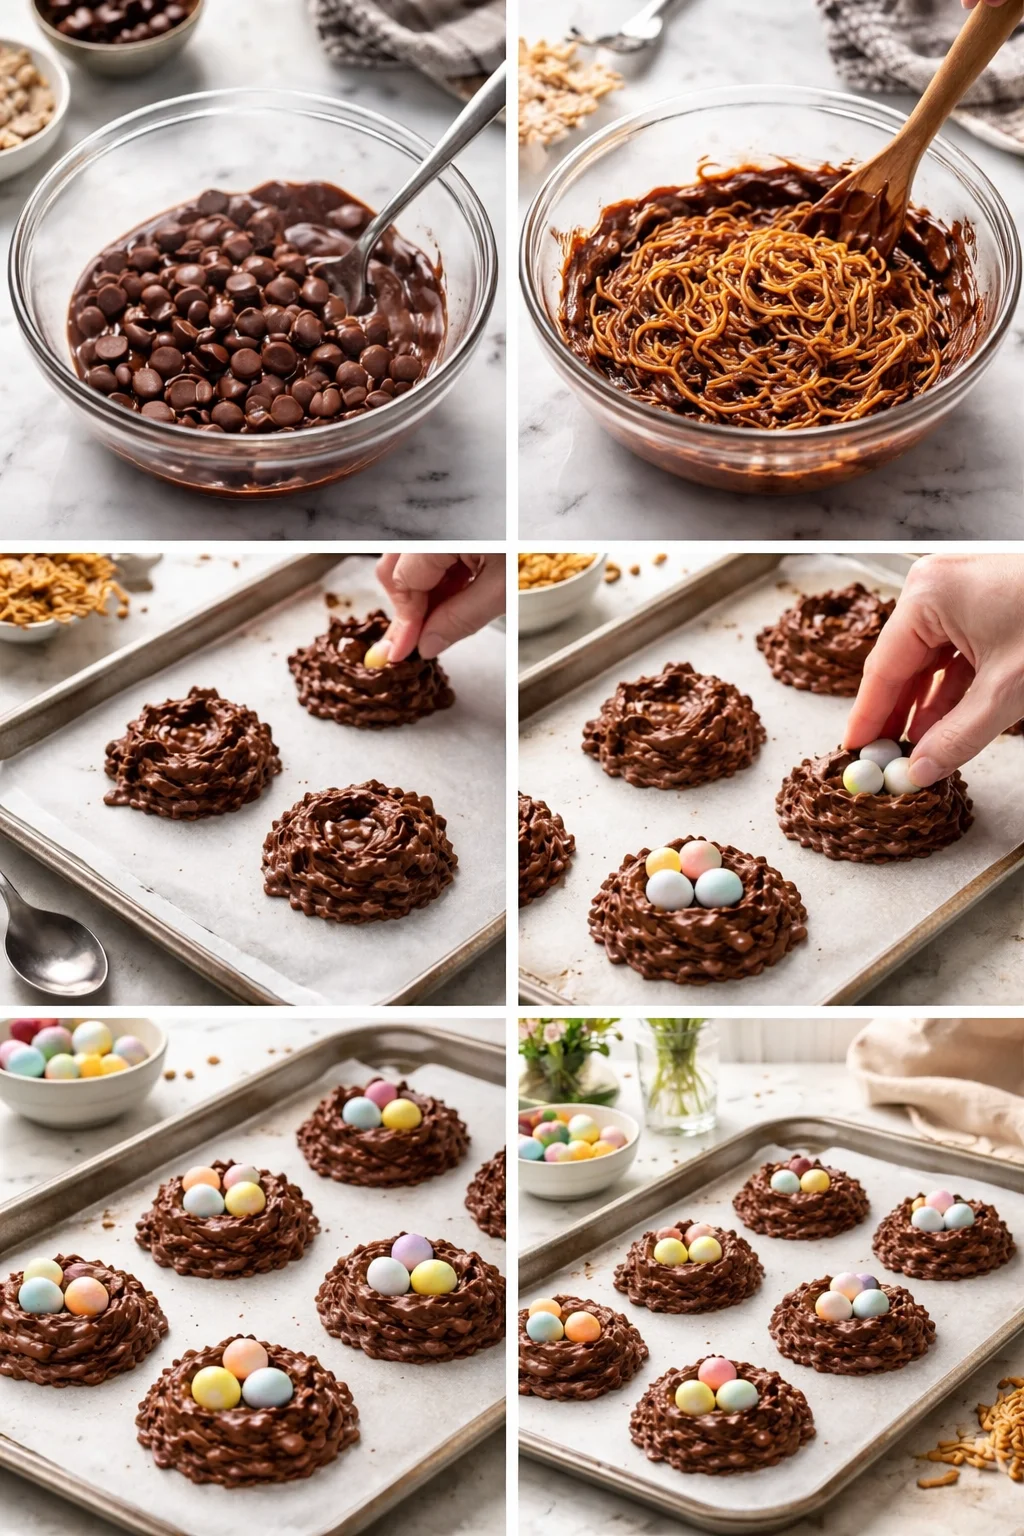
Photo Tutorial: How to Make Easter Birds Nest Cookies {video_youtube}
This is the part where it all comes together. I am going to describe it like I am standing in the kitchen with you, because that is genuinely how simple it is.
Step by step in plain language
1) Melt the chocolate. Add chocolate chips to a microwave safe bowl. Microwave for 20 to 30 seconds at a time, stirring each time. Stop when it is mostly melted and just needs a final stir to go smooth. If you are using peanut butter, stir it in now until glossy.
2) Add the crunch. Toss in chow mein noodles or your crunchy choice. Stir gently until everything is coated. You want the noodles coated but not crushed to dust, so take it easy here.
3) Scoop and shape. Drop spoonfuls onto your lined tray. Then use the back of a spoon or your thumb to press a little dip in the center. That is your “nest” space.
4) Add candy eggs. While the chocolate is still soft, place 2 to 4 mini eggs in the center. Press lightly so they stay put.
5) Let them set. Leave them at room temp if your kitchen is cool, or pop the tray in the fridge for about 20 to 30 minutes until firm.
I have learned one tiny trick: if your mixture feels too stiff to shape, the chocolate probably cooled down too much. Just warm it for 10 seconds and stir again. And if you love that chewy chocolate and crunchy combo, you might also be into chocolate chip cookie dough brownie bites for a different kind of bite sized treat.
“I made these for my kid’s class party and the tray was empty in five minutes. The nests looked adorable, and I did not have to bake a thing.”
Variations
This is where you can make CHOCOLATE BIRD NEST your own. I like having a “classic” version and one fun twist on the same platter.
Easy swaps that still work
Dark chocolate: A little less sweet and super rich. If you do dark chocolate, I really recommend that pinch of salt.
White chocolate: Pretty for spring, especially with pastel eggs. Just know it is sweeter and softer, so chill it to set.
Butterscotch or peanut butter chips: Mix a handful into the chocolate for a different flavor.
Pretzel nests: Break thin pretzel sticks into shorter pieces. The salty crunch is amazing.
Nut free version: Skip peanut butter and use a teaspoon of coconut oil to help the chocolate melt smoothly.
Extra decorations: Toasted coconut flakes look like little nest fibers, and they taste great too.
For a fruity chocolate vibe (and a really pretty dessert tray), you could pair these with chocolate covered cherries. It is a nice way to add something fresh tasting next to the crunchy nests.
One more fun idea: add a tiny dot of melted chocolate to “glue” on a little candy chick or a small jelly bean. It is not necessary, but it is cute.
Tips and FAQs for Success
I have made these enough times to know what goes wrong, and it is usually one of three things: overheated chocolate, not enough coating, or warm room temperature. Here is how to keep it easy.
My best real life tips
Do not overheat the chocolate. If it gets grainy, it is harder to coat the noodles and the nests look messy. Short microwave bursts and lots of stirring are your friend.
Work quickly once the crunch goes in. The mixture starts setting as it cools, so scoop and shape right away.
Chill if your kitchen is warm. If it is a hot day, just use the fridge so the nests hold their shape.
Line your tray. Parchment paper saves you from sticky cleanup and makes lifting the nests easy.
Size matters. Smaller nests set faster and are easier to eat, especially for kids.
Common Questions
1) Can I make CHOCOLATE BIRD NEST ahead of time?
Yes. I usually make them 1 to 2 days early. Store them in an airtight container in a cool spot.
2) How do I store them and how long do they last?
Keep them airtight. They are best within 3 to 5 days for maximum crunch. After that, they still taste good but the crunch can soften a bit.
3) Can I freeze them?
You can, but I do not love the texture after thawing. The chocolate can get a little cloudy and the crunch is not as crisp. If you must freeze, separate layers with parchment and thaw in the fridge.
4) What if I do not have chow mein noodles?
Pretzels work, and so does crispy rice cereal. It will not look exactly the same, but it will still taste great.
5) Why did my nests not set?
Usually the chocolate ratio is off or the room is too warm. Chill them longer. Next time, use a bit more chocolate or add a spoonful of peanut butter to help firm things up.
A sweet little wrap up before you start
If you want a no stress holiday treat, CHOCOLATE BIRD NEST is the kind of recipe that delivers big cuteness with minimal effort. You melt, stir, scoop, decorate, and you are done. For extra inspiration, I like comparing different approaches like Bird’s Nest Cookies | easygayoven and the super pretty version from Chocolate Easter Bird’s Nest Cookies – SugarHero. Try a classic batch first, then do a second batch with a twist once you know your favorite texture. You are going to love how fast these disappear from the plate.

No-Bake Bird Nest Cookies
Ingredients
Method
- Melt the chocolate. Add chocolate chips to a microwave safe bowl. Microwave for 20 to 30 seconds at a time, stirring each time until mostly melted.
- If using peanut butter, stir it in until glossy.
- Add the chow mein noodles or your crunchy choice into the melted chocolate. Stir gently until everything is coated.
- Drop spoonfuls onto the lined baking tray. Use the back of a spoon or your thumb to create a dip in the center.
- Place 2 to 4 mini eggs in the center of each nest while the chocolate is still soft.
- Let them set at room temperature or pop the tray in the fridge for about 20 to 30 minutes until firm.