

Red Velvet Crinkle Cookies are my go to move when I want something cute, chocolatey, and festive without turning my kitchen into a full on bakery project. You know those days when you promised to bring dessert, but time is not on your side? These cookies save me every single time. They look fancy with that snowy powdered sugar crackle, but the steps are honestly pretty simple. Plus they taste like a soft brownie cookie with a hint of vanilla and cocoa. If you have ever had crinkle cookies that turned out flat or dry, don’t worry, I’ve been there and I’ll walk you through what actually works. 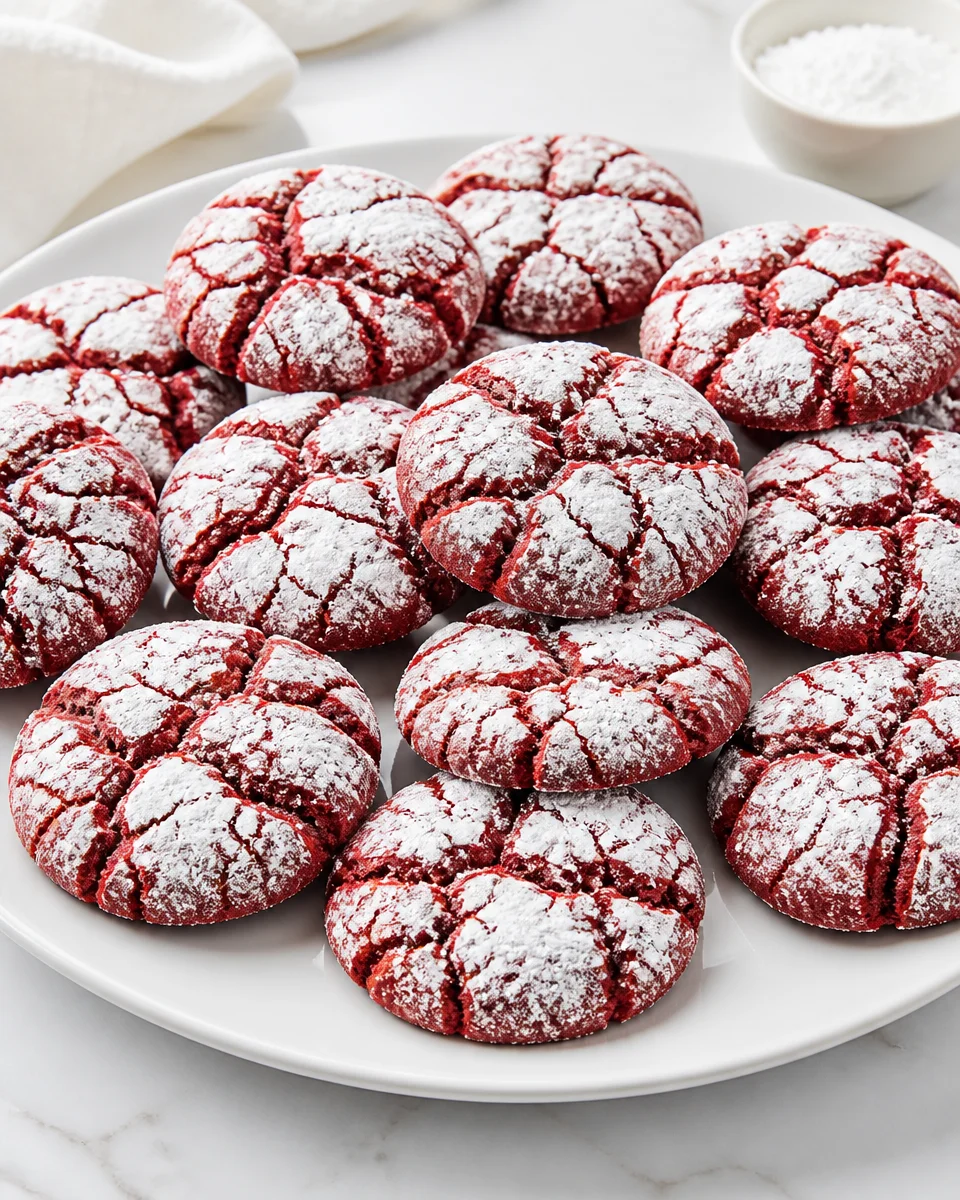
What are red velvet crinkle cookies?
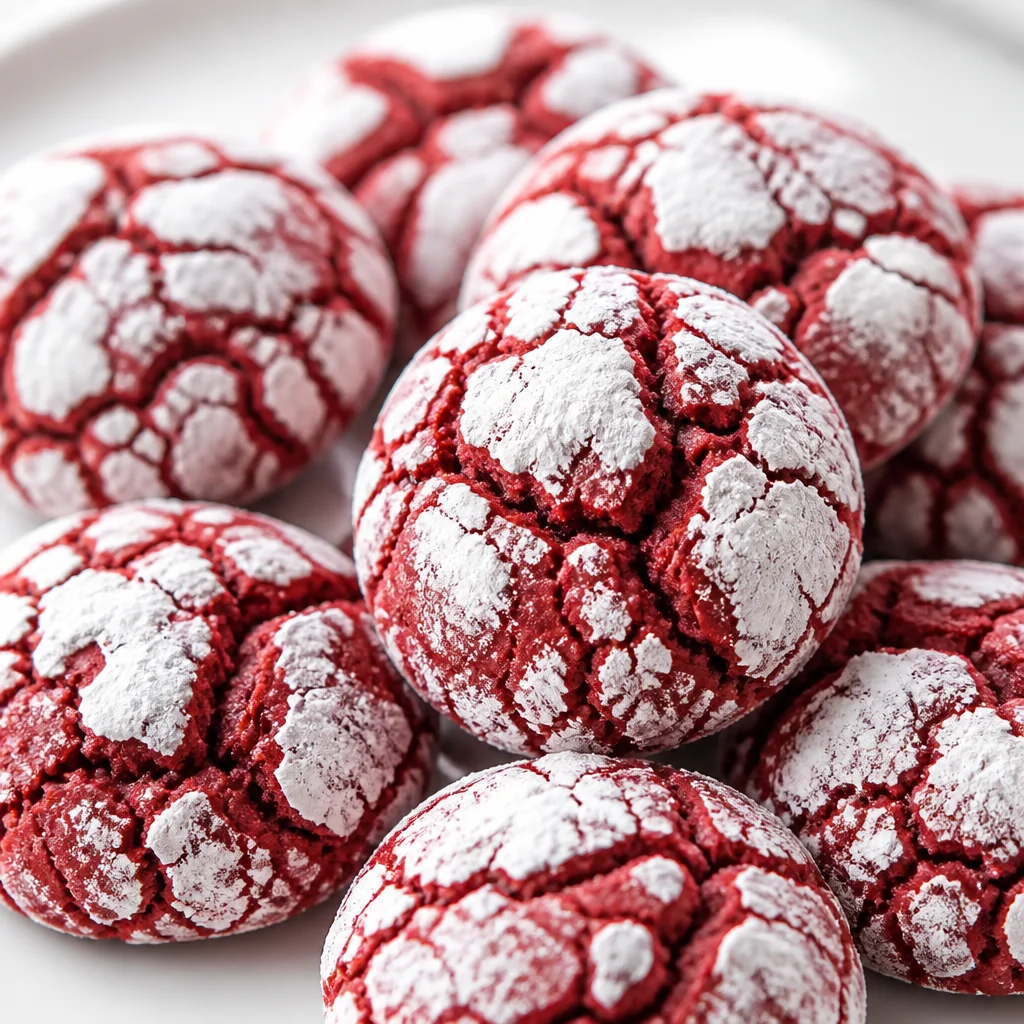
They are soft, fudgy cookies with that classic red velvet vibe, meaning a little cocoa, a little vanilla, and that deep red color that makes people do a double take. The “crinkle” part is the magic finish on top. You roll the dough balls in powdered sugar, bake them, and the cookies spread and crackle so you get those pretty white lines over the red cookie.
Texture wise, I think the best Red Velvet Crinkle Cookies are slightly chewy on the edges and super soft in the middle. Not cakey, not crunchy. More like a brownie had a cookie moment.
Flavor note: red velvet is not just chocolate. It is mild cocoa plus vanilla and a tiny tang if you use buttermilk or a bit of vinegar. I keep mine easy but still flavorful.
If you are in a red velvet mood and want another fun dessert to bookmark, this one is dangerously good: Cookies & Cream Red Velvet Brownies. It is like a party in a pan.
How to make crinkle cookies
I’m going to explain it like I would to a friend standing in my kitchen. No fancy chef talk, just what you actually do.
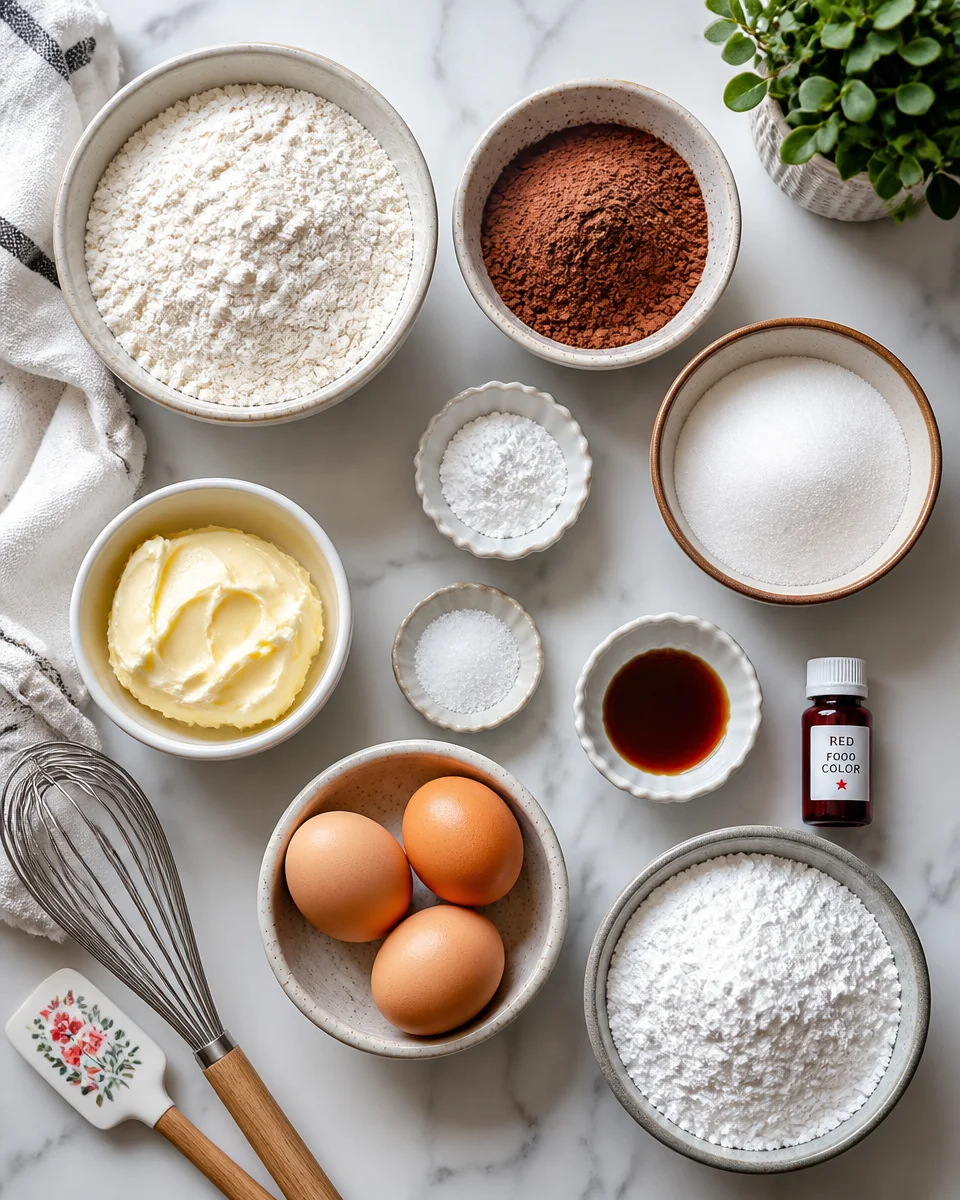
Ingredients you will need
- All purpose flour
- Unsweetened cocoa powder (just a little)
- Baking powder
- Salt
- Butter (softened)
- Granulated sugar
- Eggs
- Vanilla extract
- Red food coloring (gel or liquid, both work)
- Powdered sugar for rolling
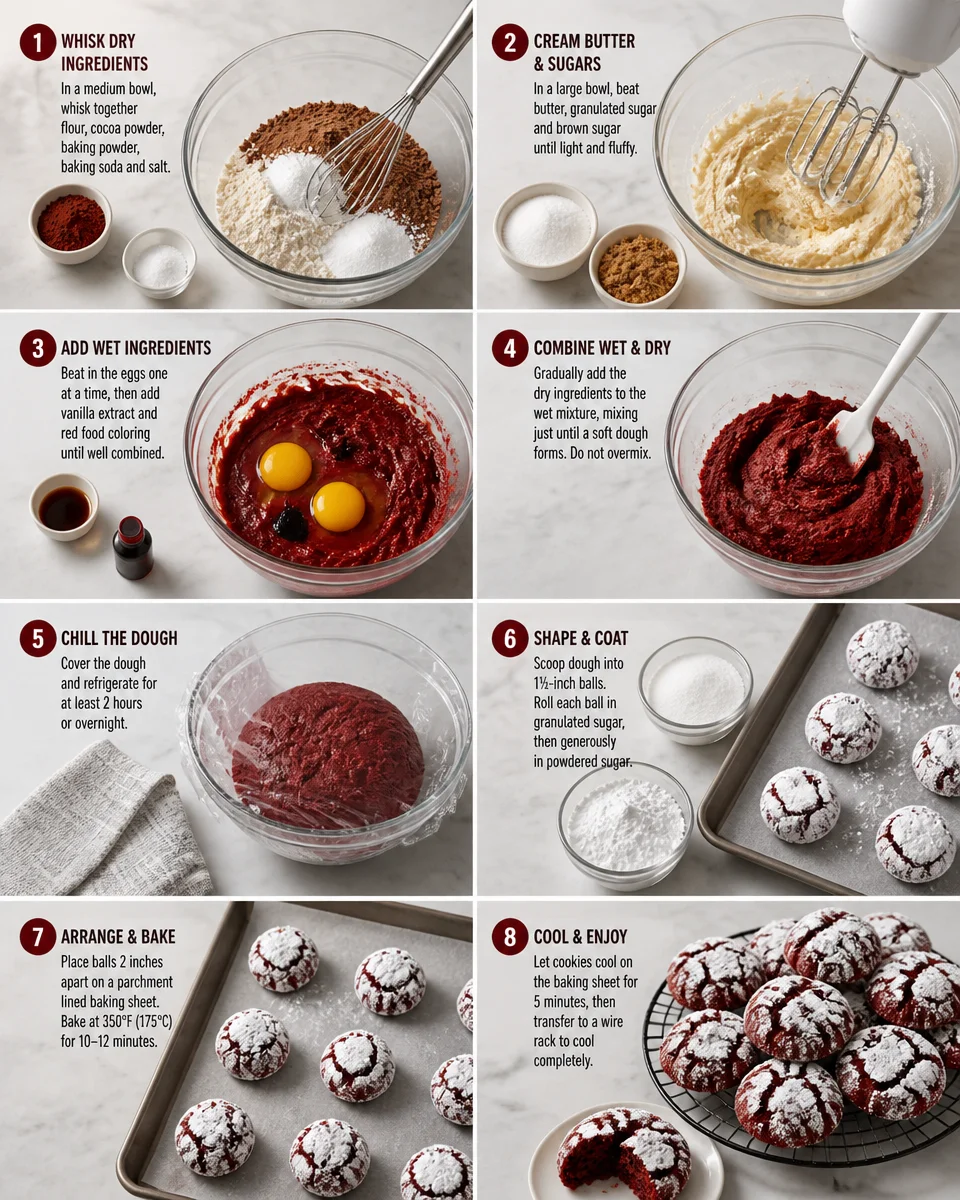
Directions in plain language
1) Mix your dry stuff in one bowl: flour, cocoa, baking powder, and salt.
2) In another bowl, cream the butter and sugar until it looks lighter and kind of fluffy. This helps the cookies feel soft instead of heavy.
3) Add eggs and vanilla, then mix again. Add your red coloring until you like the shade. I usually go a bit deeper than I think I need because the color mellows slightly when baked.
4) Add the dry mix into the wet mix and stir until you don’t see flour streaks. The dough will be sticky. That is normal and honestly part of the crinkle cookie life.
5) Chill the dough. Yes, really. We will talk more about why in a second.
6) Scoop dough into balls. I like about 1 to 1.5 tablespoons each. Roll them quickly between your palms.
7) Roll each ball in powdered sugar. My little trick is to roll once, then roll again for extra snowy coverage.
8) Bake until the tops are crackly and the edges look set, but the centers still look a tiny bit soft. Let them cool on the tray for a few minutes before moving them.
While we are chatting cookies, if you like super simple recipes for busy days, you should absolutely peek at 3 Ingredient Peanut Butter Cookies. They are the definition of low effort, high reward.
Tips for the best crinkle cookies
I have made these enough times to know what makes them go from “cute” to “wow, you made these?” Here are the tips I actually use.
Tip 1: Measure flour the gentle way. If you pack flour into the cup, you can end up with dry cookies. Spoon it into the cup and level it off.
Tip 2: Don’t skip the second powdered sugar roll. This is how you get that bold crackle look. The first layer melts a bit, the second one stays prettier.
Tip 3: Watch your bake time like a hawk. Overbaked crinkle cookies lose that soft center. Pull them when they look set around the edges and still slightly underdone in the middle. They finish baking on the hot tray.
Tip 4: Use a scoop if you can. Even cookie sizes bake evenly. It also makes the whole thing less messy.
Tip 5: Cocoa matters. Use unsweetened cocoa powder, not hot chocolate mix. Hot chocolate mix has sugar and other ingredients that change the dough.
I tried this method with the double powdered sugar roll and the chill time, and my cookies finally cracked the way they are supposed to. They stayed soft for days, too.
If you want another red velvet dessert that feels like a celebration, I love making this for gatherings: Layered Red Velvet Cheesecake Bundt Cake. It is a total showstopper, even if you keep the decorating simple.

Why do I have to chill the dough?
I know, chilling feels like the annoying step when you just want cookies now. But for Red Velvet Crinkle Cookies, it is the difference between thick and fudgy versus flat and kind of sad.
Chilling helps for a few reasons:
First, the butter firms up, so the cookies do not spread too fast in the oven. That gives you a thicker cookie with a softer center.
Second, the dough gets easier to roll. Sticky dough is normal here, but chilled dough is way less frustrating.
Third, the crackle look is better when the outside sets while the inside is still expanding. Cold dough helps create that timing.
How long should you chill? I aim for at least 2 hours. Overnight is totally fine if you cover it well. If you are really in a rush, 45 minutes in the freezer can help, but don’t forget about it in there.
By the way, if you are a cheesecake fan and also a cookie dough fan, this is a fun rabbit hole: Red Velvet Cookie Dough Cheesecake. I made it once for a birthday and people still bring it up.
Cookie baking tools
You do not need a fancy kitchen to make these, but a few tools make it smoother and less messy.
- Mixing bowls (one for dry, one for wet)
- Hand mixer or stand mixer (hand mixer is totally fine)
- Cookie scoop for even sizing
- Baking sheets
- Parchment paper or a silicone baking mat
- Cooling rack (helpful, not mandatory)
If you are trying to build a little cookie collection for your recipe box, this easy one is worth saving too: 4 Ingredient Cake Mix Peanut Butter Soft Cookies. It is one of those “how is this so good?” recipes.
Common Questions
1) Can I make the dough ahead of time?
Yes. You can chill it overnight. Just keep it covered so it does not dry out. If it gets too firm, let it sit at room temp for 10 to 15 minutes so you can scoop it.
2) Why didn’t my powdered sugar stay white?
Usually it is because the dough was too warm or you only rolled once. Chill the dough well and do that double roll in powdered sugar.
3) Can I use gel food coloring?
Absolutely. Gel gives a stronger color with less liquid, which is great. Start small, then add more until you like the shade.
4) How do I know when they are done?
Look for crackly tops and edges that look set. The centers should still look a bit soft. They firm up as they cool.
5) How should I store them?
Keep them in an airtight container at room temp for about 3 to 4 days. If you want them extra soft, toss in a little piece of bread. It sounds weird, but it works.
A sweet little wrap up before you bake
If you want a cookie that looks special but still feels easy, Red Velvet Crinkle Cookies really hit the spot. Chill the dough, go heavy on the powdered sugar, and pull them from the oven while the centers are still soft. If you want to compare methods and see other bakers’ spins, I like checking Red Velvet Crinkle Cookies – Broma Bakery and Red Velvet Crinkle Cookies – Barley & Sage when I’m in a tweaking mood. Now go make a batch, and try not to eat three before they cool, because I never manage that part.
Red Velvet Crinkle Cookies
Ingredients
Method
- Mix flour, cocoa powder, baking powder, and salt in one bowl.
- In another bowl, cream together the softened butter and granulated sugar until lighter and fluffy.
- Add eggs and vanilla to the butter mixture, and mix well. Add the red food coloring until reaching desired shade.
- Gradually stir the dry ingredients into the wet mixture until just combined. The dough should be sticky.
- Chill the dough for at least 2 hours.
- Preheat the oven and line a baking sheet with parchment paper.
- Scoop about 1 to 1.5 tablespoons of dough and roll into balls.
- Roll each ball in powdered sugar, coating well.
- Bake until the tops are crackly and the edges look set, but the centers are still slightly soft, about 10 minutes.
- Allow cookies to cool on the tray for a few minutes before transferring to a cooling rack.
