


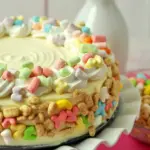
Lucky Charms No-Bake Cheesecake is the kind of dessert you pull together when you want something festive without turning on the oven. Maybe you have a birthday, a classroom treat, or just a midweek craving for something creamy and nostalgic. This recipe is colorful, quick, and surprisingly sturdy, thanks to the marshmallow magic. The crust has a gentle crunch that balances the fluffy filling, and every slice looks like a party. If you’ve ever wanted a dessert that makes kids beam and adults sneak seconds, this is it.
The Story Behind This Recipe
Hey, I’m Alexandraa! This Lucky Charms No-Bake Cheesecake was built for busy nights: simple steps, reliable results, and flavor that makes people ask for seconds. Lucky Charms No-Bake Cheesecake is the kind of dessert you pull together when you want something festive without turning on the oven. Maybe you have a…
Ingredients for No-Bake Lucky Charms Marshmallow Cheesecake
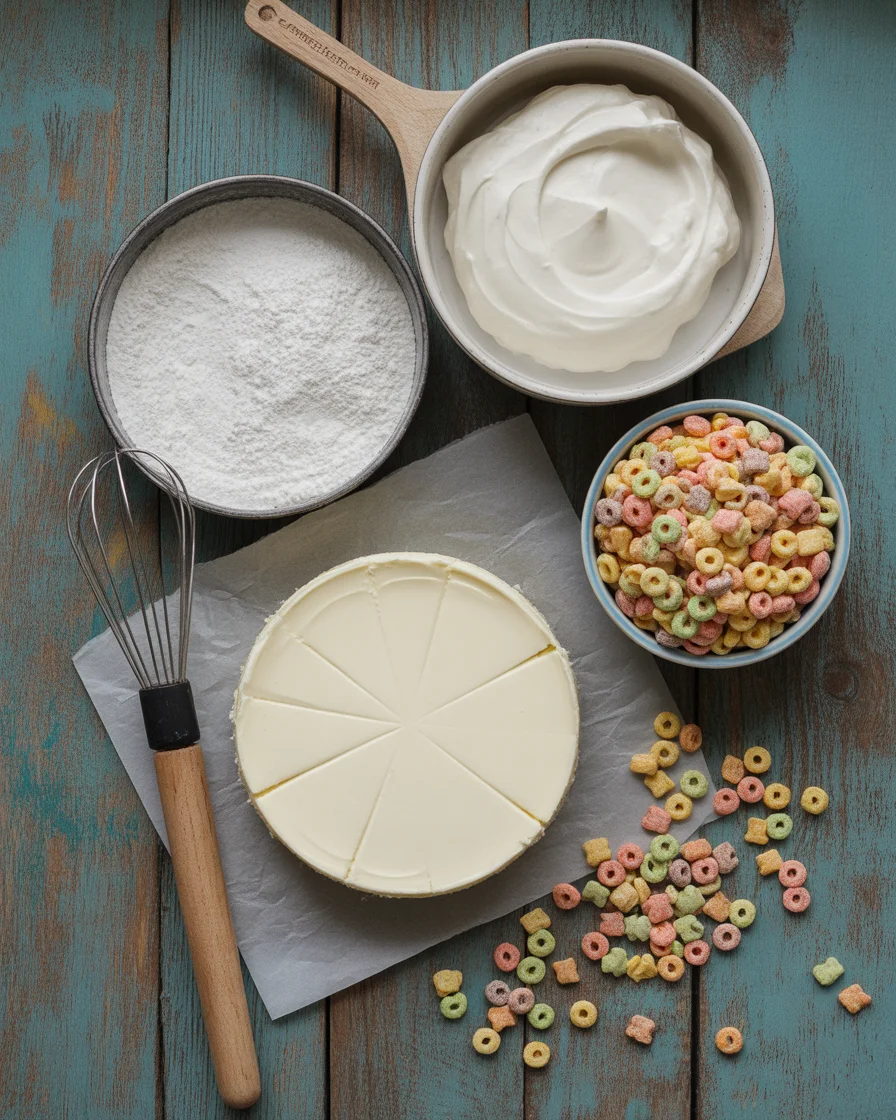
Here’s everything you need to make a silky, marshmallowy cheesecake with a fun cereal crunch. I’m giving both cups and metric so you can bake your way. The amounts are just right for a 9-inch springform pan.
Equipment you’ll need
Springform pan is ideal, but a deep pie dish works in a pinch. You’ll also want a large saucepan, a rubber spatula, a hand mixer or stand mixer, and parchment paper.
- 5 cups Lucky Charms cereal, divided (4 cups for crust, 1 cup for garnish), about 200 g
- 6 tablespoons unsalted butter, melted, 85 g
- 1/8 teaspoon fine salt for the crust
- 4 cups mini marshmallows, 200 g
- 16 ounces full-fat cream cheese, softened, 450 g
- 1/2 cup powdered sugar, sifted, 60 g
- 1 teaspoon pure vanilla extract
- 1/8 teaspoon fine salt for the filling
- 1/3 cup sour cream or plain Greek yogurt, 80 g
- 1 cup cold heavy cream, 240 ml, whipped to soft peaks
- Optional: 2 to 3 drops gel food coloring for pastel swirls
- Extra Lucky Charms marshmallows for topping
Why these ingredients work: The cereal crust holds together with butter and a pinch of salt for balance. Melted marshmallows add body and sweetness without eggs or gelatin. Whipped cream lightens the filling so it sets creamy, not dense.
Allergy or swap tips: Use gluten-free marshmallow cereal if needed. Dairy-free cream cheese and coconut whip will change the flavor slightly but still set nicely. Taste and adjust sweetness since dairy-free alternatives can vary.

How to Make No-Bake Lucky Charms Marshmallow Cheesecake
Clear a little space in your fridge for the chill time. Most of the hands-on work is done in 20 minutes. The rest is waiting, which is the hardest part.
Make the crust
- Prep the pan: Line the base of a 9-inch springform pan with a round of parchment. Lightly butter the sides to help releases later.
- Crush the cereal: Pulse 4 cups Lucky Charms in a food processor until the texture looks like coarse sand with a few teeny pebbles. No processor? Pop the cereal into a bag and crush with a rolling pin.
- Mix and press: Stir the crumbs with melted butter and a pinch of salt. Pour into the pan and press firmly with the bottom of a measuring cup. Aim for an even layer with a slight lip along the walls.
- Chill: Freeze the crust for 10 minutes while you make the filling. A cold crust grips the filling better.
Make the filling
- Melt the marshmallows: In a large saucepan over low heat, melt mini marshmallows with 1 tablespoon of water, stirring gently until smooth. Remove from heat and let cool for 5 minutes so it doesn’t melt the cream cheese.
- Beat the cream cheese: In a bowl, beat softened cream cheese until ultra smooth. Add powdered sugar, vanilla, salt, and sour cream. Beat again until no lumps remain.
- Combine: Pour the slightly cooled melted marshmallows into the cream cheese mixture. Mix on low just until blended.
- Fold in the cream: Whip heavy cream to soft peaks. Gently fold into the filling using a spatula. If using food coloring, swirl tiny drops in at the very end for a pastel marbled look.
- Fill and set: Spread the filling into the prepared crust and smooth the top. Chill at least 6 hours, preferably overnight, until firm enough to slice.
- Decorate: Right before serving, sprinkle on the remaining cereal and extra marshmallows. Keep it playful and uneven for that whimsical bakery vibe.
For another quick treat that requires zero oven time, try the crisp, chocolatey layers in this no-bake crunchie slice. It’s a great companion to your Lucky Charms No-Bake Cheesecake on a party dessert table.
Tips for the Perfect Marshmallow Cheesecake
Use fresh cereal. Stale cereal turns chewy in the crust and topping. Fresh gives you that delicate crunch that contrasts with the creamy filling.
Measure with care. Too much butter makes the crust greasy, and not enough makes it crumbly. If your crust seems dry, stir in 1 extra tablespoon of melted butter.
Beat cream cheese until silky. Lumps are hard to fix later. Start with fully softened cream cheese and beat it smooth before adding anything else.
Cool the marshmallows before mixing. Hot marshmallows can melt the cream cheese and deflate the whipped cream. Five minutes of cooling does the trick.
Do not rush the chill time. The filling needs hours in the fridge to set. Overnight yields the cleanest slices and the creamiest texture. If you’re in a pinch, pop the pan in the freezer for 30 minutes before slicing, but keep an eye on it.
Want something lighter for a weekday dessert? You might love this cool and fruity blueberry cheesecake parfait. It’s a great way to use leftover berries or whipped cream.
Make-ahead and storage
Make-ahead: The assembled cake keeps well for 2 days in the fridge. Add cereal topping right before serving so it stays crisp. If you want to prep earlier, freeze the undecorated cheesecake for up to 1 month, then defrost overnight in the fridge.
Storage: Refrigerate leftovers covered. The cereal on top will soften by day two, but the flavor stays wonderful. For best texture, store topping separately and add fresh cereal to each slice.
“I brought this to a family game night, and even the non-sweet tooth folks asked for seconds. The texture was spot on and the colors made everyone smile. I made it the night before and it sliced like a dream.”
Variations of the Lucky Charms Cheesecake
Chocolate lovers: Swap 2 tablespoons of the powdered sugar for cocoa powder and drizzle the top with melted chocolate before adding cereal. The chocolate note makes the marshmallow sweetness feel a little more grown-up without losing the fun.
Rainbow swirl: Divide the filling into three bowls and tint each with a tiny drop of gel color. Dollop into the crust and swirl briefly with a knife. Keep the swirls minimal so the colors don’t muddy.
Mini cheesecakes: Line a muffin pan with paper liners, add 2 tablespoons of crust to each cup, and fill to the top. They set faster and are kid-friendly for birthday spreads. These disappear fast.
Bar version: Use a 9 by 9 inch pan lined with a parchment sling. Press in the crust and spread the filling. Chill, then lift and cut into squares. Bars travel better than a full cake and are easier for potlucks.
Dairy-light version: Use light cream cheese and Greek yogurt for part of the filling. The texture is a bit softer, but the cake still sets nicely thanks to the marshmallows.
If no-bake treats are your thing, add these coconutty bites to the menu too: no-bake coconut cream balls. They’re easy, sweet, and perfect next to a colorful slice.
Other Fun Dessert Recipes to Try
Love nostalgic cereal desserts? You’ll have fun with these no-bake lemon cheesecake Rice Krispie treats. Bright lemon flavor plus a chewy cereal base is a cheerful twist on a classic bar.
For a fruity showstopper in a jar, check out these apple pie cheesecake trifles. Warm cinnamon apples, creamy layers, and crumbly bits make each spoonful feel like a cozy fall hug, even in spring.
And if you enjoy playful finger desserts, take a peek at the air-fryer option on the site. Cheesecake in a crispy shell is such a vibe on movie night, and cleanup is a breeze.
Common Questions
How long does it take for the cheesecake to set? About 6 hours in the fridge, but overnight gives the best slice. It should feel firm when you gently tap the top.
Can I use store-bought whipped topping instead of heavy cream? Yes. Use about 2 and 1/2 cups whipped topping folded into the filling. The texture will be slightly fluffier and sweeter.
My crust is crumbly. What can I do? Stir in 1 more tablespoon of melted butter and press firmly. Chill the crust before adding the filling to lock it in place.
Can I use a regular pie dish if I don’t have a springform pan? Absolutely. It will be a little harder to cut clean slices, but it tastes the same. Line the bottom with parchment to help lift the first slice.
Is this safe at room temperature for a party? Keep it chilled until serving and return leftovers to the fridge within 2 hours. It’s a dairy-based dessert, so cool storage is best.
Sweet send-off for your kitchen adventure
If you’re craving color and comfort in one bite, the Lucky Charms No-Bake Cheesecake delivers every time. It’s quick to assemble, kid-approved, and honestly just fun to look at in the fridge while it chills. For more inspiration and variations, you can peek at recipes like the classic marshmallow version from No-Bake Lucky Charms Marshmallow Cheesecake | The Domestic Rebel or explore the bright cereal artistry in Lucky Charms Cereal Cheesecake – Pankobunny. I hope this becomes your go-to party trick, the kind you can make ahead and pull out to delighted applause. Now go make some magic and enjoy every creamy, crunchy forkful.
No-Bake Lucky Charms Marshmallow Cheesecake
Ingredients
Method
- Line the base of a 9-inch springform pan with a round of parchment. Lightly butter the sides.
- Crush 4 cups of Lucky Charms in a food processor until the texture resembles coarse sand.
- Stir the crumbs with melted butter and a pinch of salt. Pour into the pan and press firmly to create an even layer.
- Freeze the crust for 10 minutes while preparing the filling.
- In a saucepan over low heat, melt the mini marshmallows with 1 tablespoon of water until smooth, then cool for 5 minutes.
- In a bowl, beat the softened cream cheese until smooth. Add powdered sugar, vanilla, salt, and sour cream, beating again until no lumps remain.
- Pour the cooled melted marshmallows into the cream cheese mixture and mix on low just until blended.
- Whip heavy cream to soft peaks and gently fold into the filling. If using food coloring, swirl it in right at the end.
- Spread the filling into the prepared crust and smooth the top. Chill for at least 6 hours, or overnight for best results.
- Sprinkle the remaining cereal and extra marshmallows on top right before serving.