


Brownie Christmas Trees might just be the cutest way to bring dessert to a holiday party. Every year I want something festive that does not eat up my whole afternoon, and these little trees hit that sweet spot. They are easy to decorate, fun for kids to help with, and they always get the wow reaction on a cookie tray. If you have a box of brownie mix or a favorite scratch recipe, you are halfway there. I am sharing exactly how I make them, plus tricks to keep the edges neat and the tops swirly. And yes, I am giving you make-ahead tips because parties rarely go as planned.
The Story Behind This Recipe
Hey, I’m Alexandraa! This Fun and Festive Brownie Christmas Trees for the Holidays was built for busy nights: simple steps, reliable results, and flavor that makes people ask for seconds. Brownie Christmas Trees might just be the cutest way to bring dessert to a holiday party. Every year I want something festive that does not eat…
How to Make Christmas Tree Brownies
Here is my go-to method for fudgy brownies cut into clean triangle trees with green frosting and cheerful sprinkles. This batch makes about 12 to 16 trees depending on how big you cut them. Plan on 15 minutes to mix, 25 to 30 minutes to bake, and a little decorating time once they cool.
Ingredients
- 1 box brownie mix plus ingredients on the box, or use the scratch list below
- Scratch option: 10 tablespoons unsalted butter, 1 cup sugar, 2 large eggs, 1 teaspoon vanilla, 1/2 cup cocoa powder, 1/2 cup all-purpose flour, 1/4 teaspoon salt, 1/2 cup chocolate chips
- Green frosting: 1/2 cup unsalted butter, softened, 2 to 2 1/2 cups powdered sugar, 1 teaspoon vanilla, 1 to 2 tablespoons milk, green gel food coloring
- Decorations: assorted sprinkles, small star sprinkles, mini M&Ms, tiny candy canes or pretzel sticks for trunks
- Optional: white chocolate drizzle for garlands
Step by Step Directions
- Prep the pan: Line a 9×13 pan with parchment with overhang so you can lift the whole slab out. Lightly grease the parchment. This helps you get sharp edges later.
- Mix the batter: Use the box mix as directed, or for scratch brownies whisk melted butter and sugar, then add eggs and vanilla. Stir in cocoa, flour, and salt just until combined. Fold in chocolate chips.
- Bake: Spread the batter evenly and bake at 350 F for 25 to 30 minutes. Start checking at 24 minutes. A toothpick should come out with a few moist crumbs. Do not overbake if you want fudgy trees.
- Cool completely: This matters. Warm brownies will crumble when you cut them. I chill the pan for at least 30 minutes once it hits room temp. **Cool brownies equal clean cuts.**
- Cut triangles: Lift the slab out using the parchment. Trim edges if you want perfect lines. Cut long strips, then cut each strip into triangles. Save the scraps for snack bites.
- Make frosting: Beat butter until creamy. Add powdered sugar a little at a time with vanilla and just enough milk to get a smooth, pipeable texture. Tint a bright green. If frosting feels soft, chill 5 to 10 minutes.
- Decorate: Pipe zigzags or swirls to look like branches. Add sprinkles and a star on top. Gently press a mini candy cane or pretzel stick into the base for a trunk.
- Set and serve: Let the frosting set 15 to 20 minutes before packing or serving. If you want extra shine, add a quick white chocolate drizzle.
Tools You Will Need
- 9×13 metal baking pan
- Parchment paper with overhang
- Sharp chef’s knife or a large bench scraper
- Piping bag with star tip or zip-top bag with corner snipped
- Cooling rack
If you like playful holiday bakes, take a peek at these bright green treats for inspiration too: Grinch Brownies Recipes. They pair so well with these trees on a party platter.
Once you try this, you will see why I reach for Fun and Festive Brownie Christmas Trees for the Holidays any time I need a fast showstopper. 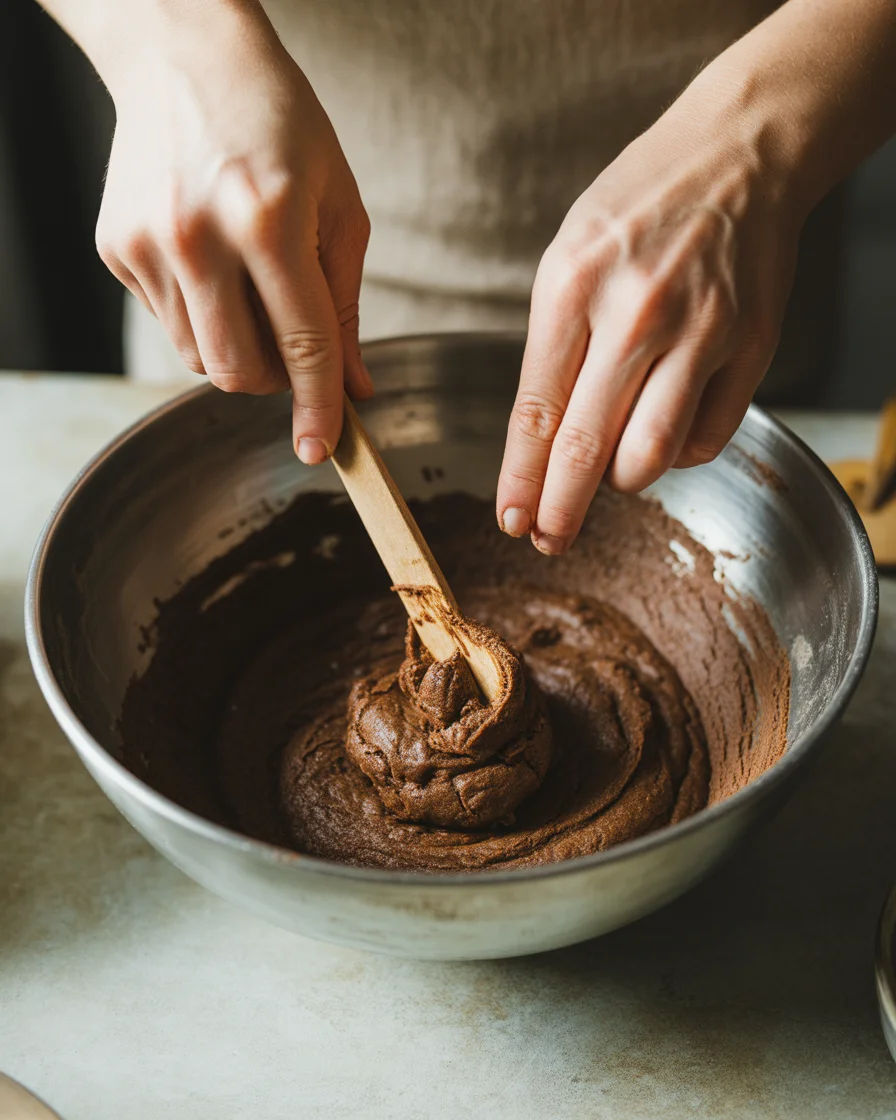
Tips for the Perfect Dessert
I have made more than a few pans of these, and these are the little details that change everything.
- Use parchment and chill the slab before cutting. **Clean lines** make the trees look professional.
- Wipe your knife between every few cuts. Crumbs stick to frosting, so neat cutting helps later.
- Go light on milk when making frosting. You want a thick, smooth swirl that holds shape.
- Gel food coloring beats liquid for rich green without thinning the frosting.
- For even triangles, mark the brownie top lightly with a ruler before slicing.
- Let kids do the sprinkle part. It turns dessert time into a cozy memory.
- Short on time? Use store-bought green frosting and keep the decorations simple.
- Traveling with them? Put trees in a single layer in a shallow container. **No stacking.**
These were the first brownies to disappear at my office party. People kept asking who brought the little trees with the star sprinkles. I wrote the recipe on three sticky notes before lunch.
Want more easy ideas for the whole holiday spread? Browse the sweets in this collection: Christmas Holiday Treats. You will find fun options to mix and match with your brownies.
If your dessert table needs one reliable head-turner, Fun and Festive Brownie Christmas Trees for the Holidays are it. 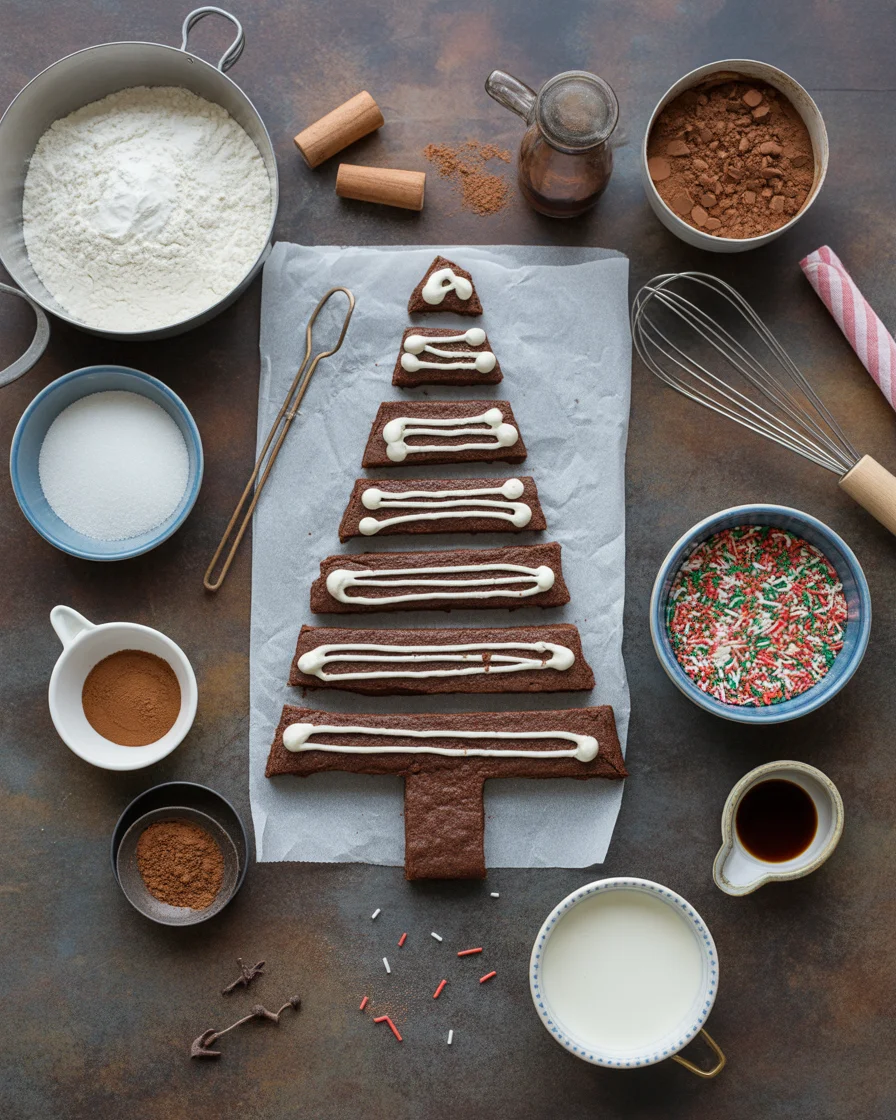
Flavor Variations
There is a lot of room to play here, and you do not need to change the base recipe much to get new flavors.
Peppermint trees: Stir 1/2 teaspoon peppermint extract into the batter and swap the trunk for a mini candy cane. Finish with crushed candy cane sprinkles. It is a simple twist that screams wintertime.
Gingerbread twist: Add 1 teaspoon ground ginger and a pinch of cinnamon to the batter. The warm spice with fudgy chocolate is a crowd pleaser. A light dusting of powdered sugar can look like snow.
Salted caramel trees: Swirl 1/3 cup thick caramel into the batter before baking. After frosting, sprinkle a little flaky salt on top. The sweet and salty balance is lovely.
Cookies and cream: Fold in chopped chocolate sandwich cookies and top with green frosting plus a few crushed cookie crumbs. If that sounds dreamy, you might also like these Cookies and Cream Red Velvet Brownies for a different holiday spin.
Butter cookie pairing: Serve your trees next to tender butter cookies for texture contrast. I adore a buttery bite between the rich squares, like the ones here: Christmas Butter Cookies.
Fruit and white chocolate: Add dried cranberries to the batter and finish with a white chocolate drizzle over the green frosting. If you love a snowy vibe, this White Christmas Pie is another festive pick for your dessert board.
However you customize them, keep the structure the same so they stay sturdy and slice neatly. Fun and Festive Brownie Christmas Trees for the Holidays are flexible but still dependable.
Nutrition Information
These numbers are estimates, since decorations vary. For a standard tree cut from a 9×13 pan into 14 to 16 pieces, you are looking at roughly 260 to 320 calories per piece. Most calories come from chocolate and frosting.
Approximate per tree:
Calories: 290. Carbs: 38g. Fat: 14g. Protein: 3g. Sugar: about 28g. Sodium will vary depending on your baking mix and frosting. If you choose a scratch recipe with less sugar or use a lighter frosting swirl, your numbers may shift lower.
Allergen notes: Contains wheat, eggs, and dairy. You can try dairy-free butter and non-dairy milk for the frosting if needed. For gluten-free, use a trusted gluten-free brownie mix and watch bake time and cool time since texture can be more delicate. Always check your decorations for allergens too. **Read labels** on sprinkles and candy canes to avoid surprise ingredients.
Storage: Keep brownies in an airtight container for up to 3 days at room temperature. If your kitchen runs warm, refrigerate and bring to room temp before serving for the best texture. Unfrosted slabs can be wrapped and frozen up to 2 months. Frost shortly before serving so colors stay bright and the surface looks fresh.
Food safety: Make sure brownies are fully cooled before frosting to avoid melted frosting and a sticky mess. Use clean tools and containers, and keep them away from high heat or direct sunlight at parties. A little planning keeps these looking gorgeous and tasting great.
Related Dessert Recipes
If you love a dessert table with a little of everything, pair these trees with a mix of cookies and bars. A chewy or crunchy partner makes the fudgy texture pop. I like to bring two choices for variety and a third if I know the crowd loves chocolate.
Try this lineup:
– A creamy pie for contrast, like the snowy classic linked in the flavor section.
– A second brownie moment with a color pop, such as the Cookies and Cream Red Velvet Brownies.
– A platter of bite-size butter cookies or a rolled treat like a brownie pinwheel. For a fun swirl, peek at this Brownie Cookie Roll.
– And do not miss exploring the full lineup of holiday confections here: Christmas Holiday Treats. It is a treasure hunt of sparkle.
If you bring these to a party, let people know they are cut from a big pan. It makes guests more comfortable grabbing seconds. Fun and Festive Brownie Christmas Trees for the Holidays also travel well when set in a shallow box in a single layer with a bit of parchment between rows.
Common Questions
How do I get sharp triangle cuts without crumbling?
Chill the brownie slab for 30 to 60 minutes, then use a long, sharp knife and wipe it clean after each slice. Line your pan with parchment so you can lift the whole piece out first.
Can I use canned frosting?
Yes. Whip it briefly to make it fluffier, then add gel color. If it is too soft, chill it for 10 minutes so it holds shape when piped.
How far ahead can I make these?
Bake the brownie slab 1 to 2 days ahead, wrap well, and store at room temperature. Decorate the day you serve for the brightest color and the best texture.
What if I do not have a piping bag?
Use a zip-top bag and snip off a small corner. For a textured look, cut a zigzag edge on the bag before piping.
How many trees will I get from a 9×13 pan?
Usually 14 to 16 trees, depending on how thick your strips are. Mark the top lightly before cutting to keep sizes consistent.
A Sweet Little Forest For Your Table
If party planning feels hectic, keep dessert fun and simple. Fun and Festive Brownie Christmas Trees for the Holidays are reliable, sweet, and easy to decorate with kids. Use the steps and tips above to get neat triangles, bright frosting, and sturdy little trunks that stand up to travel. If you want even more inspiration, this guide to Easy Christmas Tree Brownies is a great visual companion and shows another way to decorate. Now grab that pan, set out the sprinkles, and let your kitchen smell like the holidays.
Brownie Christmas Trees
Ingredients
Method
- Line a 9×13 pan with parchment paper, allowing overhang, and lightly grease it.
- For scratch brownies, whisk melted butter and sugar, then add eggs and vanilla. Stir in cocoa, flour, and salt until combined. Fold in chocolate chips.
- Spread the brownie batter evenly in the pan and bake at 350°F for 25 to 30 minutes.
- Start checking at 24 minutes with a toothpick; it should come out with a few moist crumbs.
- Cool brownies completely; ideally chill for 30 minutes once at room temperature before cutting.
- Lift the brownies from the pan using the parchment. Trim edges if desired, then cut into long strips and then triangles.
- Beat butter until creamy, adding powdered sugar gradually, then vanilla and just enough milk for a smooth, pipeable texture. Tint green as desired.
- Pipe frosting onto brownies to resemble tree branches and add decorations like sprinkles and a star on top.
- Press a mini candy cane or pretzel stick into the base of the tree for a trunk.
- Allow the frosting to set for 15 to 20 minutes before serving or packing.
- For extra shine, drizzle white chocolate on top before serving.