


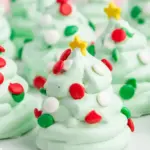
Deliciously Sweet Christmas Tree Meringues Recipe! If you want a treat that feels fancy but is actually super simple, you’re in the right place. Maybe you’ve tried meringues before and ended up with sugary puddles or chalky bites. I’ve been there, and it’s no fun. These little Christmas tree cuties are light, crisp, and melt in your mouth, plus they look like they came from a bakery window. Let me show you how to nail them with zero stress and plenty of holiday joy.
The Story Behind This Recipe
I’ve spent years testing recipes for Middle East Sector, and this Sweet & Festive Christmas Tree Meringues Recipe to Delight! is a keeper: fast to prep with no weird tricks. Deliciously Sweet Christmas Tree Meringues Recipe! If you want a treat that feels fancy but is actually super simple, you’re in the right place. Maybe you’ve…
The Perfect Light & Airy Meringue
How to get that cloud-like texture every time
Meringue can feel intimidating, but once you understand a couple of small details, the rest becomes very doable. The goal is simple, we want a glossy, stable foam that keeps its shape, bakes up beautifully, and tastes as sweet as a snow day. The magic comes from whipping egg whites with sugar until they become shiny and thick, then baking them low and slow so they dry out without browning.
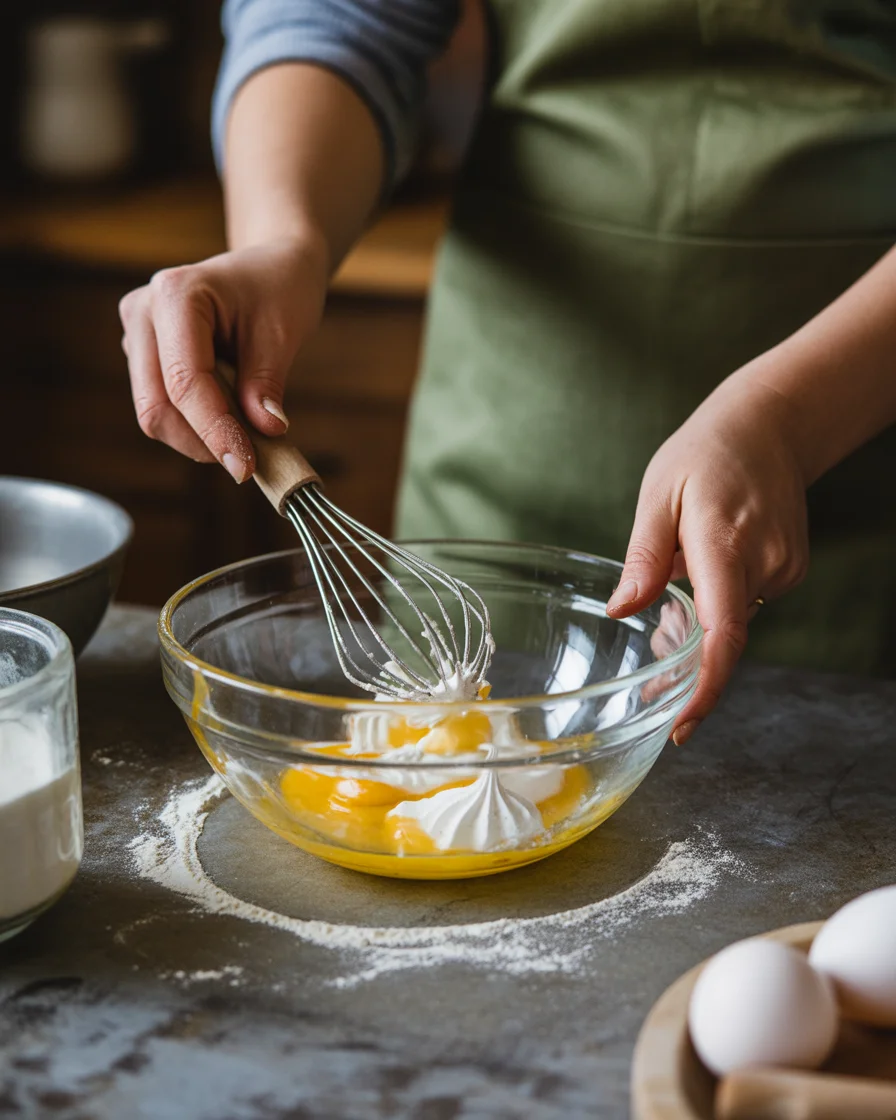
Start with room temperature egg whites. They whip faster and higher, giving you the fluff you want. Add a pinch of cream of tartar to help stabilize the whites. If you do not have it, a tiny splash of lemon juice works too. Use superfine sugar if you can find it, because it dissolves quickly and keeps the meringue smooth. Regular granulated sugar can work, just add it very slowly so it actually dissolves and does not leave grit.
A clean bowl is your best friend. Any oil, water, or egg yolk will prevent the whites from whipping properly. I always give the bowl and whisk a quick wipe with a little vinegar, then dry them completely. It takes ten seconds and saves frustration later.
Be patient with whipping. Start on medium speed until the mixture becomes frothy, add the sugar gradually, then increase the speed. When you can lift your whisk and see peaks that stand tall with a slightly curved tip, you are there. The mixture should be thick, shiny, and look like bright snow.
“My holiday cookie plates used to look a bit predictable. After I tried this, the meringue trees stole the show. Crisp outside, marshmallowy inside, and everyone asked for the recipe.”
By the way, if you love lining a whole tray of festive goodies, check out my go-to Christmas holiday treats collection for more seasonal inspiration. It pairs perfectly with these little trees.
Why you’ll love these Christmas Tree meringues
These cookies are more than cute decorations. They are a holiday confidence boost. They look like they take hours, yet they are surprisingly easy once you follow the rhythm. Here is why I make them every December:
- Light and crisp with a tender center, which means no heavy post-cookie slump.
- Adorable presentation thanks to that tree shape and festive sprinkles.
- Make ahead friendly, so you can bake now and serve later without stress.
- Gluten free by nature, and easily dairy free too.
- Kid approved for both making and munching.
If you love classic holiday bakes to round out your dessert tray, these go wonderfully with buttery shortbread. Try these cozy Christmas butter cookies and you’ll have that perfect mix of crunchy and crumbly on the same plate.
Also, yes, I will say it out loud again because it matters for searchers and cooks alike: this is my favorite Deliciously Sweet Christmas Tree Meringues Recipe! The joy is in the details, and the details are simple enough to repeat anytime.
What you’ll need to make Christmas tree meringues
Ingredients and simple tools
Nothing fancy here, which is the best part. You likely have most of this already.
- 4 large egg whites at room temperature
- 1 cup superfine sugar or granulated sugar added gradually
- 1/2 teaspoon cream of tartar or 1 teaspoon lemon juice
- 1 teaspoon vanilla extract
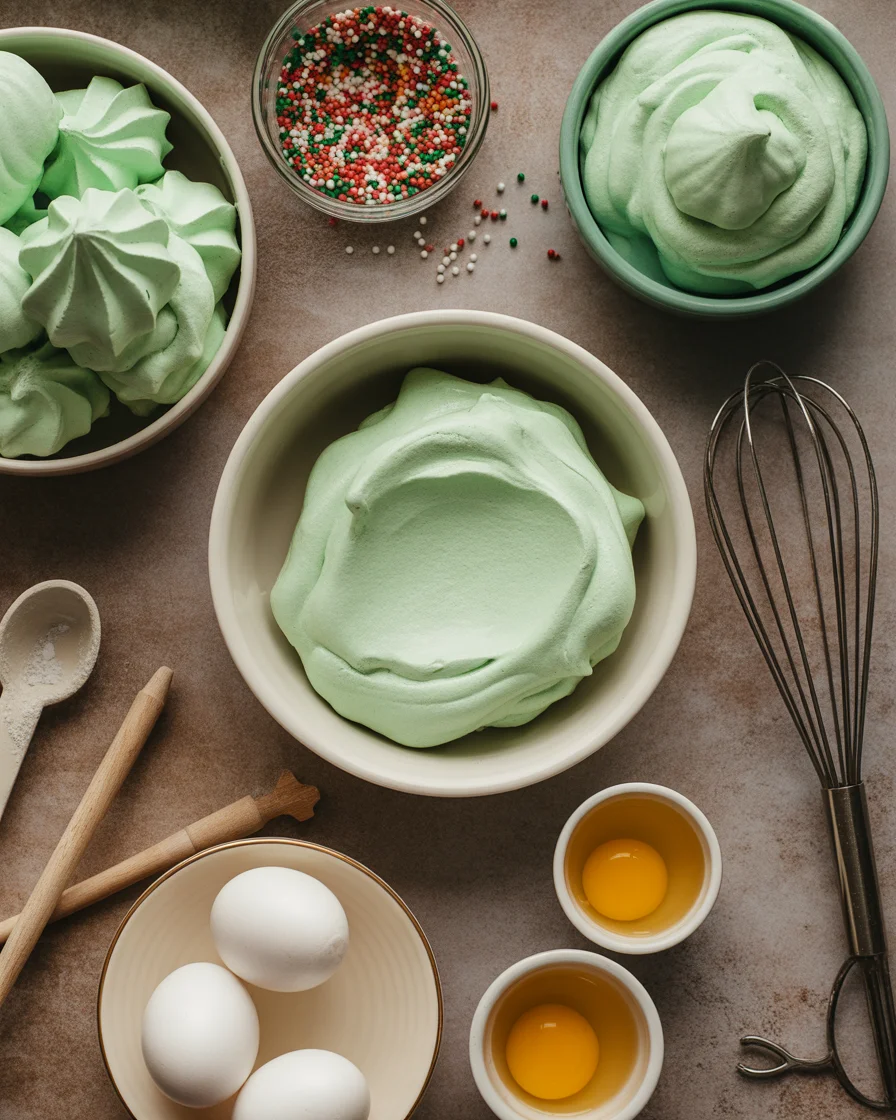
- Green gel food coloring
- Holiday sprinkles, star sprinkles for the tree tops if you have them
- Piping bag with a large open star tip or round tip
- Two baking sheets lined with parchment paper
Use gel coloring over liquid for stronger color without thinning your meringue. You only need a little, and a deeper green looks great on camera and on your table.
Want a dessert duo that pops on the dessert cart? Pair these trees with a creamy chilled pie like this white Christmas pie. The contrast of textures is dreamy.
How to make these meringues
Step-by-step that actually works
Prep your oven first. Set it to 200 degrees F and line your pans with parchment. Low heat is the name of the game. We are drying these out, not really baking them like a cake.
Separate the eggs while they are cold to make it easier, then let the whites sit at room temperature for about 20 minutes. Add the egg whites and cream of tartar to a clean mixing bowl. Begin whipping on medium speed until foamy. Slowly add the sugar, a tablespoon at a time, while the mixer runs. This slow addition helps the sugar dissolve and prevents gritty meringue.
Once all the sugar is in, increase the mixer to medium high. Beat until you have stiff, glossy peaks. Rub a bit of meringue between your fingers. If you feel grains of sugar, keep whipping for another minute. When ready, mix in the vanilla and a few drops of green gel coloring. Fold very gently. You can go for a bright evergreen or a softer mint shade, both look great with sprinkles.
Fit your piping bag with a large tip and fill it with the green meringue. Pipe little trees by making three stacked swirls, small to large, right onto the parchment. Leave a bit of space between them. Add sprinkles or a star candy on top. If you do not have a star tip, a round tip creates cute modern trees that look just as festive.
Slide the trays into the oven and bake for 75 to 90 minutes. Do not open the door early. When time is up, turn off the oven and let the meringues sit inside for another hour to cool slowly. This helps prevent cracks. They should lift cleanly from the parchment and feel dry on the outside.
Short on time but still want a holiday wow moment? After the meringues are in, you can prep another easy dessert, like this chilled white Christmas pie, while you wait. It makes hosting feel so much lighter.
Once cooled, store in an airtight container at room temperature. They’ll keep their crispness for about a week. And yes, this truly is my Deliciously Sweet Christmas Tree Meringues Recipe! I never tire of it.
Tricks and tips for perfect meringues
Small adjustments that make a big difference
Here are the little things that help you level up quickly:
Clean tools only. Any grease kills volume. Wipe the bowl and whisk with vinegar, then dry thoroughly.
Add sugar gradually. A spoonful at a time keeps things smooth and prevents collapse.
Use low heat. Keep the oven around 200 degrees F. High heat browns and cracks your trees.
Dry them in the oven. Turn off the oven and let them sit. Slow cooling reduces cracks and stickiness.
Humidity matters. If it’s a very humid day, your meringues may turn sticky. Bake a few minutes longer and store with a little packet of desiccant or a couple of tablespoons of uncooked rice in a breathable sachet near the container to absorb moisture.
Get creative with flavors. Try a tiny hint of peppermint extract, or dip the bases in melted chocolate once cooled. Sprinkles, crushed candy canes, or a dusting of powdered sugar make them feel extra snowy.
If you are building a holiday snack board for a party, add something savory to balance all the sweetness. I like a creamy spread like this garden vegetable spread alongside fresh crackers, then set a plate of meringue trees nearby for dessert. It feels festive without tons of effort.
One more note for searchers and friends alike, this method is the heart of my Deliciously Sweet Christmas Tree Meringues Recipe! Keep the oven low, the mixing patient, and you will be golden.
Common Questions
Quick Q&A for stress-free baking
How do I know my meringue is ready to pipe?
Look for stiff, shiny peaks that stand tall when you lift the whisk. The mixture should look smooth and glossy, not foamy or grainy.
Can I make these without cream of tartar?
Yes. Use about 1 teaspoon of lemon juice to stabilize the whites. It is not exactly the same, but it works well.
Why did my meringues crack?
Usually from baking too hot or cooling too fast. Bake at low heat and let them cool in the oven with the door closed for at least an hour.
How do I store them so they stay crisp?
An airtight container at room temperature is best. If humidity is high, add a small moisture absorber near the container, not touching the cookies.
Can I color them without gel food coloring?
You can, but liquid coloring may thin the mixture. Use just a few drops and whip a little longer if needed. Gel gives the best color with the least effort.
Warm, festive finishing notes for your cookie tray
That’s it. You have everything you need to bring a tray of cheerful, crisp trees to the table. Remember the rhythm, room temperature whites, slow sugar, low oven, and patient cooling. Bake a batch, tuck them in an airtight tin, and you are set for gifting and gatherings. If you want more ideas or a second take on the look, I love the tips from Christmas Tree Meringues from Crumbs and Corkscrews, which line up nicely with this approach. Most of all, have fun with it, because that’s the heart of my Deliciously Sweet Christmas Tree Meringues Recipe! Happy holiday baking.
Christmas Tree Meringues
Ingredients
Method
- Preheat your oven to 200 degrees F and line your baking sheets with parchment paper.
- Separate the eggs while they are cold and then let the whites sit at room temperature for about 20 minutes.
- Add the egg whites and cream of tartar to a clean mixing bowl. Begin whipping on medium speed until foamy.
- Slowly add the sugar, one tablespoon at a time, while the mixer runs to help dissolve it.
- Once all the sugar is added, increase the mixer speed to medium-high and beat until you have stiff, glossy peaks.
- Mix in the vanilla extract and a few drops of green gel food coloring gently.
- Fit your piping bag with a large tip and fill it with the green meringue.
- Pipe little trees by making three stacked swirls, small to large, onto the parchment, leaving space between them.
- Add holiday sprinkles or a star candy on top of each tree.
- Bake the meringues in the preheated oven for 75 to 90 minutes without opening the door.
- Turn off the oven and let the meringues sit inside for another hour to cool slowly, which helps prevent cracks.
- Once cooled, store the meringues in an airtight container at room temperature. They’ll keep their crispness for about a week.