

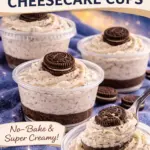
OREO DESSERT CUPS are my go to move when I need a quick dessert that looks like I tried harder than I actually did. You know those days when someone texts, “Stopping by in 30,” and suddenly you are panic cleaning and wishing you had something sweet in the fridge? This is the fix. These little cups are creamy, crunchy, and honestly kind of addictive in that “just one more bite” way. I started making them for family nights, and now they are the thing people ask for the minute they walk in. 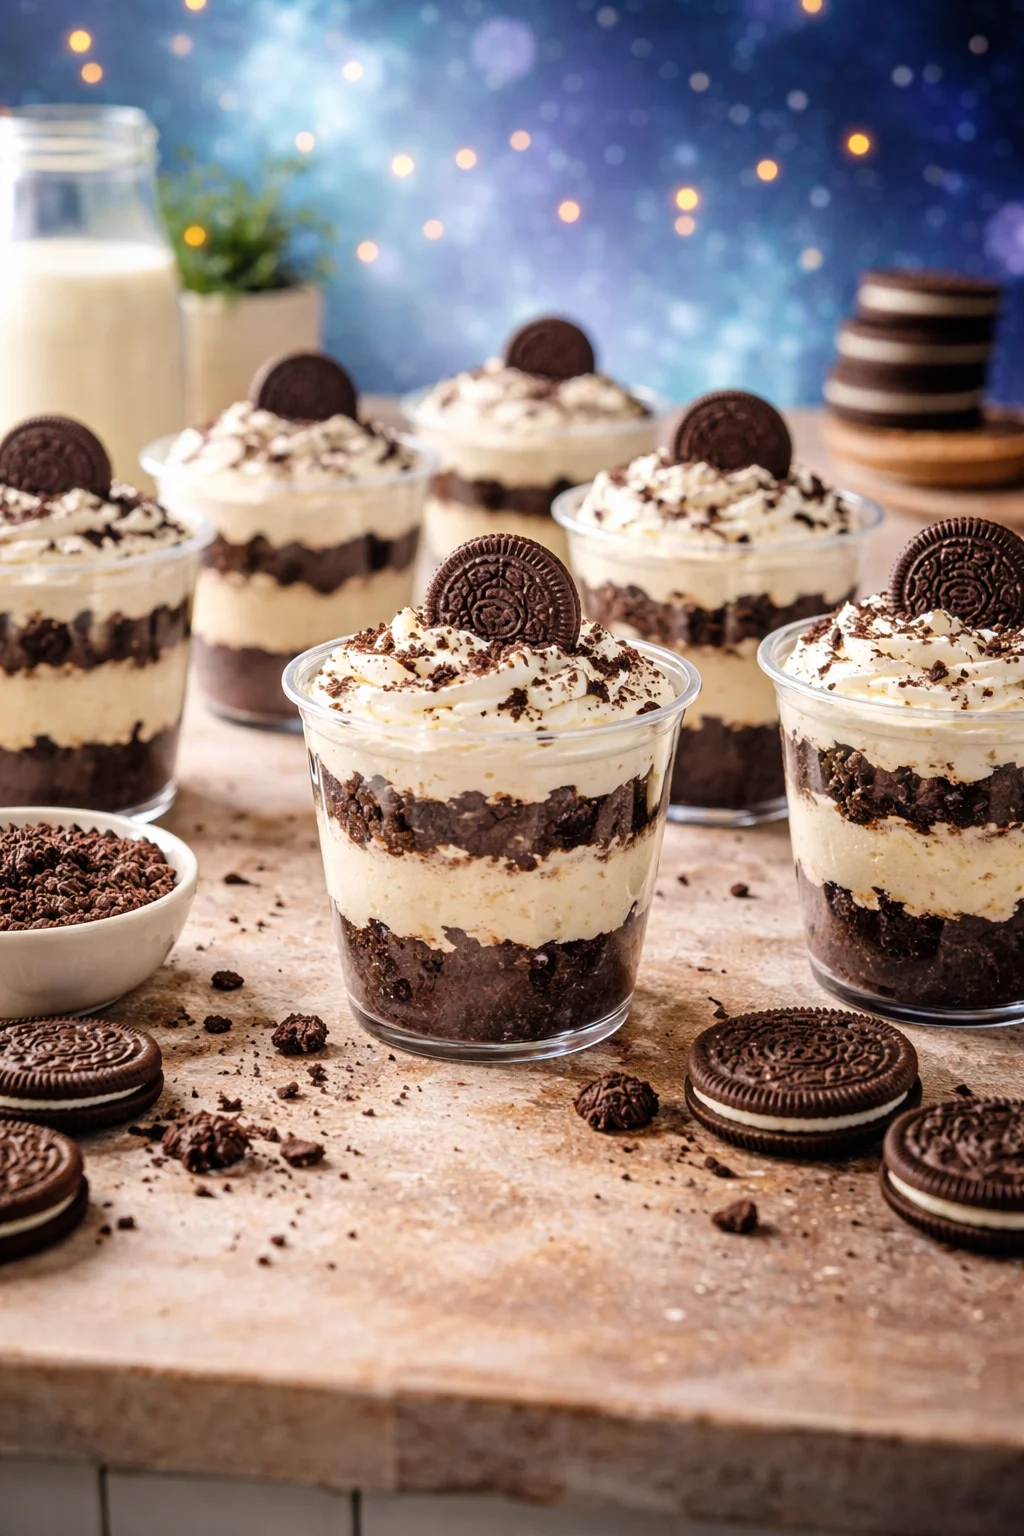
The Story Behind This Recipe
Here’s why I love this Oreo Dessert Cups: it bakes up beautifully and it tastes like a bakery treat. OREO DESSERT CUPS are my go to move when I need a quick dessert that looks like I tried harder than I actually did. You know…
Ingredient Tips & Equipment Information
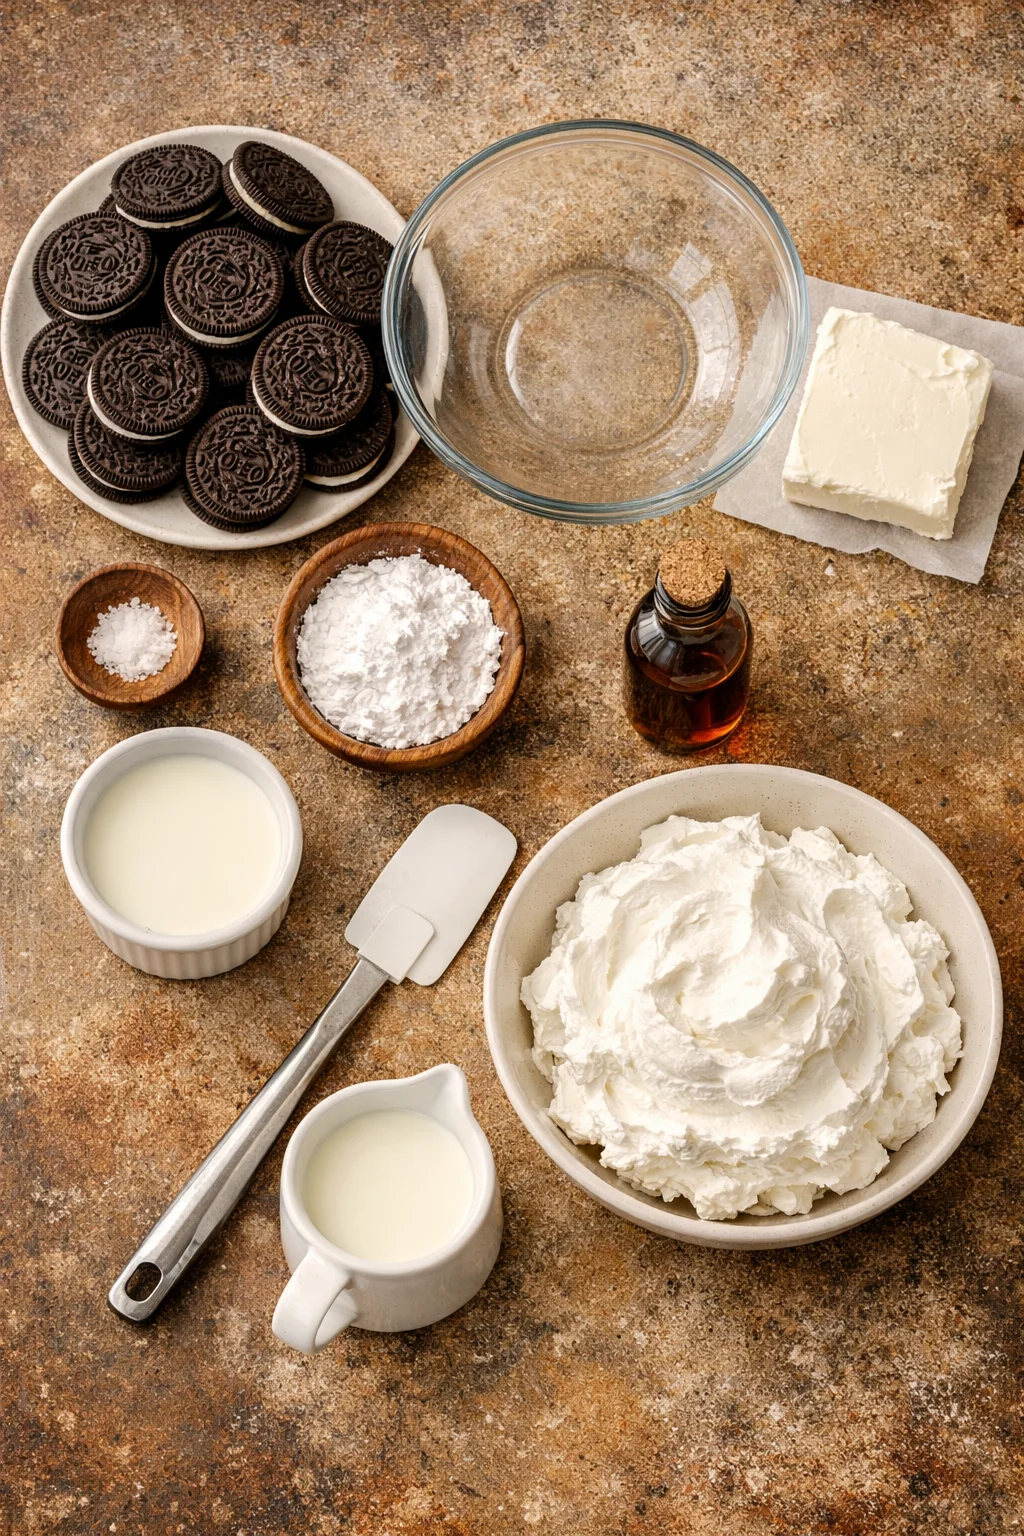
The best part about OREO DESSERT CUPS is that the ingredient list stays simple, but the result feels fancy. The goal is strong Oreo flavor, a fluffy creamy layer, and that crunchy cookie bite in every spoonful.
What you will need
- Oreo cookies (classic works best, but any flavor is fair game)
- Cream cheese (full fat gives the smoothest texture)
- Powdered sugar (sweetens without feeling grainy)
- Vanilla extract (small amount, big difference)
- Whipped topping or homemade whipped cream
- Milk (optional, for loosening the cream layer if needed)
- Pinch of salt (sounds odd, tastes right)
If you love switching flavors, you might also like my other Oreo style desserts, like this mint Oreo dessert that tastes super refreshing after a heavy meal.
For equipment, you do not need anything fancy. Here is what I usually grab:
- Mixing bowl and spoon or hand mixer
- Zip top bag plus rolling pin (easy cookie crushing)
- Small cups, jars, or dessert glasses
- Measuring cups and spoons
Quick note on cups: clear cups make the layers look so pretty. I have used everything from little mason jars to leftover yogurt cups when I was in a pinch. Both worked.
How to make Oreo Dessert Pots
I call them pots sometimes because they feel like those cute cafe desserts in a jar. But yes, they are basically OREO DESSERT CUPS, and you are about to see how simple they are.
Step by step directions
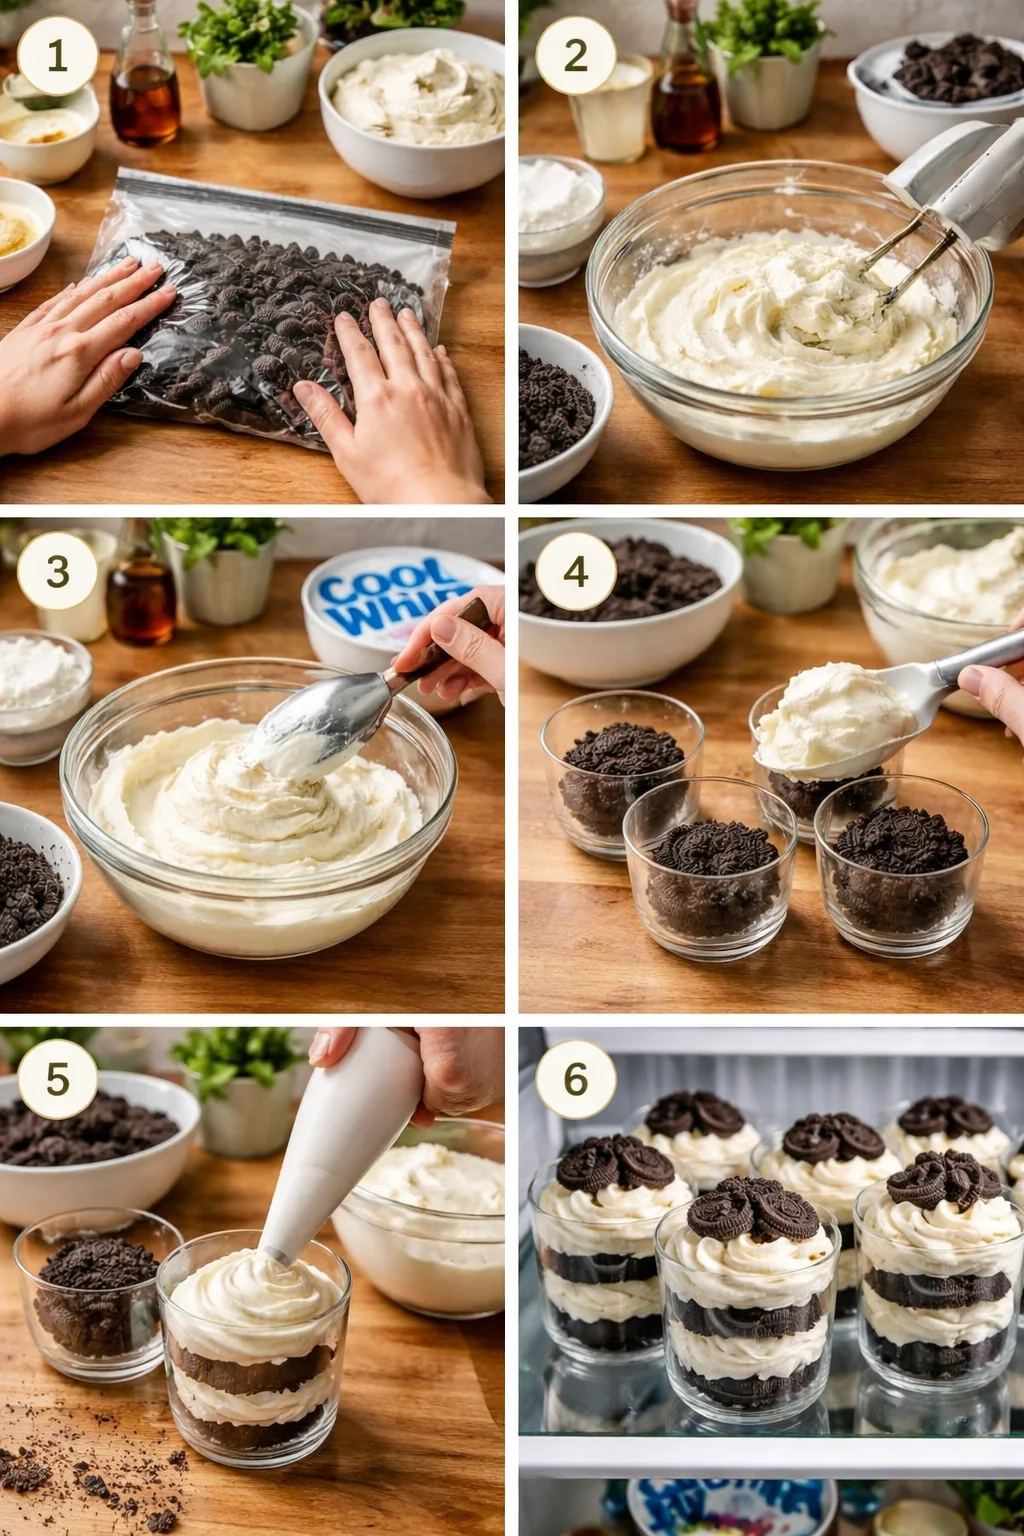
Step 1: Crush the Oreos. I crush about 18 to 22 cookies for a batch that makes 6 small cups or 4 bigger ones. Toss them in a zip bag and roll over them. You want mostly crumbs, with a few bigger chunks for texture.
Step 2: Make the creamy filling. In a bowl, mix 8 oz cream cheese (softened) with 1/2 cup powdered sugar and 1 teaspoon vanilla. Mix until smooth. If it feels a little too thick, add 1 to 2 tablespoons of milk.
Step 3: Fold in the fluff. Add about 2 cups of whipped topping (or whipped cream) and fold gently. Do not overmix. You want it light, not soupy.
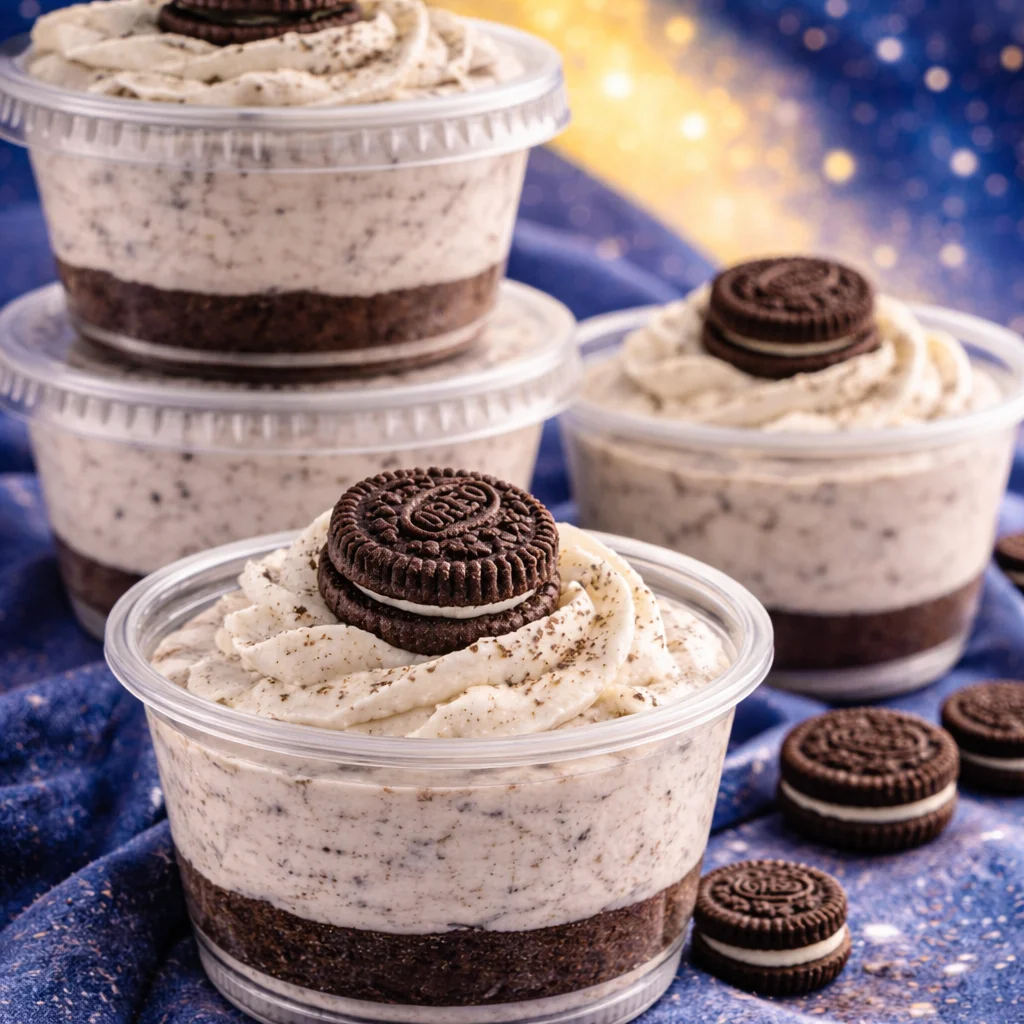
Step 4: Layer it up. Start with cookie crumbs, then a layer of cream, then crumbs again, and repeat until your cups are full. I always finish with crumbs and one cookie chunk on top because it looks fun and tells everyone exactly what dessert they are getting.
Step 5: Chill. Pop them in the fridge for at least 1 hour. Two hours is even better because the flavors settle and the texture gets that perfect spoonable bite.
If you are into portioned desserts like this, these strawberry Oreo cheesecake cups are another favorite in my kitchen when I want something fruity with that cookie crunch.
Recipe Tips
I have made OREO DESSERT CUPS enough times that I have learned a few little tricks that save the day. These are the things I wish someone told me the first time.
Use softened cream cheese. If it is cold, you will fight lumps forever. I leave it out for 30 minutes. If I forget, I microwave it for 10 seconds at a time until it is soft, not melted.
Do not skip the chill time. They taste good right away, but chilling makes them taste like a real dessert cup instead of a bowl of mixed ingredients.
Make your layers uneven on purpose. That sounds weird, but it looks more natural and homemade in a good way. Perfect layers can look a little too “manufactured.”
Want it extra rich? Add a thin drizzle of chocolate syrup between layers or mix mini chocolate chips into the cream. If you like playful dessert mashups, you should try these air fried Oreos sometime too. Totally different vibe, but so fun for a weekend treat.
“I made these for my kid’s birthday and the adults ate more than the kids. Everyone kept asking where I bought them. I loved that I could make them the night before.”
Storage
These are basically made for the fridge, which is why I love them. OREO DESSERT CUPS hold up really well, so you can prep them ahead and feel like your life is together.
Fridge: Keep them covered and chilled. They stay tasty for about 3 days. After that, the cookie crumbs start to soften a lot. Some people like that, but I prefer them within the first two days when the texture is still a mix of creamy and crunchy.
Freezer: You can freeze them, but the texture changes a bit. If you do freeze, use freezer safe cups, cover tightly, and thaw in the fridge. It becomes more like a soft frozen dessert. Not bad, just different.
Best storage tip: If you know you want the crunchiest top, wait to add the final Oreo crumble until right before serving.
Serving Suggestions
This is where you can make them feel casual or party ready, depending on the day. I have served OREO DESSERT CUPS in tiny cups for baby showers and also in big mugs on the couch during movie night. Both felt right.
- Top it simply with extra cookie crumbs and a mini Oreo
- Add fresh strawberries or raspberries for a bright bite
- Drizzle chocolate or caramel over the top
- Sprinkle a little sea salt if you like sweet and salty desserts
- Serve with coffee for that “I am at a cafe” feeling
If you are building a little dessert table, it is fun to mix these cups with something creamy like banana pudding cups so guests can choose their favorite flavor vibe.
Common Questions
Can I make these Oreo dessert cups the night before?
Yes, and they are actually better after a few hours in the fridge. Just cover them well so they do not pick up fridge smells.
Do I have to use whipped topping, or can I use real whipped cream?
Either works. Real whipped cream tastes amazing, but it can deflate a bit faster. If you want the most stable cups for a party, whipped topping holds up longer.
How do I keep the layers looking neat?
Use a spoon and wipe the inside edges of the cup if crumbs stick. Or just embrace the messy look. It still tastes the same, and it feels more homemade.
Can I make this without cream cheese?
You can, but it changes the dessert a lot. Cream cheese gives that cheesecake like tang. If you skip it, try using thick Greek yogurt or pudding, but expect a lighter flavor.
What size cups should I use?
For parties, 4 to 6 oz cups are perfect. For family dessert night, I go bigger because no one wants a tiny cup when they know there is more in the fridge.
A sweet little wrap up
OREO DESSERT CUPS are one of those desserts that never fails me because they are quick, cozy, and easy to tweak. You get that creamy filling, that cookie crunch, and the cute layered look without baking anything. If you want another fun version to compare, I found this helpful read on Oreo Dessert Pots – The Baking Explorer and it is a nice way to see how other people layer and flavor theirs. And if you are really trying to keep it super simple, this one is worth a look too: 5 Ingredient No-Bake Oreo Cheesecake Cups | Lemons & Zest. Try my version once, make it your own, and tell me if you end up sneaking a spoonful straight from the bowl like I always do.
Oreo Dessert Cups
Ingredients
Method
- Crush the Oreos. Toss 18 to 22 cookies in a zip bag and roll over them to get mostly crumbs, with a few bigger chunks for texture.
- Make the creamy filling. In a bowl, mix the softened cream cheese, powdered sugar, and vanilla until smooth. If too thick, add milk.
- Fold in the whipped topping gently until combined. Do not overmix.
- Layer the dessert: Start with cookie crumbs, then cream layer, and repeat until cups are full. Finish with crumbs and a cookie chunk on top.
- Chill in the fridge for at least 1 hour, ideally 2 hours, for best texture and flavor.