
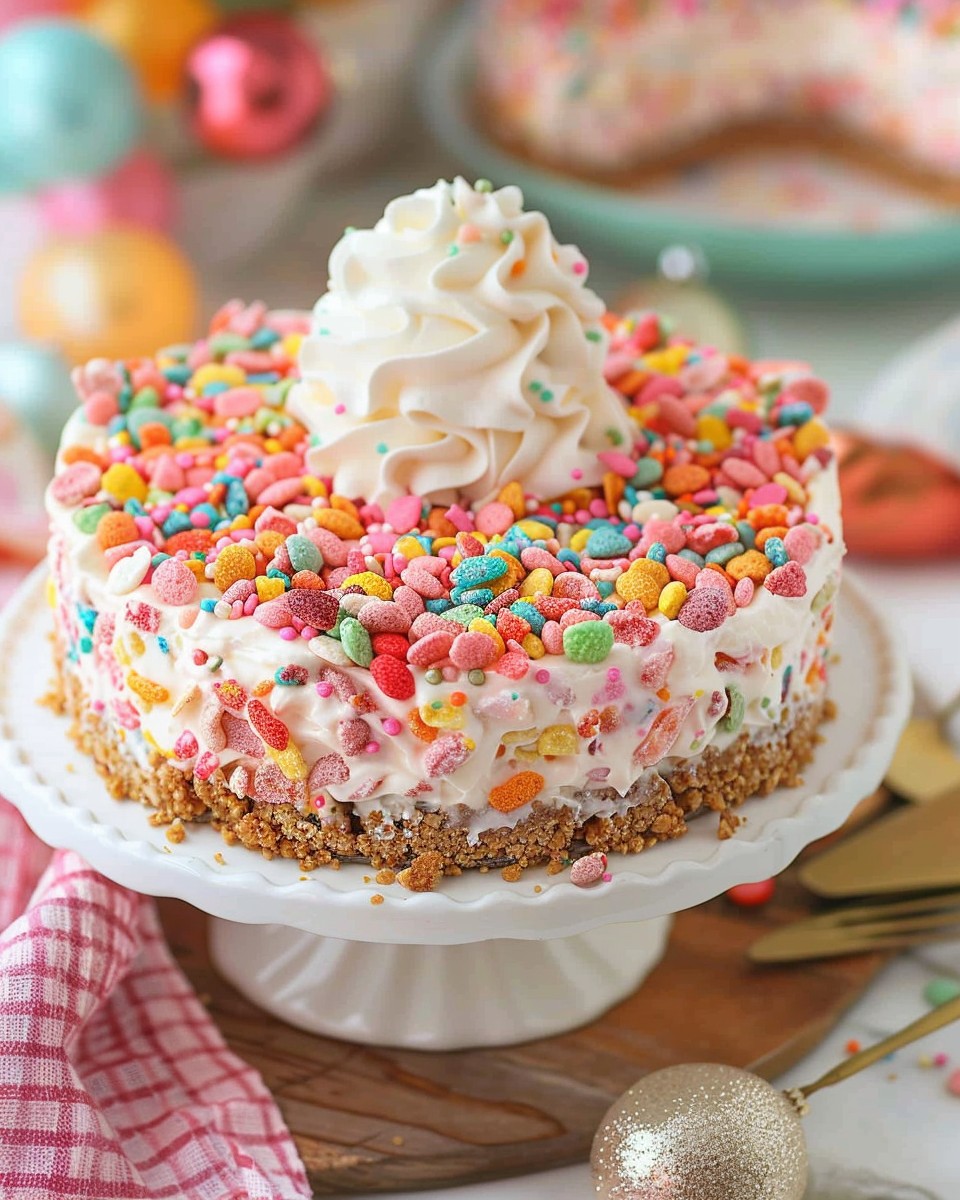
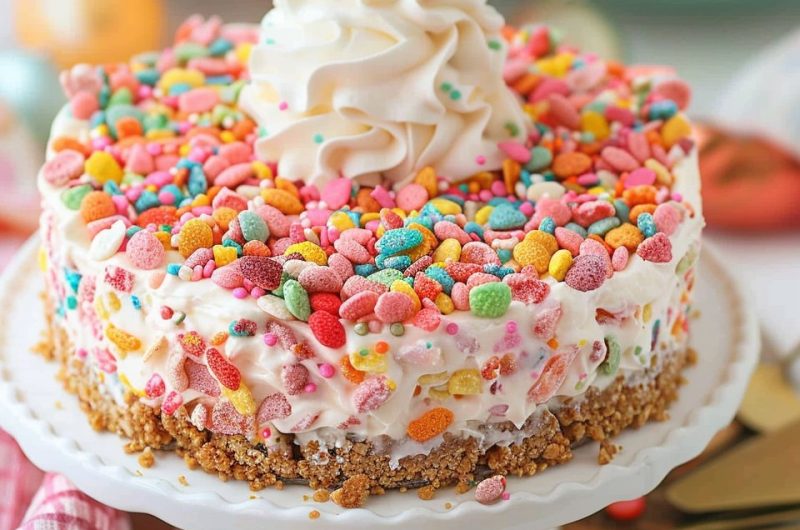
Sometimes, dessert is meant to be fun, colorful, and completely indulgent. No-Bake Fruity Pebbles Cheesecake is exactly that—a playful twist on the classic cheesecake that’s bursting with vibrant colors and fruity flavors. The crunchy cereal crust paired with creamy cheesecake filling creates a delightful texture combination that’ll take you back to childhood.
The first time I made this, I was enchanted by how quickly it came together and how happy it made everyone who tried it. Each slice is like a little party on your plate, filled with nostalgia and a touch of whimsy.
What I love most about this recipe is that it’s approachable, no-bake, and absolutely perfect for celebrations. Let’s make this No-Bake Fruity Pebbles Cheesecake and add some fun to your dessert table.
No-Bake Fruity Pebbles Cheesecake combines a crunchy Fruity Pebbles cereal crust with a creamy cheesecake filling, topped with even more colorful cereal for an eye-catching and delicious treat. It’s a no-fuss dessert that’s perfect for any occasion.
An Exciting Story
The first time I served No-Bake Fruity Pebbles Cheesecake, it was at a family gathering. My husband couldn’t resist the creamy filling, and the kids loved the colorful crust. It became the star of the dessert table, with everyone asking for the recipe. Now, it’s a go-to for birthdays and celebrations.
Why This No-Bake Fruity Pebbles Cheesecake?
- No-Bake Simplicity: Perfect for when you don’t want to turn on the oven.
- Fun and Colorful: Bright and vibrant, ideal for parties and celebrations.
- Creamy and Crunchy: A perfect balance of textures.
- Quick to Make: Easy assembly with no complicated steps.
- Customizable: Add your favorite toppings or mix-ins.
What You Need for No-Bake Fruity Pebbles Cheesecake
- For the Crust:
- 3 cups Fruity Pebbles cereal
- 4 tbsp unsalted butter, melted
- For the Cheesecake Filling:
- 16 oz (2 blocks) cream cheese, softened
- 1 cup powdered sugar
- 1 cup heavy whipping cream, cold
- 1 tsp vanilla extract
- ½ cup Fruity Pebbles cereal (optional, for added texture in the filling)
- For the Topping:
- ½ cup Fruity Pebbles cereal (or more, for decoration)
- Whipped cream (optional, for garnish)

How to Make No-Bake Fruity Pebbles Cheesecake
- Make the Crust:
- In a food processor, pulse the Fruity Pebbles until they are finely crushed. Transfer to a bowl and mix with melted butter until the texture resembles wet sand.
- Press the mixture firmly into the bottom of a 9-inch springform pan, creating an even layer. Freeze for 15 minutes to set.
- Prepare the Cheesecake Filling:
- In a large bowl, beat the cream cheese and powdered sugar together until smooth and creamy.
- In a separate bowl, whip the heavy whipping cream with vanilla extract until stiff peaks form. Gently fold the whipped cream into the cream cheese mixture until fully combined.
- If using, fold in ½ cup Fruity Pebbles cereal for added texture and color in the filling.
- Assemble the Cheesecake:
- Spread the cheesecake filling evenly over the crust, smoothing the top with a spatula.
- Decorate:
- Sprinkle the top of the cheesecake with Fruity Pebbles cereal. Add whipped cream dollops if desired for extra flair.
- Chill:
- Refrigerate the cheesecake for at least 4 hours, or until set. For best results, chill overnight.
- Serve:
- Carefully remove the sides of the springform pan, slice, and serve chilled.
Tips for No-Bake Fruity Pebbles Cheesecake
- Pack the Crust Firmly: Use the bottom of a glass or measuring cup to press the crust tightly into the pan for a sturdy base.
- Chill Thoroughly: Ensure the cheesecake has enough time to set for clean slices and the best texture.
Substitutions and Variations
- Different Cereals: Use Cocoa Pebbles, Cap’n Crunch, or any cereal of your choice for the crust.
- Gluten-Free Option: Ensure the cereal is gluten-free, and the rest of the ingredients are certified gluten-free.
- Add a Topping: Drizzle with white chocolate or add fresh fruit for a creative twist.
Make a Healthier Version
- Use light cream cheese and reduce powdered sugar slightly for a lighter filling.
- Swap the heavy cream for Greek yogurt or a lighter whipped topping.
- Use a mix of crushed granola and cereal for the crust for a more wholesome base.
Closing for No-Bake Fruity Pebbles Cheesecake:
And there you have it—No-Bake Fruity Pebbles Cheesecake, a dessert that’s as fun to look at as it is to eat. Perfect for parties, birthdays, or just because, this playful treat is guaranteed to bring smiles to everyone’s faces. Let us know how yours turn out, and don’t forget to explore more of our no-bake dessert recipes!
Frequently Asked Questions for No-Bake Fruity Pebbles Cheesecake
- Can I make this ahead of time?
Yes, prepare and refrigerate up to 24 hours before serving. - How do I store leftovers?
Store in an airtight container in the refrigerator for up to 3 days. - Can I freeze this cheesecake?
Yes, wrap tightly and freeze for up to 1 month. Thaw in the refrigerator before serving. - What if I don’t have a springform pan?
Use a deep dish or pie pan, but serving may be trickier without removable sides. - Can I use pre-made whipped topping?
Absolutely! Substitute the heavy cream with 2 cups of pre-made whipped topping. - What pairs well with this cheesecake?
Serve with a glass of milk or hot coffee for a delicious pairing. - Can I use less sugar?
Yes, adjust the powdered sugar to taste for a less sweet filling. - How do I prevent the crust from crumbling?
Make sure the crust is packed tightly and chilled thoroughly before adding the filling. - Can I add gelatin to the filling?
Yes, dissolve 1 tsp of unflavored gelatin in 2 tbsp of warm water and mix into the cream cheese for a firmer filling. - What’s a fun serving idea?
Create individual cheesecakes in small jars or cups for a portable treat. - How do I cut clean slices?
Use a sharp knife dipped in warm water, wiping it clean between slices. - What if my filling is too soft?
Chill longer or add a bit of powdered sugar to thicken the mixture.
No-Bake Fruity Pebbles Cheesecake
4
The Diabetes Cookbook
Instant Healthy Meals From Managing Diabetes

30
minutes40
minutes300
kcal1
hour10
minutesKeep the screen of your device on
Ingredients
- For the Crust:
3 cups Fruity Pebbles cereal
4 tbsp unsalted butter, melted
- For the Cheesecake Filling:
16 oz (2 blocks) cream cheese, softened
1 cup powdered sugar
1 cup heavy whipping cream, cold
1 tsp vanilla extract
½ cup Fruity Pebbles cereal (optional, for added texture in the filling)
- For the Topping:
½ cup Fruity Pebbles cereal (or more, for decoration)
Whipped cream (optional, for garnish)For the Crust:
3 cups Fruity Pebbles cereal
4 tbsp unsalted butter, melted
- For the Cheesecake Filling:
16 oz (2 blocks) cream cheese, softened
1 cup powdered sugar
1 cup heavy whipping cream, cold
1 tsp vanilla extract
½ cup Fruity Pebbles cereal (optional, for added texture in the filling)
- For the Topping:
½ cup Fruity Pebbles cereal (or more, for decoration)
Whipped cream (optional, for garnish)
Directions
- Make the Crust:
- In a food processor, pulse the Fruity Pebbles until they are finely crushed. Transfer to a bowl and mix with melted butter until the texture resembles wet sand.
- Press the mixture firmly into the bottom of a 9-inch springform pan, creating an even layer. Freeze for 15 minutes to set.
- Prepare the Cheesecake Filling:
- In a large bowl, beat the cream cheese and powdered sugar together until smooth and creamy.
- In a separate bowl, whip the heavy whipping cream with vanilla extract until stiff peaks form. Gently fold the whipped cream into the cream cheese mixture until fully combined.
- If using, fold in ½ cup Fruity Pebbles cereal for added texture and color in the filling.
- Assemble the Cheesecake:
- Spread the cheesecake filling evenly over the crust, smoothing the top with a spatula.
- Decorate:
- Sprinkle the top of the cheesecake with Fruity Pebbles cereal. Add whipped cream dollops if desired for extra flair.
- Chill:
- Refrigerate the cheesecake for at least 4 hours, or until set. For best results, chill overnight.
- Serve:
- Carefully remove the sides of the springform pan, slice, and serve chilled.
Follow US on Pinterest
Follow @middleeastsector on Pinterest