
There’s something utterly delightful about a dessert that feels both decadent and effortless, and that’s exactly what the Mocha Chocolate Icebox Cake delivers. Picture a luscious, layered confection that marries the boldness of coffee with the rich creaminess of chocolate. This no-bake dessert whispers indulgence while providing a cool, refreshing end to any meal, making it the perfect treat for hot summer days or when you simply want to impress your guests without breaking a sweat in the kitchen.
This recipe has become a treasured gem in our household—a dessert that hits the spot and sparks joy in every bite. The star of this cake is the combination of coffee and chocolate, creating a symphony of flavors that dance on your palette. The best part? With just a handful of ingredients and minimal assembly, it’s an ideal project for busy home chefs, or even those just starting to explore their culinary talents.
One of my favorite memories is making this icebox cake with my partner, who was initially a little skeptical about a “cake” with no baking involved. But as we layered the coffee-soaked cookies with velvety chocolate mousse—made with whipped cream and rich cocoa—his doubts turned into delight. By the time we pulled the cake from the refrigerator, the anticipation was palpable. As the first slice was served, the smiles were broad and genuine, proving that this dessert speaks the universal language of happiness.
The beauty of the Mocha Chocolate Icebox Cake lies in its versatility. Feel free to experiment with flavors by adding a hint of vanilla or even a splash of liqueur for that extra indulgence! It’s a dessert that adapts to your craving while remaining simple and satisfying. Serve it at parties, family gatherings, or as a special treat just for yourself—the enchanting layers of chocolate and coffee are sure to captivate anyone who takes a bite.
So, ready your mixing bowls and get ready for a sensational dessert experience! This Mocha Chocolate Icebox Cake is more than just dessert; it’s a celebration of flavor, a shared moment, and a creation that will linger in your memories long after the last bite.
Resume of the Recipe
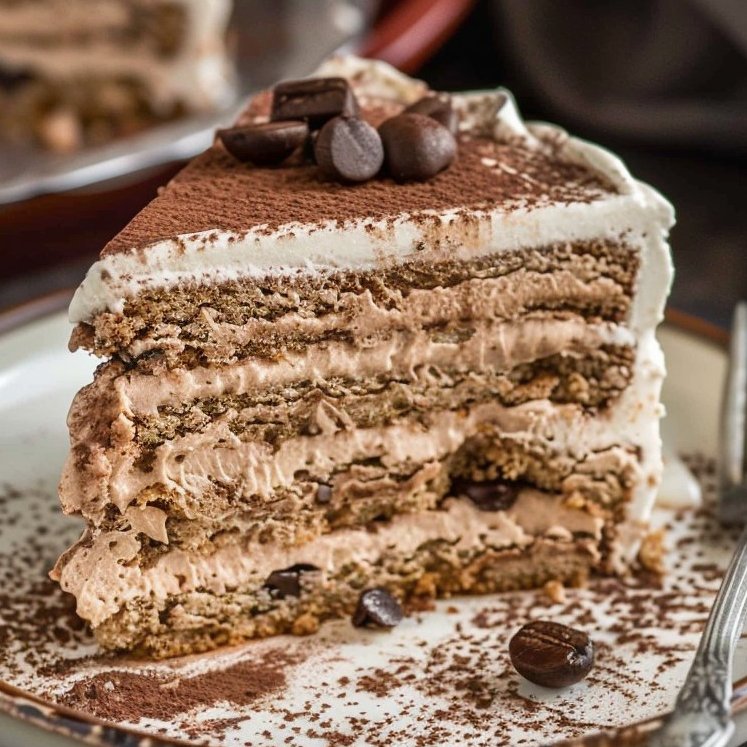
The Mocha Chocolate Icebox Cake is a rich, creamy dessert that combines the bold flavors of coffee with luscious chocolate. Made with coffee-soaked cookies and a whip of chocolate mousse, this no-bake cake is easy to assemble and delightfully refreshing.
The use of instant coffee enhances the mocha flavor while the whipped cream brings a cloud-like texture that melts in your mouth. It’s perfect for gatherings, dinner parties, or simply treating yourself at the end of a long day.
The Diabetes Cookbook
Instant Healthy Meals From Managing Diabetes

What sets this cake apart is its versatility and ease. As a make-ahead dessert, it gives you more time to spend with loved ones without the hassle of last-minute baking.
With just a handful of simple ingredients, you’ll create a stunning dessert that not only tastes divine but is also a feast for the eyes. Don’t miss out on this delightful treat!
Why This Mocha Chocolate Icebox Cake
Selling Points:
- No-Bake Delight: This icebox cake is a breeze to prepare, perfect for those warmer days when you want a delicious dessert without turning on the oven.
- Irresistible Flavor Combo: The rich combination of coffee and chocolate creates a decadent flavor profile, making it a favorite among dessert lovers.
- Perfectly Creamy Texture: With whipped cream and chocolate mousse, each bite delivers a smooth, luxurious texture that feels indulgent without being heavy.
- Make-Ahead Convenience: This dessert is designed to be prepared in advance and stored in the fridge, allowing the flavors to meld beautifully while you relax and enjoy your day.
Cuisine: American
What You Need For Mocha Chocolate Icebox Cake
Ingredients:
- 24 coffee-flavored ladyfinger cookies (or chocolate wafer cookies)
- 1 cup strong brewed coffee, cooled
- 2 cups heavy whipping cream
- 1 cup semi-sweet chocolate chips
- 1/2 cup powdered sugar
- 1 teaspoon vanilla extract
- 2 tablespoons instant coffee granules
- Cocoa powder (for dusting)
How to Make Mocha Chocolate Icebox Cake
Start by brewing a strong cup of coffee and allowing it to cool completely. In a microwave or double boiler, melt the semi-sweet chocolate chips until smooth, then set aside to cool slightly. In a mixing bowl, whip the heavy whipping cream until soft peaks form. Gradually add the powdered sugar, vanilla extract, and instant coffee granules, and continue whipping until you achieve stiff peaks.
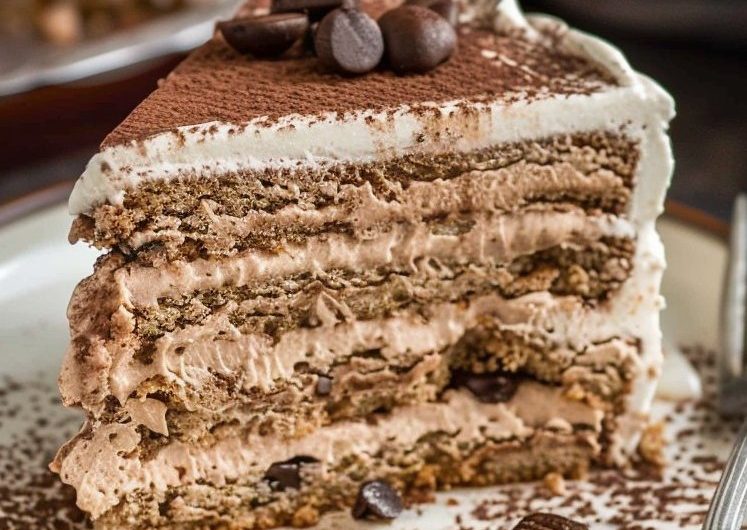
Next, gently fold the melted chocolate into the whipped cream until fully combined, creating a rich mousse-like consistency. Now it’s time to assemble! Dip each ladyfinger or chocolate wafer into the cooled coffee for just a second, ensuring they soak without falling apart. Begin layering the coffee-soaked cookies at the bottom of a springform pan, followed by a generous layer of the chocolate mousse. Repeat the process, alternating layers, finishing with the mousse on top.
Cover the cake and refrigerate for at least 4 hours or overnight, allowing the flavors to meld together. When it’s time to serve, dust the top with cocoa powder and enjoy the blissful layers.
Tips For Mocha Chocolate Icebox Cake
For the best flavor, use high-quality cocoa powder and chocolate chips, as this will enhance the overall richness of your icebox cake. Be sure to whip your cream until it reaches stiff peaks to maintain the structure of your dessert.
If you prefer a stronger coffee flavor, you can adjust the amount of instant coffee used in the whipped cream. Just be cautious—too much can overpower the chocolate!
Substitutions and Variations
Want a twist? Swap out the coffee-flavored cookies for a different variety—perhaps vanilla or chocolate chip for a different taste experience. You can also experiment with mocha extract if you desire a more concentrated flavor. For a lighter version, consider using Greek yogurt in place of some of the whipped cream—just adjust the sweetness accordingly!
Make a Healthier Version
To make a healthier Mocha Chocolate Icebox Cake, replace the heavy whipping cream with coconut cream or a low-fat whipped topping. Utilize dark chocolate chips instead of semi-sweet for a lower-sugar option, and consider using whole grain cookies as a base. This way, you can enjoy the delightful dessert with less guilt!
Closing For Mocha Chocolate Icebox Cake
And there you have it! This Mocha Chocolate Icebox Cake is sure to become a go-to dessert that you’ll want to share with friends and family. Its rich flavors and creamy texture make it an unforgettable treat for any occasion. Don’t forget to let us know how your dish turns out, and consider checking out some of our other recipes for more delightful inspirations!
Frequently Asked Questions For Mocha Chocolate Icebox Cake:
- Can I make this cake ahead of time?
Absolutely! It’s best to prepare the cake a day in advance to allow the flavors to meld together. - How long can I store the icebox cake?
The Mocha Chocolate Icebox Cake can be kept in the refrigerator for up to 5 days. - Is it necessary to use coffee-flavored cookies?
While they enhance the coffee flavor, you can use regular chocolate or vanilla cookies if preferred. - Can I use whipped cream from a can?
Yes, but homemade whipped cream will give the best texture and flavor for this cake. - What if I don’t have a springform pan?
You can use a regular cake pan lined with parchment paper, but be careful when removing the cake. - Is there a gluten-free version of this recipe?
Yes! You can use gluten-free ladyfinger cookies or chocolate wafers instead. - Can I freeze the Mocha Chocolate Icebox Cake?
Yes, you can freeze it. Just ensure it’s well covered to prevent freezer burn. - What other flavors can I use?
Experiment with hazelnut or caramel instead of mocha for a different twist! - How do I serve this dessert?
Slice into wedges with a sharp knife and use a cake server to lift the pieces out. - Is it possible to make this vegan?
Yes! Use dairy-free whipped cream and vegan chocolate chips for a delicious vegan version. - Can I add alcohol for an adult version?
Certainly! A splash of coffee liqueur works wonderfully in the mousse and will heighten the mocha flavor. - How can I make it more visually appealing?
Consider adding fresh coffee beans or chocolate shavings on top for a beautiful garnish!
Feel free to tweak any parts of this recipe as needed! Enjoy your Mocha Chocolate Icebox Cake!
Mocha Chocolate Icebox Cake
4
servings30
minutes40
minutes300
kcal1
hour10
minutesKeep the screen of your device on
Ingredients
24 coffee-flavored ladyfinger cookies (or chocolate wafer cookies)
1 cup strong brewed coffee, cooled
2 cups heavy whipping cream
1 cup semi-sweet chocolate chips
1/2 cup powdered sugar
1 teaspoon vanilla extract
2 tablespoons instant coffee granules
Cocoa powder (for dusting)
Directions
- Start by brewing a strong cup of coffee and allowing it to cool completely. In a microwave or double boiler, melt the semi-sweet chocolate chips until smooth, then set aside to cool slightly. In a mixing bowl, whip the heavy whipping cream until soft peaks form. Gradually add the powdered sugar, vanilla extract, and instant coffee granules, and continue whipping until you achieve stiff peaks.
- Next, gently fold the melted chocolate into the whipped cream until fully combined, creating a rich mousse-like consistency. Now it’s time to assemble! Dip each ladyfinger or chocolate wafer into the cooled coffee for just a second, ensuring they soak without falling apart. Begin layering the coffee-soaked cookies at the bottom of a springform pan, followed by a generous layer of the chocolate mousse. Repeat the process, alternating layers, finishing with the mousse on top.
- Cover the cake and refrigerate for at least 4 hours or overnight, allowing the flavors to meld together. When it’s time to serve, dust the top with cocoa powder and enjoy the blissful layers.
Follow US on Pinterest
Follow @middleeastsector on Pinterest