
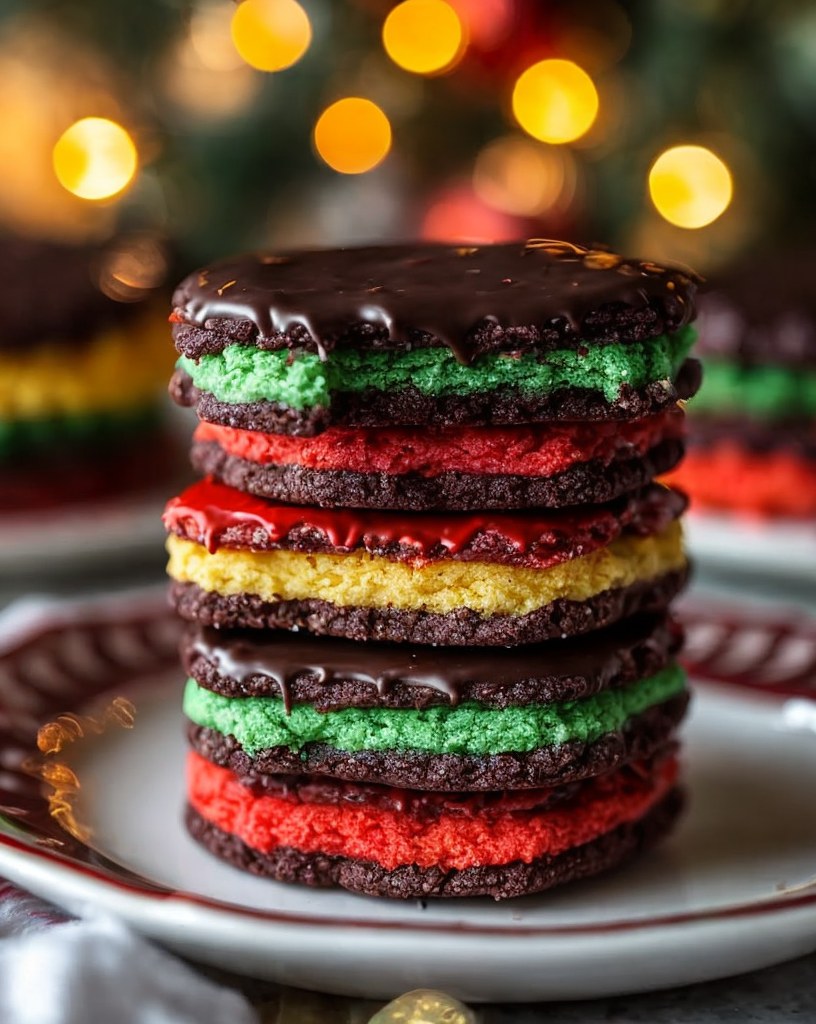
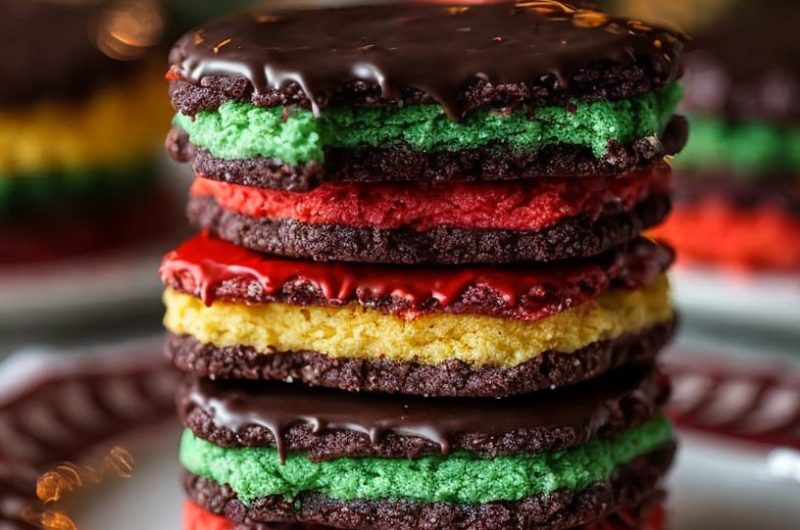
If you’ve ever admired the colorful layers of Italian Rainbow Cookies, you’re in for a treat. These cookies, also known as Tri-Color Cookies or Seven-Layer Cookies, are a delightful combination of almond cake, fruit preserves, and chocolate. While they’re technically more like a layered cake than a cookie, they’re a must-have on any holiday cookie platter or special occasion.
Making these cookies requires a bit of patience and precision, but the result is absolutely worth it. Vibrant, flavorful, and visually stunning, Italian Rainbow Cookies are a show-stopping dessert that tastes just as good as they look.
Let’s bake these colorful classics and bring a slice of nostalgia to your kitchen!
Quick Overview in Todd Wilbur’s Style
These Italian Rainbow Cookies combine almond-flavored sponge cake, fruit preserves, and chocolate glaze for a layered, bakery-quality treat. Vibrant colors and rich flavors make them a holiday favorite and a true crowd-pleaser.
Why You’ll Love This Recipe
Colorful, Almond-Flavored, and Bakery-Worthy
- Vibrant and Beautiful: Perfect for holidays and celebrations.
- Rich Almond Flavor: Enhanced by the use of almond paste or extract.
- Customizable Layers: Use your favorite fruit preserves for a personal touch.
- Impressive Yet Doable: Requires care but yields bakery-quality results.
What You Need for Italian Rainbow Cookies
Ingredients:
For the Cake Layers:
- 1 cup (2 sticks) unsalted butter, softened
- 1 cup granulated sugar
- 4 large eggs, separated (yolks and whites)
- 1 tsp almond extract
- 2 cups all-purpose flour
- ½ tsp salt
- ½ tsp red food coloring
- ½ tsp green food coloring
For the Filling:
- ¾ cup apricot preserves, strained
- ¾ cup raspberry preserves, strained
For the Chocolate Glaze:
The Diabetes Cookbook
Instant Healthy Meals From Managing Diabetes

- 8 oz semi-sweet chocolate, chopped
- 1 tbsp unsalted butter
How to Make Italian Rainbow Cookies
Step 1: Prepare the Cake Batter
- Preheat your oven to 350°F (175°C). Line three 9×13-inch baking pans with parchment paper and grease the paper.
- In a large bowl, cream the butter and sugar until light and fluffy. Add the egg yolks and almond extract, mixing until smooth.
- In a separate bowl, sift together the flour and salt. Gradually add the dry ingredients to the butter mixture, mixing until combined.
- In another bowl, beat the egg whites until stiff peaks form. Gently fold the egg whites into the batter.
Step 2: Color the Batter
- Divide the batter evenly into three bowls. Leave one plain, tint one with red food coloring, and the other with green food coloring.
Step 3: Bake the Cake Layers
- Spread each colored batter evenly into the prepared pans. Bake for 10–12 minutes, or until the cakes are just set and lightly golden. Let the cakes cool completely.
Step 4: Assemble the Layers
- Place the green layer on a large piece of plastic wrap. Spread half of the apricot preserves evenly over the top.
- Place the plain (white) layer on top and spread the raspberry preserves evenly over it.
- Place the red layer on top. Wrap the assembled layers tightly in plastic wrap and refrigerate for at least 4 hours, or overnight, to set.
Step 5: Add the Chocolate Glaze
- Melt the chocolate and butter together in a heatproof bowl over simmering water, stirring until smooth.
- Remove the chilled cake from the fridge and unwrap it. Spread the chocolate glaze evenly over the top layer. Let the glaze set at room temperature for about 1 hour.
Step 6: Trim and Slice
- Trim the edges of the cake to create clean sides. Slice into small, rectangular cookies or squares.
Tips for Perfect Rainbow Cookies
- Use a Scale: Weigh the batter for even layers.
- Chill Time is Key: Refrigerating the layers ensures they hold together while slicing.
Substitutions and Variations
- Flavor Swap: Use orange marmalade, cherry preserves, or strawberry jam for the filling.
- Dairy-Free Option: Use plant-based butter and chocolate.
- Nut-Free Version: Replace almond extract with vanilla extract for a nut-free alternative.
Make a Healthier Version
- Reduce Sugar: Use low-sugar preserves and reduce the sugar in the batter by ¼ cup.
- Whole Grain Option: Replace half the all-purpose flour with whole wheat pastry flour.
Frequently Asked Questions for Italian Rainbow Cookies
- Can I make these cookies ahead of time?
Yes! They taste even better after a day or two and can be stored in the fridge for up to a week. - Do I need three pans?
Using three pans ensures even layers, but you can bake in batches if needed. - How do I prevent the layers from sliding?
Chill the layers thoroughly before slicing to help them stay intact. - Can I freeze these cookies?
Absolutely! Wrap tightly and freeze for up to 3 months. Thaw in the fridge before serving. - What if I don’t have almond extract?
Use vanilla or lemon extract for a different flavor profile. - What’s the best way to slice these cookies?
Use a sharp knife and clean it between cuts for neat edges. - Can I use food gel instead of liquid food coloring?
Yes, food gel provides vibrant colors with less liquid. - What can I use instead of apricot preserves?
Any smooth, seedless jam or jelly works well. - Why are these cookies called “seven-layer cookies”?
The layers consist of three cakes, two preserves, and two chocolate layers. - How do I store leftovers?
Keep in an airtight container in the fridge for up to a week. - Can I skip the chocolate glaze?
The glaze is traditional, but you can skip it or replace it with powdered sugar for a simpler version. - What’s the yield for this recipe?
This recipe makes about 30–40 small cookies, depending on size.
Closing Thoughts
And there you have it—Italian Rainbow Cookies, a stunning, flavorful dessert that’s as much a treat for the eyes as it is for the palate. Perfect for holidays, special occasions, or anytime you want to impress, these cookies are sure to be a hit.
Happy baking, and enjoy every colorful bite! 😊🌈🍪
Italian Rainbow Cookies Recipe
4
servings30
minutes40
minutes300
kcal1
hour10
minutesKeep the screen of your device on
Ingredients
- For the Cake Layers:
1 cup (2 sticks) unsalted butter, softened
1 cup granulated sugar
4 large eggs, separated (yolks and whites)
1 tsp almond extract
2 cups all-purpose flour
½ tsp salt
½ tsp red food coloring
½ tsp green food coloring
- For the Filling:
¾ cup apricot preserves, strained
¾ cup raspberry preserves, strained
- For the Chocolate Glaze:
8 oz semi-sweet chocolate, chopped
1 tbsp unsalted butter
Directions
- Step 1: Prepare the Cake Batter
- Preheat your oven to 350°F (175°C). Line three 9×13-inch baking pans with parchment paper and grease the paper.
- In a large bowl, cream the butter and sugar until light and fluffy. Add the egg yolks and almond extract, mixing until smooth.
- In a separate bowl, sift together the flour and salt. Gradually add the dry ingredients to the butter mixture, mixing until combined.
- In another bowl, beat the egg whites until stiff peaks form. Gently fold the egg whites into the batter.
- Step 2: Color the Batter
- Divide the batter evenly into three bowls. Leave one plain, tint one with red food coloring, and the other with green food coloring.
- Step 3: Bake the Cake Layers
- Spread each colored batter evenly into the prepared pans. Bake for 10–12 minutes, or until the cakes are just set and lightly golden. Let the cakes cool completely.
- Step 4: Assemble the Layers
- Place the green layer on a large piece of plastic wrap. Spread half of the apricot preserves evenly over the top.
- Place the plain (white) layer on top and spread the raspberry preserves evenly over it.
- Place the red layer on top. Wrap the assembled layers tightly in plastic wrap and refrigerate for at least 4 hours, or overnight, to set.
- Step 5: Add the Chocolate Glaze
- Melt the chocolate and butter together in a heatproof bowl over simmering water, stirring until smooth.
- Remove the chilled cake from the fridge and unwrap it. Spread the chocolate glaze evenly over the top layer. Let the glaze set at room temperature for about 1 hour.
- Step 6: Trim and Slice
- Trim the edges of the cake to create clean sides. Slice into small, rectangular cookies or squares.
Follow US on Pinterest
Follow @middleeastsector on Pinterest