
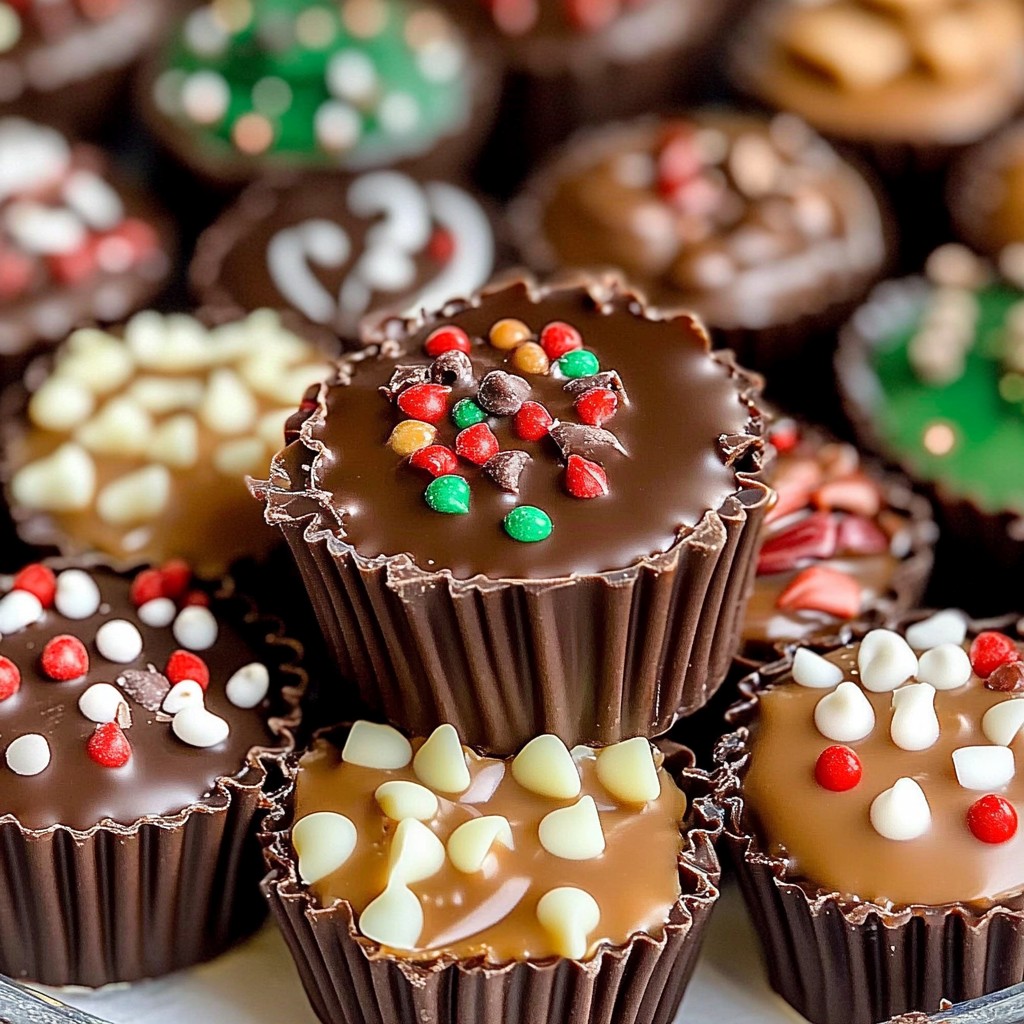
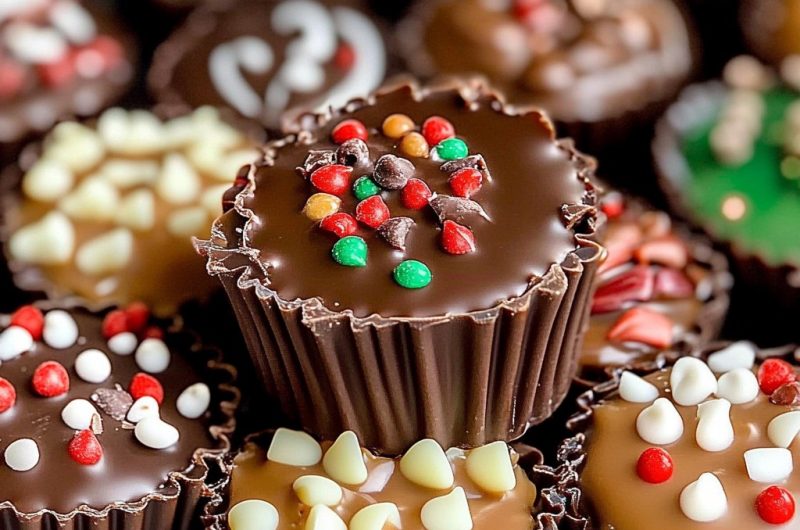
There’s something magical about bite-sized treats that pack a punch of flavor. Christmas Chocolate Caramel Cups combine the rich, velvety decadence of chocolate with the gooey sweetness of caramel, all topped with festive decorations to make them holiday-ready. They’re elegant, indulgent, and surprisingly easy to make!
The first time I made these, the combination of creamy caramel and smooth chocolate won everyone over. Each cup is like a little gift for your taste buds, wrapped in its festive topping.
What I love most about this recipe is how customizable it is—add a sprinkle of sea salt, crushed candy canes, or edible glitter for extra holiday flair. Let’s create these Christmas Chocolate Caramel Cups and bring some sweetness to the season!
Christmas Chocolate Caramel Cups feature layers of creamy caramel and rich chocolate in a bite-sized treat. These festive candies are perfect for holiday gifting, dessert tables, or as a sweet snack for yourself.
An Exciting Story
The first time I served Christmas Chocolate Caramel Cups at a holiday dinner, they were the first dessert to disappear. My husband loved the gooey caramel center, and the kids couldn’t get enough of the fun toppings. Now, these treats have become a staple in my holiday baking rotation, and I love how they make everyone’s face light up.
Why These Christmas Chocolate Caramel Cups?
- Rich and Indulgent: A perfect balance of chocolate and caramel.
- Festive and Fun: Perfect for the holiday season with customizable toppings.
- Easy to Make: No complicated techniques or special equipment required.
- Perfect for Gifting: Package them in holiday boxes or bags for a thoughtful homemade gift.
- Crowd-Pleaser: Loved by kids and adults alike.
What You Need for Christmas Chocolate Caramel Cups
- For the Chocolate Layer:
- 12 oz semi-sweet chocolate chips
- 1 tbsp coconut oil or butter
- For the Caramel Layer:
- 20 soft caramels, unwrapped (store-bought or homemade)
- 2 tbsp heavy cream
- For Decoration:
- Crushed candy canes
- Edible glitter
- Holiday sprinkles
- Sea salt (optional)
- Equipment:
- Mini muffin tin
- Mini cupcake liners
How to Make Christmas Chocolate Caramel Cups
- Prepare the Liners:
- Line a mini muffin tin with mini cupcake liners.
- Make the Chocolate Layer:
- In a microwave-safe bowl, combine the chocolate chips and coconut oil. Microwave in 30-second intervals, stirring between each, until smooth and melted.
- Spoon about 1 teaspoon of melted chocolate into each liner and use the back of the spoon to spread it slightly up the sides. Place the tray in the refrigerator to set for 10 minutes.
- Make the Caramel Layer:
- In a small saucepan, melt the caramels and heavy cream over low heat, stirring constantly, until smooth and creamy. Remove from heat and let cool slightly.
- Assemble the Cups:
- Spoon about 1 teaspoon of the caramel mixture onto the set chocolate layer. Top with another teaspoon of melted chocolate, spreading it to seal the edges.
- Decorate:
- Immediately sprinkle crushed candy canes, edible glitter, sprinkles, or sea salt on top while the chocolate is still soft.
- Chill and Set:
- Refrigerate the cups for at least 30 minutes, or until fully set.
- Serve and Enjoy:
- Remove the cups from the liners and serve chilled or at room temperature. Store in an airtight container in the refrigerator for up to 2 weeks.
Tips for Christmas Chocolate Caramel Cups
- Work Quickly: Assemble the layers while the chocolate and caramel are still soft for smooth results.
- Use Good Chocolate: High-quality chocolate will make these cups taste even better.
Substitutions and Variations
- Different Toppings: Use chopped nuts, shredded coconut, or drizzle white chocolate over the tops.
- Salted Caramel: Add a pinch of sea salt to the caramel for a salted caramel version.
- Dairy-Free: Use dairy-free chocolate and coconut cream instead of heavy cream.
Make a Healthier Version
- Use dark chocolate with at least 70% cocoa for a lower-sugar option.
- Make homemade caramel with natural sweeteners like honey or maple syrup.
- Skip the toppings and reduce the caramel layer for a lighter treat.
Closing for Christmas Chocolate Caramel Cups:
And there you have it—Christmas Chocolate Caramel Cups, a treat that’s as festive as it is delicious. Perfect for sharing, gifting, or indulging, these cups are sure to become a holiday favorite. Let us know how yours turn out, and don’t forget to explore more of our holiday dessert recipes!
Frequently Asked Questions for Christmas Chocolate Caramel Cups
- Can I make these ahead of time?
Yes, they store well in the refrigerator for up to 2 weeks. - How do I store leftovers?
Store in an airtight container in the refrigerator to keep the caramel fresh. - Can I freeze these?
Yes, freeze in a single layer in an airtight container for up to 3 months. Thaw in the refrigerator before serving. - What if I don’t have mini cupcake liners?
Use silicone molds or make your own liners with parchment paper. - Can I use milk chocolate?
Yes, but milk chocolate is sweeter, so adjust the caramel’s sweetness if needed. - What pairs well with these cups?
Serve with coffee, hot chocolate, or a glass of cold milk for the perfect pairing. - How do I prevent the caramel from hardening too quickly?
Keep the caramel warm on low heat while assembling the cups. - Can I make these larger?
Use a standard muffin tin for larger cups and adjust the filling quantities. - What’s a fun serving idea?
Arrange the cups in a decorative holiday tin or gift box for festive gifting. - Can I make them vegan?
Use vegan chocolate and a coconut cream-based caramel for a plant-based version. - How do I make the layers neat?
Use a piping bag or small spoon for precise layering. - What’s a good alternative to caramel?
Use peanut butter, Nutella, or a ganache filling for a twist.
Christmas Chocolate Caramel Cups
4
The Diabetes Cookbook
Instant Healthy Meals From Managing Diabetes

30
minutes40
minutes300
kcal1
hour10
minutesKeep the screen of your device on
Ingredients
- For the Chocolate Layer:
12 oz semi-sweet chocolate chips
1 tbsp coconut oil or butter
- For the Caramel Layer:
20 soft caramels, unwrapped (store-bought or homemade)
2 tbsp heavy cream
- For Decoration:
Crushed candy canes
Edible glitter
Holiday sprinkles
Sea salt (optional)
- Equipment:
Mini muffin tin
Mini cupcake liners
Directions
- Prepare the Liners:
- Line a mini muffin tin with mini cupcake liners.
- Make the Chocolate Layer:
- In a microwave-safe bowl, combine the chocolate chips and coconut oil. Microwave in 30-second intervals, stirring between each, until smooth and melted.
- Spoon about 1 teaspoon of melted chocolate into each liner and use the back of the spoon to spread it slightly up the sides. Place the tray in the refrigerator to set for 10 minutes.
- Make the Caramel Layer:
- In a small saucepan, melt the caramels and heavy cream over low heat, stirring constantly, until smooth and creamy. Remove from heat and let cool slightly.
- Assemble the Cups:
- Spoon about 1 teaspoon of the caramel mixture onto the set chocolate layer. Top with another teaspoon of melted chocolate, spreading it to seal the edges.
- Decorate:
- Immediately sprinkle crushed candy canes, edible glitter, sprinkles, or sea salt on top while the chocolate is still soft.
- Chill and Set:
- Refrigerate the cups for at least 30 minutes, or until fully set.
- Serve and Enjoy:
- Remove the cups from the liners and serve chilled or at room temperature. Store in an airtight container in the refrigerator for up to 2 weeks.
Follow US on Pinterest
Follow @middleeastsector on Pinterest