
Oh, my goodness, Kitchies, you know those moments when you want something sweet, something creamy, something fruity, and something with a little bit of a crunch? Something that just makes you smile with how utterly clever and delicious it is? Well, let me introduce you to my current obsession, a dessert that’s a total party in your mouth: these Cherry Cheesecake Tacos! Seriously, they’re a playful twist on classic cheesecake and a fun take on everyone’s favorite handheld food. They’re guaranteed to be a hit, no matter the occasion!
I first got the idea for these when I was thinking about how much everyone loves dessert “dips” and “bars” at parties. And then, it hit me – what if we made dessert tacos? The thought of a crispy shell, sweet and cinnamon-y, filled with creamy cheesecake and topped with juicy cherries, just seemed like pure genius. It took a little experimenting to get the shells just right – crispy but not too hard, and easy to shape. And then, perfecting that creamy, dreamy cheesecake filling, not too sweet, not too heavy. But once I nailed it, oh boy, it was game over!
Honestly, making these is just plain fun. The process of turning simple tortillas into sweet, crispy shells is surprisingly satisfying, and then whipping up that creamy filling… it’s a little assembly line of deliciousness. And the colors! Those vibrant red cherries against the creamy white filling and the golden-brown shell are just so visually appealing. It just screams “happy occasion” or “best dessert ever!”
These aren’t just a novelty, either. They’re genuinely the most satisfying, sweet, and creamy little bites you’ll ever sink your teeth into. They’re perfect for a summer BBQ, a casual get-together, a birthday party (my kids Leo and Maya go wild for them!), or honestly, just because you want a super fun and delicious dessert. My husband, David, always says they’re his favorite “handheld cheesecake,” and he’s not wrong!
So, if you’re ready to get creative in the kitchen, bake something truly unique, and impress everyone with both its cuteness and its incredible taste, then you are absolutely in the right place. Get ready to fall head over heels for these Cherry Cheesecake Tacos. They’re a little bit of magic, a lot of deliciousness, and a whole lot of fun to make and eat!
Resume: Cherry Cheesecake Tacos
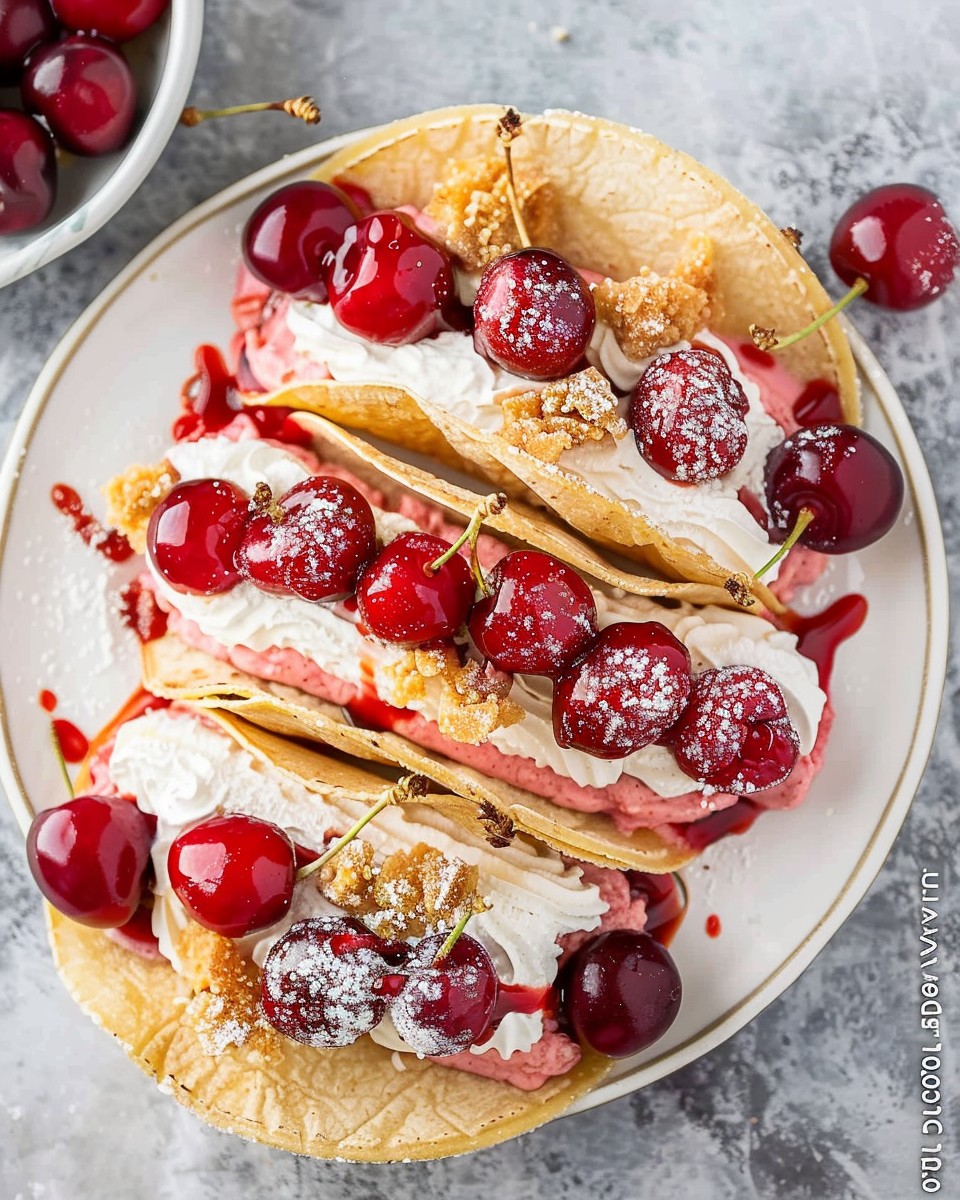
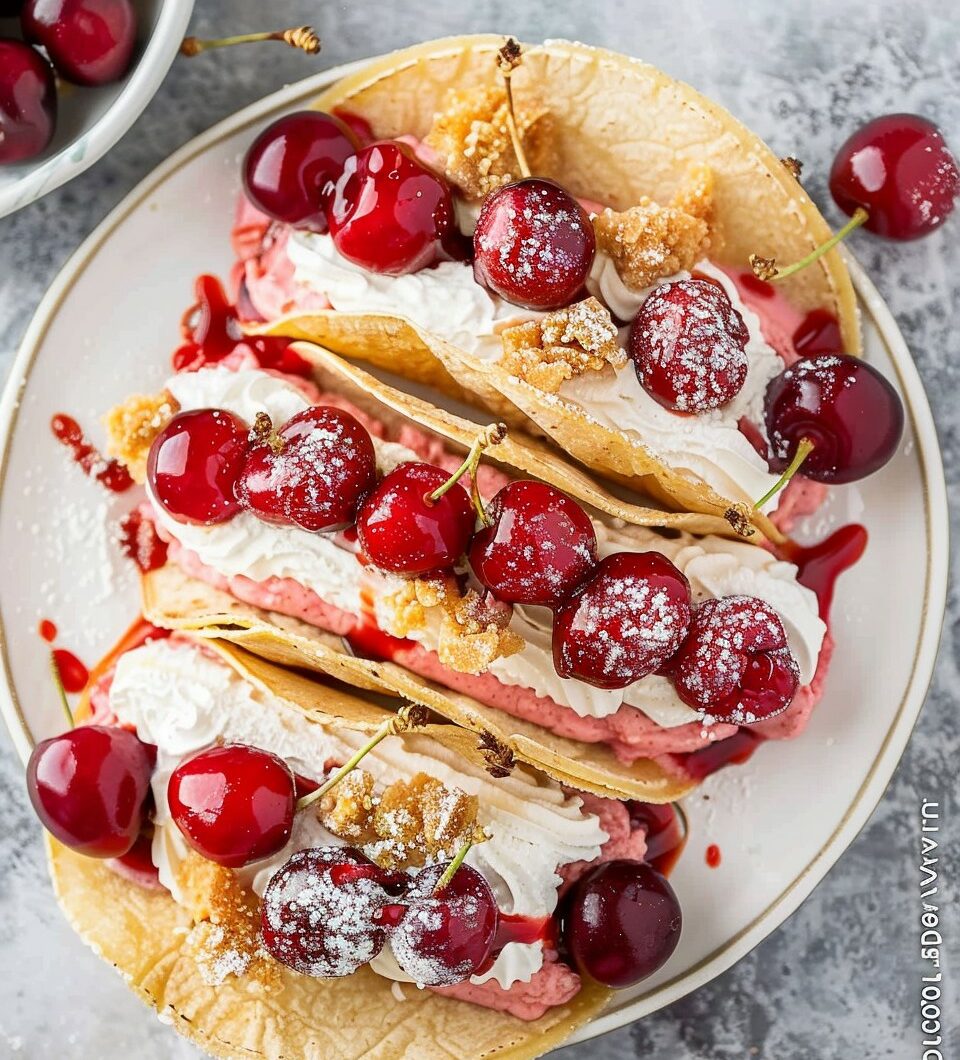
Prepare for a truly delightful dessert experience with these Cherry Cheesecake Tacos! This ingenious treat features crispy, cinnamon-sugar-coated tortilla shells, filled with a smooth, creamy cheesecake filling, and topped with a luscious dollop of sweet cherry pie filling. It’s a fun, handheld twist on a classic dessert that’s perfect for any occasion.
What makes these dessert tacos unique is their creative transformation of a savory staple (tortillas) into a sweet, crunchy shell. This provides an irresistible textural contrast to the cool, rich cheesecake filling and the juicy fruit topping. It’s an innovative approach to serving cheesecake that’s both whimsical and incredibly satisfying.
The Diabetes Cookbook
Instant Healthy Meals From Managing Diabetes

This recipe focuses on simplicity and ease, making it perfect for both novice and experienced bakers. With readily available ingredients like flour tortillas, cream cheese, and canned cherry pie filling, you can assemble these delicious bites with minimal fuss. The customizable topping options allow for endless creativity.
Forget boring desserts. These Cherry Cheesecake Tacos promise a deeply satisfying, sweet, and wonderfully fun eating experience. They’re perfect for parties, celebrations, or anytime you crave a playful and delicious twist on a classic. Get ready for everyone to ask for the recipe!
Exciting Story: The Neighborhood Potluck and The Unexpected Dessert Hit
Okay, so the story of these Cherry Cheesecake Tacos becoming the star of our last neighborhood potluck? It’s pretty legendary now! We have this big annual summer potluck with all our neighbors here in Marrakesh. Everyone brings their best dish, and there’s always a bit of friendly competition, especially with desserts. I wanted to bring something really different, something that would spark conversation. David, my husband, just said, “Make something with cherries, you always love baking with them.”
I was scrolling through some dessert ideas, and I kept seeing variations of “dessert tacos.” My mind immediately leaped to cheesecake and cherries, a combo I adore. The idea of taking simple tortillas and turning them into sweet, crispy shells seemed so fun and unexpected. I spent the morning before the potluck baking the shells – the smell of cinnamon and sugar toasting was just heavenly. Then, whipping up that creamy cheesecake filling and having the vibrant cherry pie filling ready.
When I arrived at the potluck, I carefully laid out the beautiful, golden-brown taco shells, piped in the creamy cheesecake, and then topped each one with a glistening spoonful of cherries. They looked absolutely adorable on the table! At first, people paused, a little unsure. “Are those… dessert tacos?” someone asked. My friend Sarah, always curious, picked one up. She took a bite, and her eyes just lit up. “Oh my goodness,” she exclaimed, “these are genius! Crispy, creamy, and that cherry is perfect!”
Before I knew it, people were grabbing them, little murmurs of “Wow!” and “You have to try this!” filled the air. Even the kids, Leo and Maya, who were busy with games, raced over when they saw the dessert, quickly devouring a few each. David, beaming, just kept saying, “See? I told you cherries!” By the end of the evening, the platter was completely empty, and I had at least ten people asking for the recipe. That day, these Cherry Cheesecake Tacos weren’t just dessert; they were the undisputed hit of the potluck, a perfect little bite of summer fun. They’re now a permanent fixture on our warm-weather dessert rotation!
Why These Cherry Cheesecake Tacos Are Your New Favorite Sweet Treat!
So, what makes these Cherry Cheesecake Tacos the absolute, hands-down winner for your next sweet craving, or a delightful addition to any gathering? Well, it’s all about that incredible fusion of textures and flavors that just sings! You’ve got the irresistible crispy, golden crunch of the tortilla shell, which we transform into a sweet, cinnamon-sugar delight. This provides the perfect contrast to the next layer: a luscious, smooth, and tangy cheesecake filling that melts in your mouth. And then, the vibrant, sweet-tart burst of juicy cherry pie filling on top just seals the deal. It’s a symphony of sensations in every single bite!
The genius of this recipe also lies in its utter simplicity and incredible charm. We’re taking humble flour tortillas and, with a little butter and cinnamon sugar, baking them into perfect, crispy dessert taco shells. The cheesecake filling is a quick, no-bake whisk-together affair with cream cheese, powdered sugar, and a touch of vanilla. And that cherry pie filling? Straight from a can, which is a fantastic shortcut for maximum flavor with minimal effort. It’s a beautiful balance of homemade goodness and smart shortcuts, making it totally achievable for any home cook. Plus, they’re individual, handheld, and just plain adorable, making them perfect for parties and guaranteed to disappear fast!
What You Need For Cherry Cheesecake Tacos [Simplified]
Alright, my sweet-toothed friends, here’s what you’ll want to gather for these super fun and utterly delicious Cherry Cheesecake Tacos! It’s going to be so good.
For the Crispy Taco Shells:
- 6-8 small flour tortillas (about 4-5 inches, often labeled “street taco size”)
- ¼ cup unsalted butter, melted
- ½ cup granulated sugar
- 1 tablespoon ground cinnamon
For the No-Bake Cheesecake Filling:
- 1 block (8 ounces / 226g) cream cheese, softened to room temperature (this is KEY!)
- ½ cup powdered sugar (also called confectioners’ sugar)
- 1 teaspoon vanilla extract
- ½ cup cold heavy whipping cream
For the Cherry Topping:
- 1 can (21 ounces / 595g) cherry pie filling
You’ll also need:
- A shallow bowl for the cinnamon sugar
- An upside-down muffin tin (for shaping the shells)
- Electric mixer (handheld or stand mixer)
- Piping bag (or a sturdy Ziploc bag with the corner snipped off)

How to Make Cherry Cheesecake Tacos
Alright, let’s get ready to make these absolutely adorable and delicious Cherry Cheesecake Tacos! This recipe is surprisingly straightforward, and the result is truly a treat.
Part 1: Making the Crispy Taco Shells
First things first, preheat your oven to 350°F (175°C).
In a shallow bowl, whisk together the granulated sugar and ground cinnamon. This is your delicious coating! Set it aside.
Now, take your small flour tortillas. One by one, brush both sides of each tortilla with the melted butter. Make sure they’re well coated. Immediately after buttering, dip each tortilla into the cinnamon-sugar mixture, pressing gently to ensure both sides are fully coated. Give them a gentle shake to remove any excess sugar.
To shape them into taco shells, flip a muffin tin upside down. Carefully drape each coated tortilla between the muffin cups, allowing it to hang and form a “taco” shape. You should be able to fit 3-4 tortillas per regular muffin tin (using the space between the cups).
Pop the muffin tin with the tortillas into your preheated oven and bake for about 7-10 minutes, or until the tortillas are golden brown and perfectly crisp. Keep a close eye on them, as they can brown quickly!
Once baked, remove the muffin tin from the oven and let the crispy shells cool completely while still on the upside-down muffin tin. This is super important – letting them cool in shape helps them hold that taco shell form.
Part 2: Preparing the No-Bake Cheesecake Filling
While your shells are cooling, let’s get that dreamy cheesecake filling ready! In a large mixing bowl (or the bowl of your stand mixer), place your softened cream cheese. Beat it with an electric mixer on medium speed until it’s perfectly smooth, light, and fluffy – no lumps here! This might take 1-2 minutes.
Next, gradually add the powdered sugar, beating on low speed until it’s fully incorporated. Then, beat in the vanilla extract.
Now, add the cold heavy whipping cream to the cream cheese mixture. Increase the mixer speed to medium-high and beat for about 2-3 minutes, or until the mixture becomes thick, fluffy, and holds soft peaks. Make sure everything is well combined and beautifully smooth.
Transfer this creamy cheesecake filling to a piping bag (or a sturdy Ziploc bag with one corner snipped off). Place it in the refrigerator to chill for at least 30 minutes. Chilling helps it firm up and makes it easier to pipe!
Part 3: Assembly!
Once your crispy taco shells are completely cooled and firm, and your cheesecake filling is nicely chilled, it’s assembly time!
Remove the chilled cheesecake filling from the fridge. Carefully pipe the cheesecake filling into each cooled taco shell, filling them about halfway to three-quarters full.
Finally, spoon a generous dollop of cherry pie filling right on top of the cheesecake filling in each taco. You can arrange a few extra cherries if you like!
Serve your delightful Cherry Cheesecake Tacos immediately for the best texture and enjoyment. Get ready for a dessert fiesta! Enjoy every single delicious bite!
Tips For Cherry Cheesecake Tacos:
For those perfectly crispy and shapely taco shells, ensure you press the tortillas firmly into the cinnamon-sugar mixture to get a good, even coat. And when baking, don’t overcrowd your muffin tin; give the tortillas enough space to crisp up. Crucially, let them cool completely on the upside-down muffin tin; this is what helps them set and hold their taco shape so they don’t flatten out when you fill them!
When making the cheesecake filling, the absolute most important tip is to use cream cheese that is truly softened to room temperature. This ensures you get a smooth, lump-free filling that pipes beautifully. If your cream cheese is cold, it will be lumpy and hard to mix. Also, ensure your heavy cream is very cold when whipping it with the cream cheese, as this helps it thicken properly and create that lovely, airy texture.
Substitutions and Variations:
Want to play around with your Cherry Cheesecake Tacos? You’ve got tons of fun options! For the fruit topping, feel free to swap out the cherry pie filling for your favorite flavor – blueberry, strawberry, apple, or even peach pie filling would be absolutely delicious! You could also use fresh berries, lightly macerated with a bit of sugar, if you prefer.
For the shells, instead of cinnamon sugar, you could try using a plain granulated sugar coating, or even a mix of graham cracker crumbs and sugar for a more “cheesecake crust” vibe. You can also drizzle a little chocolate syrup over the cherry topping for a chocolate-cherry cheesecake taco! Or, for a different twist, add a tiny bit of lemon zest to the cheesecake filling for a brighter, more citrusy flavor.
Make a Healthier Version:
To make your Cherry Cheesecake Tacos a bit healthier, you’ve got some good adjustments you can make! For the crispy taco shells, instead of brushing with butter and frying, you can bake them with a light spray of cooking oil and then coat them in cinnamon-sugar after baking. This significantly reduces the fat. You can also reduce the amount of sugar in the cinnamon-sugar coating.
For the no-bake cheesecake filling, opt for light or reduced-fat cream cheese. You can also use a sugar-free powdered sugar substitute if you’re comfortable with that, and choose light or sugar-free whipped topping (like Cool Whip Lite) instead of heavy cream (if that’s a texture you enjoy, as it will be different from whipped heavy cream). For the cherry topping, look for sugar-free cherry pie filling or make your own by lightly sweetening fresh or frozen cherries with a small amount of natural sweetener and a cornstarch slurry to thicken. These are already portion-controlled, which helps with mindful indulgence!
Closing For Cherry Cheesecake Tacos:
And there you have it, folks! Your very own, incredibly fun, utterly delicious Cherry Cheesecake Tacos, ready to be the star of your next dessert spread! This treat is such a clever way to bring smiles to faces, combining everyone’s favorite flavors and textures into perfect, handheld bites. It’s crispy, it’s creamy, it’s fruity, and it’s genuinely a hit every single time! Don’t forget to let us know how your Cherry Cheesecake Tacos turn out in the comments below – I’d absolutely love to hear it! – and definitely check out some of our other Recipes:
Are you curious about anything else? Take a look at the most frequently asked questions we get about this recipe:
Frequently Asked Questions For Cherry Cheesecake Tacos:
Q1: What kind of tortillas are best for Cherry Cheesecake Tacos? A1: Small flour tortillas (often labeled “street taco size,” about 4-5 inches in diameter) are perfect for these dessert tacos. Their size makes them ideal for bite-sized treats, and flour tortillas crisp up beautifully.
Q2: My taco shells aren’t crispy. What went wrong? A2: This usually happens if they weren’t baked long enough, or if they weren’t coated properly in butter and cinnamon sugar. Ensure they are golden brown and crisp when you remove them from the oven. Also, make sure your oven is preheated to the correct temperature.
Q3: Can I use a different fruit pie filling? A3: Yes, absolutely! Blueberry, strawberry, apple, or peach pie filling would all be delicious substitutes for the cherry pie filling. Use your favorite!
Q4: How long do Cherry Cheesecake Tacos last in the fridge? A4: These dessert tacos are best served immediately after assembly, as the shells can start to soften over time due to the moisture from the filling and fruit. However, you can store assembled leftovers in an airtight container in the refrigerator for up to 1 day, though the shells might be less crisp.
Q5: Can I make the shells ahead of time? A5: Yes, you can! You can bake the crispy cinnamon-sugar taco shells up to 2-3 days in advance. Store them in an airtight container at room temperature. You can also make the cheesecake filling a day ahead and store it in the fridge. Assemble just before serving for best results.
Q6: Why is it important for the cream cheese to be softened? A6: Having softened cream cheese at room temperature is crucial for achieving a smooth, lump-free cheesecake filling. Cold cream cheese will be difficult to beat and will likely result in a lumpy texture.
Q7: Can I make the cheesecake filling lighter? A7: Yes, you can use light or reduced-fat cream cheese, and you can substitute the heavy whipping cream with thawed light whipped topping (like Cool Whip Lite) for a lighter version of the filling.
Q8: Can I deep-fry the tortillas instead of baking them? A8: Yes, some recipes do deep-fry the tortillas! If you choose to deep-fry, heat neutral oil (like vegetable or canola) to 350-375°F (175-190°C). Use tongs to hold the tortilla folded in half in the hot oil for about 30-60 seconds per side until crispy. Immediately toss in cinnamon sugar after frying. Be cautious with hot oil.
Q9: What if I don’t have a piping bag for the filling? A9: No problem! You can simply use a sturdy Ziploc bag. Spoon the cheesecake filling into the bag, push it down to one corner, twist the top to seal, and then snip off a small piece of the corner with scissors. This works just like a piping bag!
Q10: Can I add fresh fruit instead of canned pie filling? A10: Yes! If using fresh fruit, like sliced strawberries or blueberries, you might want to macerate them first. Toss the sliced fruit with a tablespoon or two of sugar and a squeeze of lemon juice, and let them sit for 15-30 minutes to release their natural juices.
Q11: Can I make these chocolate cherry cheesecake tacos? A11: Absolutely! You could add 1-2 tablespoons of unsweetened cocoa powder to the cheesecake filling for a chocolate cheesecake base, or even drizzle melted chocolate over the cherry topping for extra chocolatey goodness.
Q12: How many Cherry Cheesecake Tacos does this recipe make? A12: This recipe typically makes 6-8 dessert tacos, depending on the size of your tortillas and how generously you fill them.
Cherry Cheesecake Tacos
4
servings30
minutes40
minutes300
kcal1
hour10
minutesKeep the screen of your device on
Ingredients
For the Crispy Taco Shells:
6 -8 small flour tortillas (about 4-5 inches, often labeled “street taco size”)
¼ cup unsalted butter, melted
½ cup granulated sugar
1 tablespoon ground cinnamon
For the No-Bake Cheesecake Filling:
1 block (8 ounces / 226g) cream cheese, softened to room temperature (this is KEY!)
½ cup powdered sugar (also called confectioners’ sugar)
1 teaspoon vanilla extract
½ cup cold heavy whipping cream
For the Cherry Topping:
1 can (21 ounces / 595g) cherry pie filling
You’ll also need:
A shallow bowl for the cinnamon sugar
An upside-down muffin tin (for shaping the shells)
Electric mixer (handheld or stand mixer)
Piping bag (or a sturdy Ziploc bag with the corner snipped off)
Directions
- Part 1: Making the Crispy Taco Shells
- First things first, preheat your oven to 350°F (175°C).
- In a shallow bowl, whisk together the granulated sugar and ground cinnamon. This is your delicious coating! Set it aside.
- Now, take your small flour tortillas. One by one, brush both sides of each tortilla with the melted butter. Make sure they’re well coated. Immediately after buttering, dip each tortilla into the cinnamon-sugar mixture, pressing gently to ensure both sides are fully coated. Give them a gentle shake to remove any excess sugar.
- To shape them into taco shells, flip a muffin tin upside down. Carefully drape each coated tortilla between the muffin cups, allowing it to hang and form a “taco” shape. You should be able to fit 3-4 tortillas per regular muffin tin (using the space between the cups).
- Pop the muffin tin with the tortillas into your preheated oven and bake for about 7-10 minutes, or until the tortillas are golden brown and perfectly crisp. Keep a close eye on them, as they can brown quickly!
- Once baked, remove the muffin tin from the oven and let the crispy shells cool completely while still on the upside-down muffin tin. This is super important – letting them cool in shape helps them hold that taco shell form.
- Part 2: Preparing the No-Bake Cheesecake Filling
- While your shells are cooling, let’s get that dreamy cheesecake filling ready! In a large mixing bowl (or the bowl of your stand mixer), place your softened cream cheese. Beat it with an electric mixer on medium speed until it’s perfectly smooth, light, and fluffy – no lumps here! This might take 1-2 minutes.
- Next, gradually add the powdered sugar, beating on low speed until it’s fully incorporated. Then, beat in the vanilla extract.
- Now, add the cold heavy whipping cream to the cream cheese mixture. Increase the mixer speed to medium-high and beat for about 2-3 minutes, or until the mixture becomes thick, fluffy, and holds soft peaks. Make sure everything is well combined and beautifully smooth.
- Transfer this creamy cheesecake filling to a piping bag (or a sturdy Ziploc bag with one corner snipped off). Place it in the refrigerator to chill for at least 30 minutes. Chilling helps it firm up and makes it easier to pipe!
- Part 3: Assembly!
- Once your crispy taco shells are completely cooled and firm, and your cheesecake filling is nicely chilled, it’s assembly time!
- Remove the chilled cheesecake filling from the fridge. Carefully pipe the cheesecake filling into each cooled taco shell, filling them about halfway to three-quarters full.
- Finally, spoon a generous dollop of cherry pie filling right on top of the cheesecake filling in each taco. You can arrange a few extra cherries if you like!
- Serve your delightful Cherry Cheesecake Tacos immediately for the best texture and enjoyment. Get ready for a dessert fiesta! Enjoy every single delicious bite!
Follow US on Pinterest
Follow @middleeastsector on Pinterest