
If you’re looking for a treat that’s indulgent, elegant, and perfect for any occasion, these Red Velvet Cheesecake Balls are your answer. Combining the tangy richness of cream cheese with the classic flavor of red velvet, these little bites are coated in chocolate for a treat that’s as delicious as it is stunning.
I first made these for a holiday party, and they were the first dessert to disappear from the table! They’re incredibly easy to make and so versatile—perfect for gifting, serving at parties, or indulging on your own.
Let’s create a batch of these heavenly Red Velvet Cheesecake Balls and elevate your dessert game!
Quick Overview in Todd Wilbur’s Style
These Red Velvet Cheesecake Balls are bite-sized treats made with red velvet cake and cream cheese frosting, coated in luscious chocolate. Easy to make and irresistibly delicious, they’re the perfect dessert for parties, holidays, or gifting.
Why You’ll Love These Red Velvet Cheesecake Balls
Decadent, Beautiful, and Easy
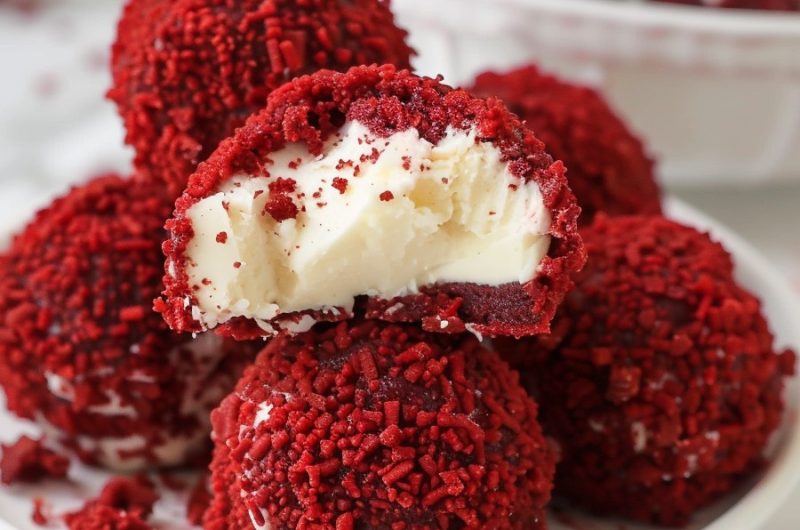
- Rich and Creamy: The cream cheese adds a tangy richness that perfectly complements the red velvet cake.
- Show-Stopping Presentation: Perfectly round, chocolate-coated bites that look as good as they taste.
- Simple to Make: Only a few steps for a dessert that impresses every time.
- Great for Any Occasion: Perfect for parties, holidays, or even as a thoughtful homemade gift.
What You Need for Red Velvet Cheesecake Balls
Ingredients:
For the Red Velvet Cheesecake Mixture:
- 1 box red velvet cake mix (plus ingredients to prepare it)
- 1 cup cream cheese frosting (store-bought or homemade)
For the Coating:
- 2 cups semi-sweet or white chocolate chips (or candy melts)
- 1 tbsp coconut oil or vegetable shortening (optional, for smoother coating)
Optional Garnishes:
The Diabetes Cookbook
Instant Healthy Meals From Managing Diabetes

- Red or white sprinkles
- Drizzled white or dark chocolate

How to Make Red Velvet Cheesecake Balls
Step 1: Prepare the Cake
- Bake the red velvet cake according to the package or recipe instructions. Let it cool completely.
Step 2: Crumble and Mix
- Crumble the cooled cake into fine crumbs using your hands or a food processor.
- Add the cream cheese frosting to the crumbs and mix until well combined. The mixture should be moist and hold together when pressed.
Step 3: Form the Balls
- Roll the mixture into 1-inch balls and place them on a parchment-lined baking sheet.
- Refrigerate for at least 30 minutes, or freeze for 10–15 minutes, to firm up.
Step 4: Melt the Chocolate
- In a microwave-safe bowl, melt the chocolate chips and coconut oil (if using) in 20-second intervals, stirring between each, until smooth and fully melted.
Step 5: Coat the Balls
- Using a fork or dipping tool, dip each ball into the melted chocolate, letting the excess drip off. Place back on the parchment-lined sheet.
- Add sprinkles o other garnishes while the chocolate is still wet.
Step 6: Let Set and Serve
- Allow the chocolate coating to set completely at room temperature or in the refrigerator.
- Serve and enjoy your heavenly bites!
Tips for Perfect Red Velvet Cheesecake Balls
- Work in Batches: Keep the balls chilled while dipping to maintain their shape.
- Smooth Coating: Add a bit of coconut oil or shortening to the chocolate for a shiny, even finish.
Substitutions and Variations
- Flavor Options: Swap red velvet for chocolate, vanilla, or funfetti cake.
- Cheesecake Twist: Add a splash of vanilla or almond extract to the cream cheese frosting.
- Colorful Coatings: Use candy melts in different colors for festive themes.
Make a Healthier Version
- Lower Sugar: Use less frosting and opt for dark chocolate coating.
- Homemade Cake: Make your own red velvet cake with natural food coloring.
Closing Thoughts
And there you have it—Red Velvet Cheesecake Balls, the ultimate bite-sized indulgence. Whether you’re celebrating a special occasion, treating yourself, or gifting them to loved ones, these little desserts are sure to bring smiles.
Frequently Asked Questions for Red Velvet Cheesecake Balls
- Can I make these ahead of time?
Yes! They can be stored in the fridge for up to a week or frozen for up to 3 months. - How do I prevent the balls from falling apart when dipping?
Chill or freeze them before dipping to keep them firm. - Can I use homemade red velvet cake?
Absolutely! Homemade cake works beautifully for this recipe. - What’s the best way to melt chocolate?
Use the microwave in short intervals or a double boiler for even melting. - Can I use almond bark instead of chocolate chips?
Yes, almond bark or candy melts work perfectly for coating. - What if my coating cracks after setting?
This can happen if the balls are too cold—let them sit at room temperature for a few minutes before dipping. - Can I skip the coconut oil?
Yes, but adding it helps achieve a smoother coating. - How do I store these treats?
Store in an airtight container in the fridge for up to 7 days or freeze for longer storage. - What can I use for garnishing?
Sprinkles, edible glitter, crushed candy canes, or a drizzle of contrasting chocolate. - Can I make mini versions?
Yes, roll smaller balls for bite-sized treats. Adjust the coating process accordingly. - How do I ensure the balls are evenly sized?
Use a cookie scoop or tablespoon to portion out the mixture. - Can I add nuts or mix-ins?
Yes, finely chopped nuts or mini chocolate chips can be mixed into the cake and frosting.
Red Velvet Cheesecake Balls: A Bite of Heaven!
4
servings30
minutes40
minutes300
kcal1
hour10
minutesKeep the screen of your device on
Ingredients
- For the Red Velvet Cheesecake Mixture:
1 box red velvet cake mix (plus ingredients to prepare it)
1 cup cream cheese frosting (store-bought or homemade)
- For the Coating:
2 cups semi-sweet or white chocolate chips (or candy melts)
1 tbsp coconut oil or vegetable shortening (optional, for smoother coating)
- Optional Garnishes:
Red or white sprinkles
Drizzled white or dark chocolate
Directions
- Step 1: Prepare the Cake
- Bake the red velvet cake according to the package or recipe instructions. Let it cool completely.
- Step 2: Crumble and Mix
- Crumble the cooled cake into fine crumbs using your hands or a food processor.
- Add the cream cheese frosting to the crumbs and mix until well combined. The mixture should be moist and hold together when pressed.
- Step 3: Form the Balls
- Roll the mixture into 1-inch balls and place them on a parchment-lined baking sheet.
- Refrigerate for at least 30 minutes, or freeze for 10–15 minutes, to firm up.
- Step 4: Melt the Chocolate
- In a microwave-safe bowl, melt the chocolate chips and coconut oil (if using) in 20-second intervals, stirring between each, until smooth and fully melted.
- Step 5: Coat the Balls
- Using a fork or dipping tool, dip each ball into the melted chocolate, letting the excess drip off. Place back on the parchment-lined sheet.
- Add sprinkles o other garnishes while the chocolate is still wet.
- Step 6: Let Set and Serve
- Allow the chocolate coating to set completely at room temperature or in the refrigerator.
- Serve and enjoy your heavenly bites!
Follow US on Pinterest
Follow @middleeastsector on Pinterest