
Let me tell you about a dessert that’s been making waves in my kitchen lately. Picture this: velvety chocolate and creamy peanut butter coming together in perfect harmony, all nestled in a buttery cookie crust. This No-Bake Chocolate Peanut Butter Swirl Pie is what dessert dreams are made of.
I’ve always believed that some of the best recipes come from those moments when you really don’t want to turn on the oven. You know those hot summer days when the thought of baking makes you break into a sweat? That’s exactly how this pie was born in my kitchen. It’s a game-changer that proves you don’t need an oven to create something extraordinary.
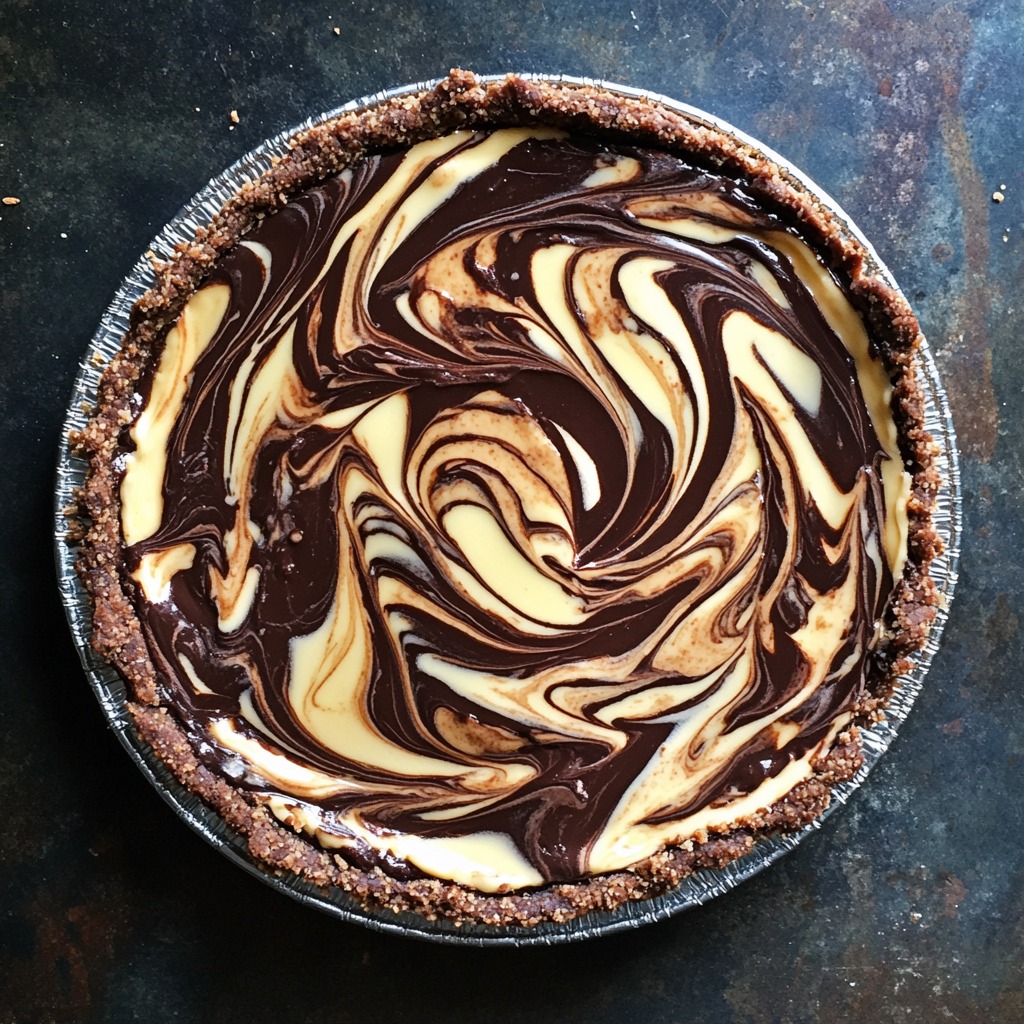
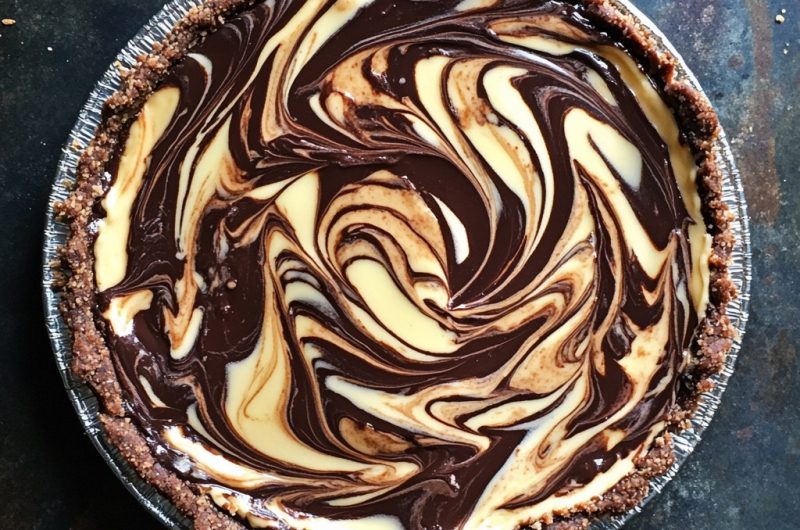
What makes this pie truly special is its luxurious texture. The filling has this incredible silky-smooth consistency that melts in your mouth, while the contrast between the rich chocolate and nutty peanut butter creates this gorgeous marbled effect that’s simply Instagram-worthy. Trust me, your guests will think you spent hours making this.
The cookie crust adds just the right amount of crunch, and the best part? It’s remarkably simple to put together. We’re talking about minimal ingredients and maximum impact here. It’s the kind of dessert that makes people think you’re a culinary genius, even though it’s practically foolproof.
And let’s talk about versatility – this pie is perfect for any occasion, from casual family dinners to fancy dinner parties. It’s one of those recipes that proves sometimes the simplest things in life are the most delicious.
This No-Bake Chocolate Peanut Butter Swirl Pie is a game-changing dessert that combines two beloved flavors in one stunning presentation. The smooth, creamy filling sits atop a perfectly crisp cookie crust, creating an irresistible texture contrast that’ll keep you coming back for more.
The beauty of this recipe lies in its simplicity – no oven required, yet the results are absolutely spectacular. The marbled swirl effect not only looks impressive but ensures you get the perfect balance of chocolate and peanut butter in every bite.
What sets this pie apart is its make-ahead friendly nature. You can prepare it the day before and let it set overnight, making it perfect for entertaining or when you need a stress-free dessert option.
The Diabetes Cookbook
Instant Healthy Meals From Managing Diabetes

The recipe uses readily available ingredients and requires minimal active preparation time, yet delivers a dessert that tastes like it came from a high-end bakery.
Exciting Story: Last summer, during our annual neighborhood block party, I was tasked with bringing dessert. With temperatures soaring into the 90s, I knew my usual baked treats weren’t going to cut it. That’s when I decided to debut this No-Bake Chocolate Peanut Butter Swirl Pie. The moment I set it down on the dessert table, people were drawn to its beautiful swirled pattern. My neighbor’s seven-year-old daughter, Emma, took one bite and declared it “better than a candy bar!” The pie disappeared in record time, and I went home with an empty dish and several recipe requests. Now it’s become my signature dessert, requested at every gathering and praised by both kids and adults alike.
Why This No-Bake Chocolate Peanut Butter Swirl Pie?
This pie is a showstopper for several reasons. First, the combination of chocolate and peanut butter is timeless – it’s like a sophisticated Reese’s cup in pie form. The filling achieves that perfect creamy consistency without being too heavy or too light. The swirl pattern isn’t just for show; it ensures you get both flavors in every forkful. Plus, the no-bake aspect means you can make this year-round, and it’s particularly perfect for summer entertaining when you want to keep your kitchen cool.
What You Need For No-Bake Chocolate Peanut Butter Swirl Pie
For the Crust:
- 24 chocolate sandwich cookies
- 6 tablespoons unsalted butter, melted
For the Filling:
- 16 oz cream cheese, softened
- 1 cup creamy peanut butter
- 1 cup powdered sugar
- 1 teaspoon vanilla extract
- 8 oz semi-sweet chocolate, melted
- 1 cup heavy cream, whipped to stiff peaks
- 1/4 teaspoon salt
For Garnish:
- Chocolate shavings
- Chopped peanuts
- Whipped cream
How to Make No-Bake Chocolate Peanut Butter Swirl Pie
Let me walk you through this dreamy dessert-making process. Start by crushing those cookies into fine crumbs – I like to use a food processor, but you can also put them in a zip-top bag and crush them with a rolling pin if you need to work out some stress! Mix those crumbs with melted butter until they resemble wet sand, then press this mixture into your pie dish, making sure to get it up the sides too.
For the filling, we’re going to create two separate mixtures that we’ll ultimately swirl together. Beat the cream cheese until it’s super smooth, then divide it between two bowls. In one bowl, blend in the peanut butter, half the powdered sugar, and vanilla. In the other, fold in the melted chocolate and remaining sugar. Gently fold half of the whipped cream into each mixture.
Now comes the fun part – creating that beautiful swirl! Alternate dollops of each mixture in your prepared crust, then use a knife to create swooping swirls throughout. Don’t overdo it – we want distinct swirls, not a muddy mixture. Refrigerate until firm, at least 4 hours or overnight.
Tips For No-Bake Chocolate Peanut Butter Swirl Pie
The key to achieving the perfect texture lies in having your cream cheese properly softened. Take it out of the fridge at least two hours before you plan to start making the pie. This ensures it’ll blend smoothly without any lumps.
When melting your chocolate, do it slowly and carefully – either in short bursts in the microwave or using a double boiler. Let it cool slightly before incorporating it into the cream cheese mixture. If it’s too hot, it can affect the texture of your filling.
Substitutions and Variations
Want to mix things up? Try using different cookies for the crust – graham crackers or peanut butter cookies work beautifully. For a darker chocolate version, use bittersweet chocolate instead of semi-sweet. You can also experiment with crunchy peanut butter for added texture, or swirl in some caramel sauce for an extra layer of decadence.
Make a Healthier Version
For a lighter version, use reduced-fat cream cheese and light whipped topping instead of heavy cream. You can also try natural peanut butter to reduce sugar content. For a gluten-free option, use gluten-free cookies for the crust. While it won’t be exactly the same, you can use Greek yogurt cream cheese to reduce fat content while maintaining creaminess.
Closing For No-Bake Chocolate Peanut Butter Swirl Pie:
And there you have it! A show-stopping dessert that’s sure to become your new go-to recipe. Don’t forget to let us know how your pie turns out, and consider checking out some of our other no-bake dessert recipes!
Frequently Asked Questions For No-Bake Chocolate Peanut Butter Swirl Pie:
- Can I make this pie ahead of time?
Yes! This pie can be made up to 2 days in advance and stored covered in the refrigerator. - How long does this pie need to set?
A minimum of 4 hours, but overnight is best for the perfect texture. - Can I freeze this pie?
Yes, it freezes well for up to 3 months. Thaw overnight in the refrigerator before serving. - What if my swirls don’t look perfect?
Don’t worry! Each pie will have its own unique pattern. The key is not to overwork the swirls. - Can I use natural peanut butter?
Yes, but make sure it’s well-stirred and at room temperature for the best results. - What type of chocolate is best to use?
Semi-sweet chocolate bars work best. Avoid chocolate chips as they contain stabilizers. - Can I make this pie without a food processor?
Yes, you can crush the cookies in a zip-top bag using a rolling pin. - How do I know when the cream cheese is properly softened?
It should be at room temperature and easily indent when pressed with your finger. - Can I use low-fat cream cheese?
Yes, but the texture may be slightly less creamy. - How do I get clean slices?
Run your knife under hot water and wipe it clean between each cut. - What if my crust is crumbly?
Add an extra tablespoon of melted butter to help it hold together better. - How should I store leftover pie?
Keep it covered in the refrigerator for up to 5 days.
No-Bake Chocolate Peanut Butter Swirl Pie
4
servings30
minutes40
minutes300
kcal1
hour10
minutesKeep the screen of your device on
Ingredients
- For the Crust:
24 chocolate sandwich cookies
6 tablespoons unsalted butter, melted
- For the Filling:
16 oz cream cheese, softened
1 cup creamy peanut butter
1 cup powdered sugar
1 teaspoon vanilla extract
8 oz semi-sweet chocolate, melted
1 cup heavy cream, whipped to stiff peaks
1/4 teaspoon salt
- For Garnish:
Chocolate shavings
Chopped peanuts
Whipped cream
Directions
- Let me walk you through this dreamy dessert-making process. Start by crushing those cookies into fine crumbs – I like to use a food processor, but you can also put them in a zip-top bag and crush them with a rolling pin if you need to work out some stress! Mix those crumbs with melted butter until they resemble wet sand, then press this mixture into your pie dish, making sure to get it up the sides too.
- For the filling, we’re going to create two separate mixtures that we’ll ultimately swirl together. Beat the cream cheese until it’s super smooth, then divide it between two bowls. In one bowl, blend in the peanut butter, half the powdered sugar, and vanilla. In the other, fold in the melted chocolate and remaining sugar. Gently fold half of the whipped cream into each mixture.
- Now comes the fun part – creating that beautiful swirl! Alternate dollops of each mixture in your prepared crust, then use a knife to create swooping swirls throughout. Don’t overdo it – we want distinct swirls, not a muddy mixture. Refrigerate until firm, at least 4 hours or overnight.
Follow US on Pinterest
Follow @middleeastsector on Pinterest