
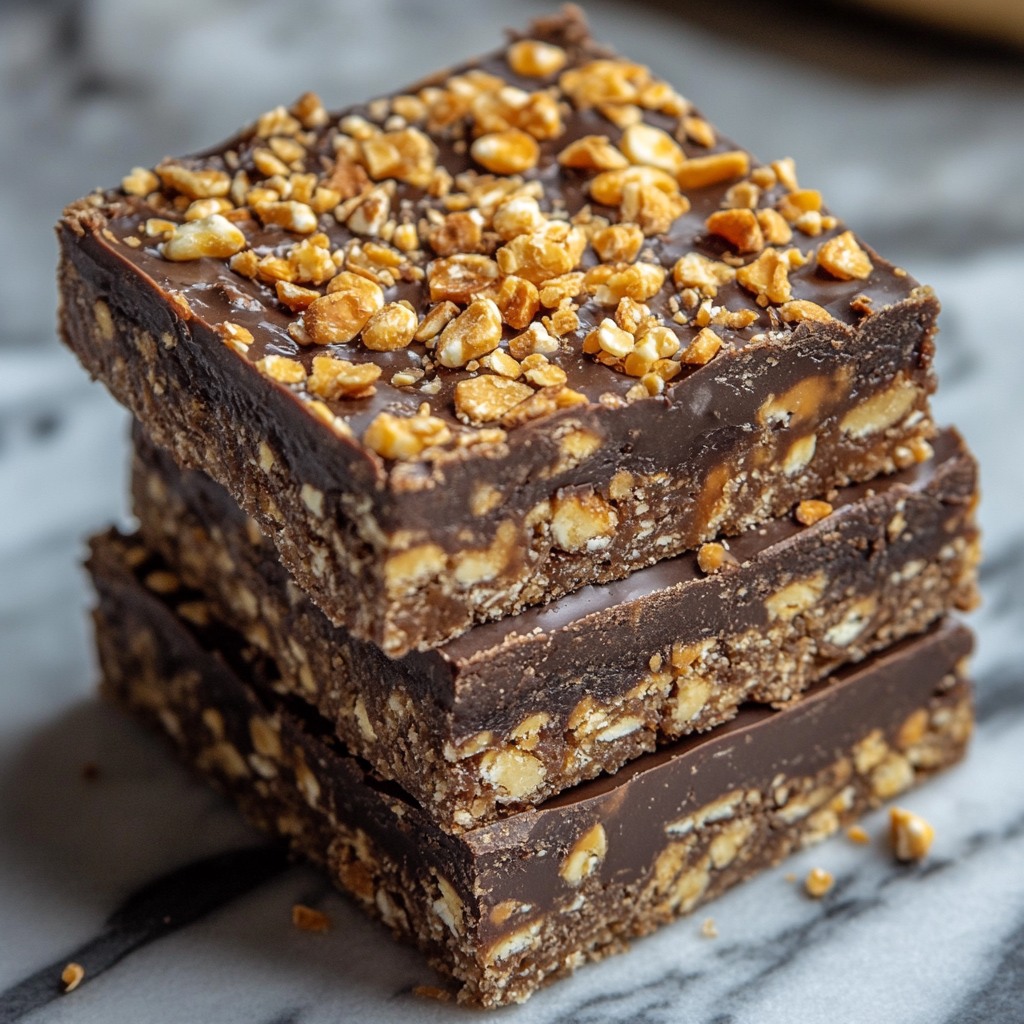
If you love the crunchy, chocolatey goodness of classic crunch bars, then get ready for a homemade version that’s even better, fresher, and packed with that satisfying snap. These Homemade Crunch Bars are made with just a handful of ingredients, require zero baking, and come together in minutes—making them the ultimate quick and easy sweet treat!
The first time I made these, my family devoured them within hours. The combination of rich, smooth chocolate and crispy rice cereal is a nostalgic bite of perfection, and the best part is—you can customize them to your liking! Whether you prefer milk chocolate, dark chocolate, or even a peanut butter twist, this recipe delivers every time.
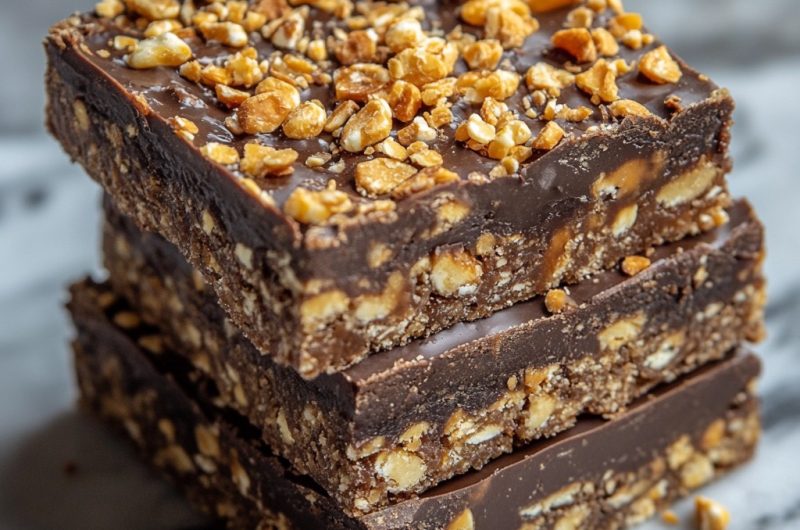
What makes these bars special is their perfect balance of texture—the silky melted chocolate hugging the crispy cereal creates a light yet indulgent bite that satisfies every craving. Whether you need a last-minute dessert, a lunchbox treat, or a midnight snack, these Homemade Crunch Bars are guaranteed to be a hit.
So let’s get started and make some chocolatey magic!
Why You’ll Love These Homemade Crunch Bars
Why This Recipe is a Must-Try
- No-Bake & Quick: Ready in just 10 minutes, plus chilling time.
- Only 3 Ingredients: Chocolate, crispy rice cereal, and a pinch of salt.
- Customizable: Add nuts, peanut butter, or caramel for a fun twist.
- Perfect for Any Occasion: Great for parties, gifts, or everyday snacking.
- Better than Store-Bought: Fresh, rich, and made with simple ingredients.
What You Need for Homemade Crunch Bars
Ingredients
- 2 cups chocolate chips (milk, dark, or semi-sweet)
- 1 ½ cups crispy rice cereal
- ¼ teaspoon sea salt (optional, for balance)
Optional Add-Ins:
- ½ cup peanut butter (for a Reese’s-style twist)
- ½ teaspoon vanilla extract
- ¼ cup chopped nuts (almonds, hazelnuts, or peanuts)
- ½ cup mini marshmallows (for an extra fun texture)
- ¼ cup caramel drizzle
How to Make Homemade Crunch Bars
Step 1: Melt the Chocolate
- Use a Double Boiler or Microwave:
- If using a double boiler, melt chocolate over low heat, stirring frequently.
- If using a microwave, heat chocolate in 30-second intervals, stirring between each, until smooth.
- Stir in Salt & Vanilla (Optional): If using, mix in sea salt and vanilla extract for extra depth of flavor.
Step 2: Mix in the Crunch
- Fold in Crispy Rice Cereal: Gently stir in the crispy rice cereal, ensuring every piece is coated in chocolate.
- Add Any Extras: If using nuts, peanut butter, or marshmallows, fold them in now.
Step 3: Set and Chill
- Prepare a Baking Dish: Line an 8×8-inch pan with parchment paper for easy removal.
- Spread Evenly: Pour the mixture into the pan, using a spatula to spread it evenly.
- Chill Until Set: Refrigerate for 1 hour, or until completely firm.
Step 4: Slice and Enjoy
- Cut into Bars: Once set, remove from the pan and cut into squares or bars.
- Store & Serve: Store in an airtight container at room temperature for up to 1 week, or in the fridge for extra crunch.
- Enjoy Your Crunchy, Chocolatey Goodness!
Closing Thoughts
And there you have it! These Homemade Crunch Bars are the perfect balance of crispy, chocolatey, and melt-in-your-mouth goodness. Whether you’re making them for yourself, your family, or as a gift, they’re sure to be a crowd-pleaser. Try them out and let us know how they turn out!
Frequently Asked Questions
1. Can I use a different type of chocolate?
Yes! Milk, dark, semi-sweet, or even white chocolate all work well.
2. How do I keep my crunch bars from melting?
Store them in the fridge or a cool, dry place to maintain their firmness.
The Diabetes Cookbook
Instant Healthy Meals From Managing Diabetes

3. Can I make these vegan?
Absolutely! Use dairy-free chocolate and ensure your rice cereal is vegan-friendly.
4. Can I add protein to these bars?
Yes! Stir in 1-2 scoops of protein powder with the chocolate for a protein-packed snack.
5. How can I make these extra crunchy?
Use crushed pretzels or chopped nuts for added texture.
6. Can I freeze homemade crunch bars?
Yes! Wrap them tightly and freeze for up to 3 months. Thaw before serving.
7. What’s the best way to melt chocolate?
A double boiler is best for even melting, but the microwave method works if stirred frequently.
8. Can I make these sugar-free?
Yes! Use sugar-free chocolate chips and a low-carb crispy cereal.
9. What else can I mix in?
Try dried fruit, toffee bits, or shredded coconut for a unique twist.
10. Can I shape them into fun designs?
Yes! Pour the mixture into silicone molds for bite-sized treats.
11. How do I get clean, even slices?
Use a sharp knife and wipe it clean between each cut for perfect bars.
12. Can kids help make these?
Definitely! This is a fun and safe recipe for kids to help stir and pour.
Homemade Crunch Bars Bonanza
4
servings30
minutes40
minutes300
kcal1
hour10
minutesKeep the screen of your device on
Ingredients
2 cups chocolate chips (milk, dark, or semi-sweet)
1 ½ cups crispy rice cereal
¼ teaspoon sea salt (optional, for balance)
- Optional Add-Ins:
½ cup peanut butter (for a Reese’s-style twist)
½ teaspoon vanilla extract
¼ cup chopped nuts (almonds, hazelnuts, or peanuts)
½ cup mini marshmallows (for an extra fun texture)
¼ cup caramel drizzle
Directions
- Step 1: Melt the Chocolate
- Use a Double Boiler or Microwave:
- If using a double boiler, melt chocolate over low heat, stirring frequently.
- If using a microwave, heat chocolate in 30-second intervals, stirring between each, until smooth.
- Stir in Salt & Vanilla (Optional): If using, mix in sea salt and vanilla extract for extra depth of flavor.
- Step 2: Mix in the Crunch
- Fold in Crispy Rice Cereal: Gently stir in the crispy rice cereal, ensuring every piece is coated in chocolate.
- Add Any Extras: If using nuts, peanut butter, or marshmallows, fold them in now.
- Step 3: Set and Chill
- Prepare a Baking Dish: Line an 8×8-inch pan with parchment paper for easy removal.
- Spread Evenly: Pour the mixture into the pan, using a spatula to spread it evenly.
- Chill Until Set: Refrigerate for 1 hour, or until completely firm.
- Step 4: Slice and Enjoy
- Cut into Bars: Once set, remove from the pan and cut into squares or bars.
- Store & Serve: Store in an airtight container at room temperature for up to 1 week, or in the fridge for extra crunch.
- Enjoy Your Crunchy, Chocolatey Goodness!
Follow US on Pinterest
Follow @middleeastsector on Pinterest