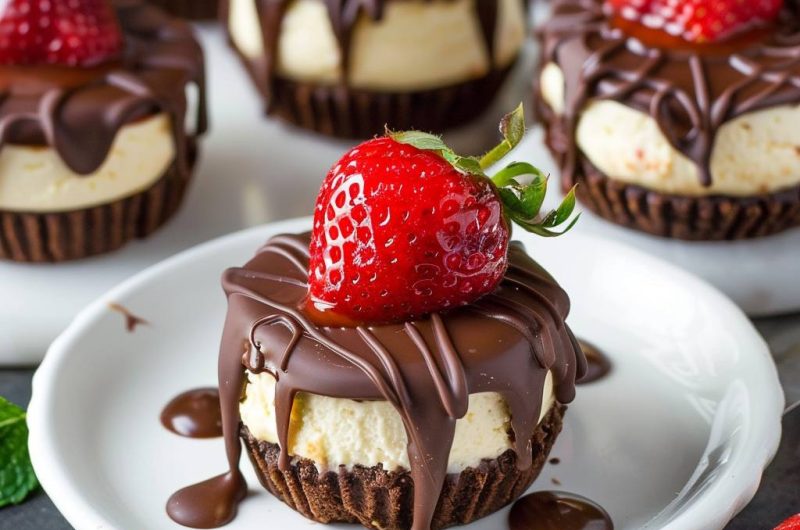
If you’re looking for a decadent dessert that combines the creamy richness of cheesecake with the indulgent sweetness of chocolate, these Chocolate Covered Mini Cheesecakes are just what you need! These bite-sized treats are perfect for parties, celebrations, or just a special sweet craving.
What makes these mini cheesecakes so special is the silky smooth cheesecake filling, nestled in a crunchy chocolate cookie crust and enveloped in rich chocolate. These Chocolate Covered Mini Cheesecakes are sure to impress anyone who takes a bite!
Resume of the Recipe
These Chocolate Covered Mini Cheesecakes feature a creamy cheesecake filling atop a chocolate cookie crust, all covered in a luscious layer of chocolate. Ready in about 45 minutes (plus chilling time), these delightful mini desserts are a perfect treat for any occasion!
With straightforward ingredients and easy preparation, you can whip up these scrumptious mini cheesecakes in no time. Let’s dive into this delicious recipe!
Exciting Story:
The first time I made Chocolate Covered Mini Cheesecakes, it was for a family gathering, and I wanted to create something special that would satisfy everyone’s sweet tooth. As I mixed the creamy filling and prepared the chocolate cookie crust, the excitement in the kitchen was palpable.
Once they were baked and chilled, dipping them in melted chocolate was the icing on the cake! The first bite was pure joy—the creamy cheesecake paired perfectly with the rich chocolate coating, creating an indulgent experience. These Chocolate Covered Mini Cheesecakes have since become a staple in my dessert repertoire, perfect for any celebration or just because!
Why These Chocolate Covered Mini Cheesecakes?
- Decadently Delicious: The rich chocolate and creamy cheesecake create a luxurious dessert experience.
- Perfectly Portioned: These mini cheesecakes are easy to serve and make for a delightful presentation.
- Easy to Make: With simple ingredients and minimal steps, this recipe is perfect for bakers of all levels!

How to Make Chocolate Covered Mini Cheesecakes
- Preheat the Oven: Start by preheating your oven to 325°F (160°C). Line a muffin tin with paper liners.
- Prepare the Crust: In a mixing bowl, combine the chocolate cookie crumbs, melted butter, and granulated sugar. Mix until well combined. Press the mixture firmly into the bottom of each muffin liner to form a crust.
- Make the Cheesecake Filling: In a large mixing bowl, beat the softened cream cheese and granulated sugar until smooth and creamy. Add the vanilla extract and mix until fully combined. Beat in the egg until just combined, then stir in the sour cream.
- Fill the Muffin Tin: Spoon the cheesecake filling over the prepared crusts, filling each liner about 2/3 full.
- Bake the Mini Cheesecakes: Bake in the preheated oven for 18-20 minutes, or until the centers are set but slightly jiggly. Remove from the oven and let them cool in the tin for about 10 minutes, then transfer to a wire rack to cool completely.
- Chill: Once cooled, refrigerate the cheesecakes for at least 2 hours to set.
- Prepare the Chocolate Coating: In a microwave-safe bowl, melt the chocolate chips with coconut oil (if using) in 30-second intervals, stirring until smooth.
- Dip the Cheesecakes: Once the mini cheesecakes are set, carefully remove them from the liners. Dip the tops into the melted chocolate or drizzle the chocolate over them, ensuring they are well coated.
- Set and Serve: Place the chocolate-covered mini cheesecakes on a baking sheet lined with parchment paper and refrigerate until the chocolate is set. Your Chocolate Covered Mini Cheesecakes are ready to be enjoyed!
Tips
- Use Room Temperature Ingredients: Ensure your cream cheese is at room temperature for easier mixing.
- Don’t Overbake: Keep an eye on the mini cheesecakes to maintain their creamy texture.
Substitutions and Variations
- Different Flavors: You can add flavor extracts like almond or lemon to the cheesecake filling for a unique twist.
- Add Toppings: Consider adding crushed nuts or sprinkles on top of the chocolate coating for added texture.
Make a Healthier Version
- Use low-fat cream cheese and a sugar substitute for a lighter option.
Closing
And there you have it! These Chocolate Covered Mini Cheesecakes are a deliciously indulgent treat that will impress anyone who tries them. Don’t forget to let us know how your mini cheesecakes turn out, and consider checking out some of our other recipes for more delightful desserts!
Frequently Asked Questions
- How long can I store leftovers?
These mini cheesecakes can be stored in an airtight container in the refrigerator for up to 5 days. - Can I freeze the mini cheesecakes?
Yes, you can freeze the cheesecakes (without the chocolate coating) for up to 2 months. Thaw in the refrigerator before serving. - What can I use instead of cream cheese?
You can use mascarpone cheese or a dairy-free cream cheese alternative. - Can I make this ahead of time?
Absolutely! These mini cheesecakes can be made a day in advance and stored in the refrigerator. - How do I know when the cheesecakes are done?
The centers should be set but slightly jiggly; they will firm up as they cool. - Can I add other flavors?
Yes! A splash of peppermint extract can create a festive twist for the holidays. - What if I want to make it spicier?
Adding a pinch of cayenne pepper to the chocolate can give it a fun kick! - What sides pair well with these mini cheesecakes?
Serve with fresh berries or a light fruit salad for a refreshing pairing! - How can I make this more festive?
Use seasonal-themed decorations on top of the chocolate coating for a fun touch! - What’s the best way to reheat leftovers?
These mini cheesecakes are best enjoyed chilled; it’s not recommended to reheat them. - Can I use flavored chocolates?
Yes! Using flavored chocolate can add an extra layer of taste to the truffles. - How can I enhance the flavors?
Consider adding a drizzle of caramel or chocolate sauce over the top before serving for an extra treat.


